
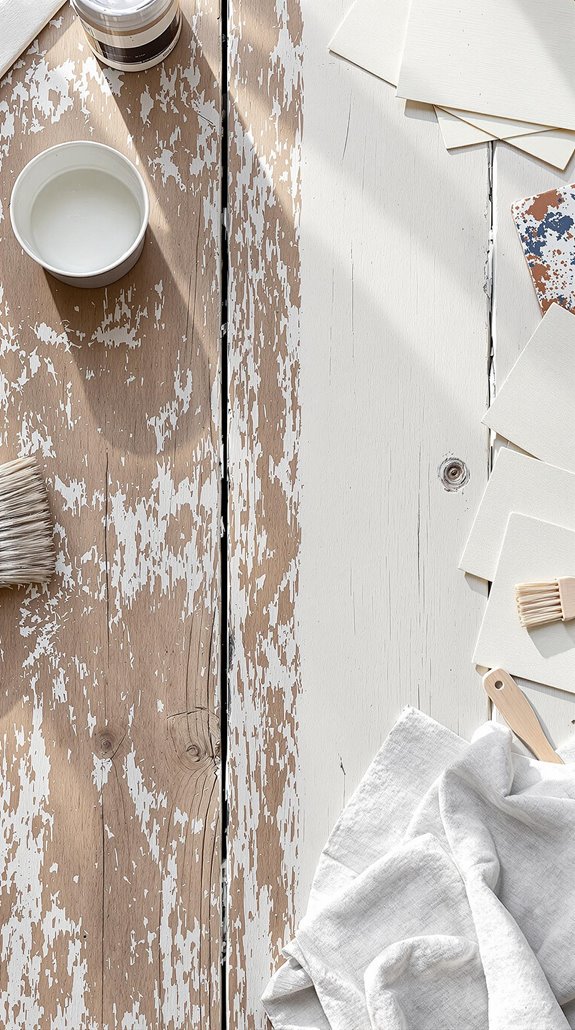
I’ve whitewashed dozens of wooden surfaces across my home, and I’ll tell you exactly what works. You don’t need expensive materials—just white paint, water, and the right mixing ratios. I’ve learned that proper surface preparation makes or breaks your finish, while specific application techniques determine whether you’ll achieve that coveted farmhouse look or end up with streaky mess. The key lies in understanding how different wood types respond to varying paint concentrations.
Key Takeaways
- Start with a 1:1 paint-to-water ratio using matte white paint for authentic rustic coverage on UK wood surfaces.
- Sand wood lightly with 120-grit sandpaper and remove all dust before applying whitewash for optimal absorption.
- Apply thin coats following wood grain direction, wiping excess immediately with lint-free cloth for controlled rustic texture.
- Use dry brushing technique or rag application method to achieve varied opacity and authentic weathered appearance.
- Seal finished surface with water-based polyacrylic after 24-hour curing time to protect against UK moisture and wear.
Materials and Tools You’ll Need for Whitewashing
Three essential categories of materials will determine your whitewashing success: preparation tools, mixing supplies, and application equipment.
I’ll start with preparation essentials: sandpaper in 80, 120, and 240 grits, plus an electric sander for efficient surface prep. You’ll need wood filler for imperfections, a wire brush for debris removal, and lint-free cloths for dust cleanup. Early detection of structural issues can prevent costly repairs, making preparation crucial.
For mixing, gather white paint (flat, eggshell, or chalk-based), water for dilution, measuring tools, and a sturdy mixing container with a stirring stick. Remember that mixing less water with more paint results in a thicker whitewash, providing a more opaque finish.
Application requires quality paintbrushes, lint-free rags for excess removal, and water-based polyurethane sealer for protection. Don’t forget your safety gear: dust mask, protective goggles, and gloves.
These tools transform ordinary wood into that coveted rustic aesthetic we’re all after.
Understanding Paint-to-Water Mixing Ratios
Since achieving the perfect whitewash finish depends entirely on your paint-to-water ratio, I’ll walk you through the precise measurements that deliver professional results. I recommend starting with a 1:1 paint-to-water baseline using tablespoons for small projects and measuring cups for larger surfaces. For higher transparency, increase to a 5:1 water-to-paint ratio. Professional guidelines suggest 1:3 paint-to-water for ideal coverage density.
Always test your mixture on scrap wood first—this step’s non-negotiable. Use dedicated mixing containers to prevent cross-contamination, and stick with matte or flat paint finishes for proper absorption. Glossy paints won’t work effectively. Apply the wash with a synthetic brush following the wood grain direction for the most natural-looking results. Remember, you can always add more water to reduce opacity or extra paint to intensify coverage until you achieve your desired rustic aesthetic.
Step-by-Step Application Techniques
Five distinct application phases separate amateur whitewashing from professional-grade results, and I’ll guide you through each critical step to achieve that perfect rustic finish.
First, I’ll prepare my surface by sanding lightly and removing all dust. Next, I’ll mix my whitewash solution and apply it with smooth, even strokes following the wood grain. Working in manageable sections prevents streaking and guarantees uniform coverage while allowing for budget-friendly renovations that enhance your home.
During application, I’ll avoid heavy puddles by maintaining thin, consistent layers. The key is controlling your brush pressure and stroke direction. After applying each section, I’ll immediately assess coverage and adjust technique accordingly.
Finally, I’ll allow proper drying time between coats, building layers gradually for desired opacity while preserving that authentic wood texture underneath. For optimal results, I’ll have clean rags ready to wipe away excess whitewash immediately after application to create that perfect subtle grain effect.
Customizing Your Whitewashed Finish
When whitewashing wood, achieving the perfect rustic finish depends entirely on how you customize your approach to match your specific project goals. I’ll adjust my paint-to-water ratio based on the coverage I want – a 1:1 ratio gives me that translucent, grain-showing effect, while 2:1 delivers solid opacity. My application method matters too: dry brushing creates streaked texture, while the rag technique gives controlled blending. I always test on scrap wood first. Different wood species react differently – oak showcases texture beautifully with scraper techniques, while reclaimed wood absorbs unevenly for authentic character. I control my wiping pressure and timing to dial in exactly the weathered look I’m after. For surfaces that have been previously stained, I recommend sealing with polyurethane first to prevent the darker stain from bleeding through and compromising your whitewashed finish. Additionally, using multiple thin coats of finish can enhance durability and maintain the rustic aesthetic you desire.
Drying Times and Layering Methods
Proper drying times and strategic layering techniques determine whether your whitewashed finish achieves that authentic rustic character or ends up looking muddy and uneven.
I always wait at least one hour between coats – this prevents the layers from mixing and creating that dreaded muddy appearance. For stained wood, I’ll extend this to 24 hours since the base affects absorption rates.
My layering approach starts with a thin 5:1 water-to-paint mixture applied with the grain using a quality brush. I wipe excess immediately with a lint-free cloth. The first coat appears stark white but lightens dramatically as it dries, revealing the wood grain underneath.
For increased opacity, I apply additional coats only after complete drying. This builds coverage gradually while maintaining that coveted translucent quality we’re after. Before beginning any application, I always test the whitewash on a small area to ensure the mixture produces the desired effect on my specific wood type.
Professional Tips for Perfect Results
Although whitewashing appears straightforward, achieving professional-grade results requires precise mixing ratios and methodical application techniques. I’ll share the insider secrets that separate amateur attempts from flawless finishes.
Start with ideal paint-to-water ratios: 1:1 for opaque coverage, 3:2 for translucent effects. Always pre-mix solutions in containers and test on scrap wood first. Natural bristle brushes emphasize grain texture, while lint-free rags create streak-free finishes using circular motions.
Work in sections under 3 square feet to manage drying times effectively. Wipe immediately after application for light coverage; delay wiping for deeper penetration. Vary your pressure—heavier wiping removes more pigment for distressed effects.
Address drips immediately with damp cloth. Apply additional coats without sanding between layers, and seal with matte water-based polyurethane. Before beginning any whitewashing project, ensure you thoroughly sand the wood surface to remove any existing sealant or previous paint finishes.
Wood Preparation and Surface Conditioning

Perfect application techniques mean nothing without properly prepared wood underneath. I’ll guide you through the essential steps that separate amateur attempts from professional-quality results.
First, I select natural woods like pine or oak—their visible grain creates authentic character. I avoid MDF completely since it lacks the texture we’re after. Raw, untreated wood works best, so I strip existing finishes using a heat gun for paint and an electric sander with 80-grit sandpaper for varnish. Painting cabinets can also enhance the overall look of your kitchen, adding a fresh aesthetic that complements your rustic home style.
My sanding progression follows 80-grit, then 120-grit, finishing with 240-grit—always parallel to the grain. After degreasing with mild detergent and allowing 24-hour drying time, I test absorbency with water droplets. I then use a wire brush to remove any remaining sanding dust from the wood surface. Finally, I apply wood conditioner to porous grains, ensuring perfect whitewash absorption.
Sealing and Protecting Your Whitewashed Wood
Once your whitewashed wood has dried completely, protecting it with the right sealant becomes critical for long-term durability. I’ve found that whitewashing first creates the perfect foundation for sealing without darkening your beautiful finish.
Here’s what works best: Apply a water-based polyacrylic sealant using smooth, even strokes with a high-quality brush. This prevents the yellowing you’d get with oil-based products. I always sand lightly between coats with 220-grit paper for proper adhesion.
The real magic happens overnight – your whitewash and sealant technique will look dramatically better after a full 24-hour cure. You’ll notice improved clarity and durability that makes all the difference. Trust me, this patient approach separates DIY enthusiasts from weekend warriors.
For most whitewashed surfaces, a second coat provides the optimal protection you need for everyday use.
Conclusion
You’ve now mastered the complete whitewashing process from prep to protection. I’ve covered the essential ratios, application techniques, and pro tips you’ll need for consistent results. Remember to test your mix ratios first, work in manageable sections, and don’t rush the drying process. With these tools and methods in your arsenal, you’ll transform any wooden surface into that coveted rustic centerpiece. Time to grab your brush and start creating your farmhouse aesthetic.
References
- https://angelamariemade.com/how-to-whitewash-wood-with-paint/
- https://www.youtube.com/watch?v=p5LrV5-aAdg
- https://chalkingupsuccess.com/how-to-whitewash-wood/
- https://www.paintingbythepenny.com/the-best-way-to-whitewash-wood/
- https://www.youtube.com/watch?v=NMNfRraovto
- https://sanding-wood-floors.co.uk/sanding-and-whitewashing-wood-floors/
- https://www.youtube.com/watch?v=8vlu51sVvy0
- https://www.homebuilding.co.uk/advice/how-to-whitewash-wood
- https://salvagedinspirations.com/how-to-whitewash-wood-with-paint/
- https://www.nashpainting.com/blog/how-much-water-do-you-need-to-make-whitewash-a-diy-guide