I’ve spent countless hours perfecting corner tiling techniques, and I can tell you that most bathroom renovations fail at the corners. You’ll face three critical challenges: selecting appropriate trim materials, achieving razor-sharp cuts, and waterproofing vulnerable joints. Your wet saw, spirit level, and sealant gun won’t guarantee success without understanding proper installation sequences. The difference between amateur and professional results lies in mastering these specific corner techniques—techniques that separate flawless finishes from costly moisture damage.
Key Takeaways
- Choose PVC or metal corner trims for high-moisture bathroom areas and select trim one size larger than tile depth.
- Start installation at external corners to establish vertical reference points and use mitring technique for precise 45-degree cuts.
- Apply notched trowel adhesive along wall edges and back-butter tiles to ensure flush installation on uneven surfaces.
- Install specialized corner waterproofing pieces first with 2-inch overlaps and seal gaps with polyurethane sealant like KERDI-FIX.
- Use direct-marking technique to eliminate measuring errors and maintain 2mm margins for L-shaped cuts around fixtures.
Choosing the Right Corner Trim for Your Bathroom Project
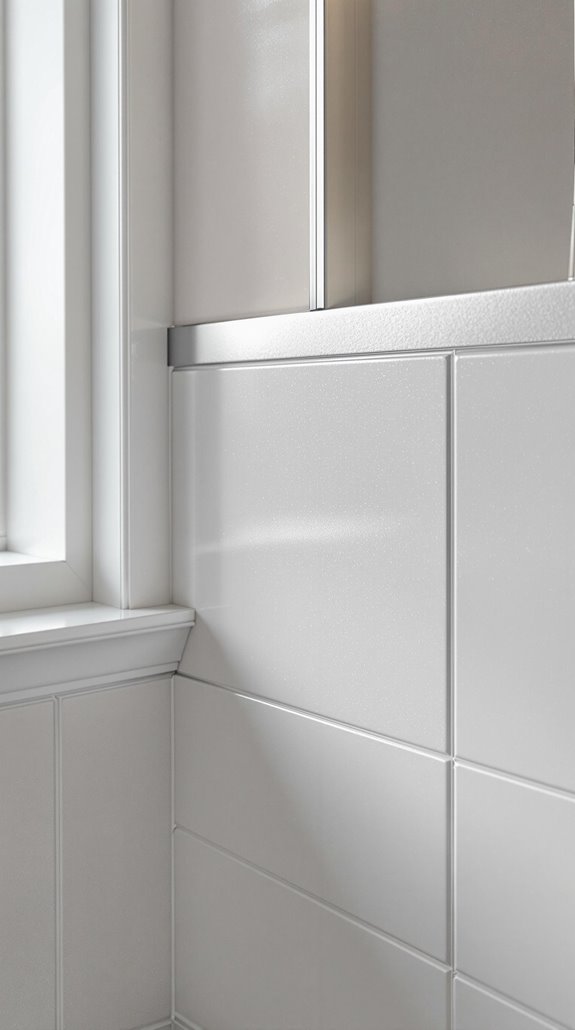
When you’re planning a bathroom tile installation, selecting the appropriate corner trim determines both the project’s durability and visual appeal. I’ll guide you through the critical factors that separate professional results from amateur mistakes.
For high-moisture areas like shower enclosures, you’ll need PVC or metal trims that resist water damage. Stainless steel delivers superior edge protection in high-traffic zones, preventing tile chipping that plagues cheaper alternatives. When matching tile thickness, measure precisely—misaligned depths create unprofessional gaps. Additionally, understanding regional price variations can help you budget effectively for your trim selection.
L-shape profiles handle external corners cleanly, while square-edge trims suit contemporary designs. For cost-conscious projects, PVC offers 30-50% savings versus metal options without sacrificing moisture resistance. Choose glossy finishes to reflect light in smaller spaces, or select matte options for minimalist aesthetics that fellow craftspeople appreciate.
Before installation begins, gather your essential tools including tile adhesive, notched trowel, appropriate saw, and level to ensure professional-grade results.
Mastering External Corner Installation Techniques
External corners present the most challenging aspect of bathroom tiling, yet they’ll make or break your project’s professional appearance. I’ll guide you through two proven techniques that deliver flawless results.
For trim installation, select trim one size larger than your tile depth to accommodate adhesive thickness. Apply adhesive with a notched trowel along the wall edge, then press trim ensuring the overhang matches your tile width perfectly. This creates seamless changes that separate professionals from amateurs. Additionally, using quality structural surveys can help you identify any underlying issues before tiling, ensuring a stable and lasting installation.
Alternatively, master the mitring technique using a wet saw to cut precise 45-degree angles. Start installation at the external corner to establish your vertical reference point. Install mitred tiles first in each row, maintaining consistent corner alignment. This method demands precision but delivers unmatched aesthetic results. Remember that tile trim serves a dual purpose by protecting edges from chipping whilst hiding unglazed tile edges.
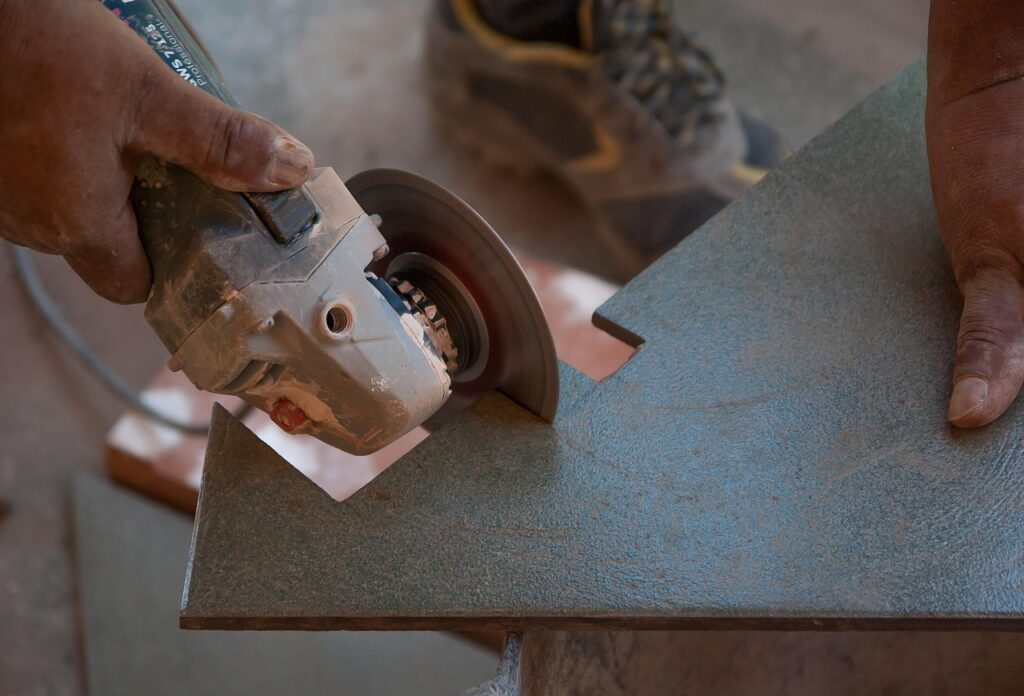
Precision Cutting Methods for Perfect Corner Tiles
Perfect corner installation depends entirely on precise tile cutting—no amount of skilled technique can compensate for poorly measured or executed cuts. I’ll guide you through the direct-marking technique that eliminates measuring errors entirely. Place your tile atop the last full tile with aligned edges, then position another full tile against the corner, overlapping your target tile. Trace the overlapping tile’s edge with a marker and cut along this line. Additionally, proper budgeting for materials is crucial to ensure you have everything you need without overspending.
For tools, I recommend wet saws for clean ceramic cuts, tile nippers for intricate notches, and angle grinders with diamond blades for beveled edges. When executing bevel cuts, set your saw’s miter guide to 45° and feed tiles slowly near the cut end. For L-shaped cuts around fixtures, maintain a 2mm margin during rough cuts, then refine with multiple blade passes. Before cutting, always roughen existing tiled surfaces with sandpaper to ensure proper adhesion when installing new tiles adjacent to old ones.
Waterproofing and Sealing Corner Joints Effectively
Since water infiltration behind tiles causes the most expensive bathroom failures, I’ll show you how to create bulletproof corner waterproofing that prevents costly repairs. It’s essential to remember that effective drainage solutions can also play a significant role in reducing water-related issues.
I always install specialized corner pieces first, then apply full membrane rolls using thin-set mortar adhesive. You’ll need to maintain 2-inch overlaps at all connections—this isn’t optional for leak-proof sealing. I embed mesh tape into horizontal joints using unmodified thinset, then cover with my 6-inch drywall knife for proper adhesion.
For gaps between boards, I fill with polyurethane sealant like KERDI-FIX, applying thick beads along bottom edges where walls meet tubs. I smooth everything using finger pressure for best bonding. The major advantage is that you can proceed with direct tile installation immediately after application without waiting for dry time, which speeds up your project timeline significantly. Remember: stick to manufacturer methods strictly—deviations void warranties and create expensive failures we’re trying to prevent.
Achieving Professional Results on Uneven Wall Surfaces
When walls deviate from true by more than 3mm, standard tiling methods won’t deliver professional results—you’ll need specialized techniques to create flush, level surfaces.
I’ll share the methods that separate amateur work from professional installations. For severe irregularities exceeding 10mm, you’ve got three primary options: fresh plastering, installing backer boards, or using thick-set adhesive with leveling systems. Choosing the right flooring direction enhances the overall aesthetic of the installation.
Professional plasterers create the ideal substrate, but backer boards offer a faster alternative with built-in waterproofing properties. When working with existing surfaces, I rely on rapid-set adhesive applied with 12mm+ notched trowels, combined with leveling clips and wedges.
The key technique is back-buttering tiles while adjusting adhesive depth to compensate for thickness variations. This approach guarantees every tile sits perfectly flush, regardless of wall irregularities. For floor applications, self-levelling compounds provide DIY enthusiasts with an accessible solution to address uneven concrete substrates before tile installation.
Conclusion
I’ve covered the critical techniques that’ll transform your corner tiling from amateur to professional-grade. Your wet saw, direct-marking method, and proper trim selection are non-negotiable tools for success. Don’t compromise on waterproofing—it’s your long-term protection against moisture damage. Remember, thick-set adhesive compensates for uneven substrates, while backer boards provide the stable foundation you need. Execute these methods precisely, and you’ll achieve the flawless bathroom finish that stands the test of time.
References
- https://www.premiumtiletrim.co.uk/news/how-to-fit-tile-trim-around-corners
- https://www.homebuilding.co.uk/advice/tiling-a-corner
- https://www.youtube.com/watch?v=eRi0pXMb9FE
- https://www.rubi.com/en/blog/how-to-tile-inside-corners/
- https://www.youtube.com/watch?v=4X4FDAS4QkQ
- https://www.rubi.com/us/blog/tiling-corners-with-trim/
- https://www.niuyuantrims.com/types-of-tile-trim/
- https://www.tbkmetal.com/bathroom-wall-tile-corner-trim-profiles-for-a-sleek-look/
- https://redblockindustries.com/blog/shower-remodel/tile-edge-trim/
- https://www.homedepot.com/b/Flooring-Flooring-Supplies-Flooring-Tools-Tile-Tools-Tile-Edging-Trim/N-5yc1vZcdv7