I’ve watched countless DIY enthusiasts struggle with skirting board caulk, creating messy lines and uneven finishes that detract from otherwise beautiful rooms. The difference between amateur and professional results isn’t expensive tools or years of experience—it’s understanding the specific techniques that guarantee clean, durable seals. Most people skip critical preparation steps and rush the application process, leading to gaps, bubbles, and peeling within months. Let me show you the exact methods that’ll transform your caulking from frustrating chore to satisfying skill.
Key Takeaways
- Remove all dust, debris, and old caulk completely, then sand surfaces and apply primer for optimal adhesion.
- Choose acrylic latex caulk for most projects or silicone-based sealants for high-moisture areas like bathrooms.
- Cut nozzle at 45 degrees, apply steady pressure, and maintain constant speed for a thin 3mm bead.
- Smooth immediately with damp finger or tool, remove masking tape while wet, and work in steady sections.
- Allow 24 hours minimum curing time and inspect every six months for cracks or separation issues.
Essential Preparation Steps for Perfect Caulking Results
While many DIY enthusiasts rush straight to the caulk gun, I’ve learned that proper preparation determines whether your skirting board caulking will look professional or amateurish.
I start by removing all dust and debris using a hand dustpan and brush, then wipe surfaces with a damp cloth. I vacuum surrounding areas to prevent airborne particles from contaminating fresh caulk. Next, I sand skirting boards thoroughly to create proper adhesion surfaces, always following the wood grain direction. Additionally, applying internal wall insulation can enhance overall home comfort and energy efficiency, making it a worthwhile consideration for homeowners.
I remove old, damaged caulk using a scraper, then clean gaps meticulously. Any pinholes get filled with wood filler before sanding smooth. I apply primer to unprimed surfaces and allow complete drying. For the best results, I ensure walls adjacent to skirting boards are filled and sanded properly before beginning the caulking process. This systematic approach guarantees your caulk bonds properly and creates the seamless finish we’re all after.
Choosing the Right Tools and Materials for Skirting Board Caulking
Three core components determine your skirting board caulking success: the right caulk type, proper application tools, and quality finishing accessories.
I recommend acrylic latex caulk for most projects—it’s paintable, flexible, and offers water-based cleanup. For humid areas like bathrooms, silicone-based sealants provide superior durability and moisture resistance. Remember that most caulks require 24 hours to fully cure before painting or heavy use.
You’ll need a reliable caulking gun (dripless models minimize waste), utility knife for precise 45-degree tip cutting, and smoothing tools for clean lines. Don’t skip the masking tape—it protects adjacent surfaces and creates sharp edges. Proper drying times are essential for achieving a smooth finish, as inadequate curing can lead to poor adhesion and unsatisfactory results.
Professional results require proper preparation tools: scrapers for old caulk removal, sanding tools for uneven surfaces, and damp cloths for cleanup. Choose 310ml-400ml tubes that match your gun’s capacity and guarantee compatibility with your skirting board material.
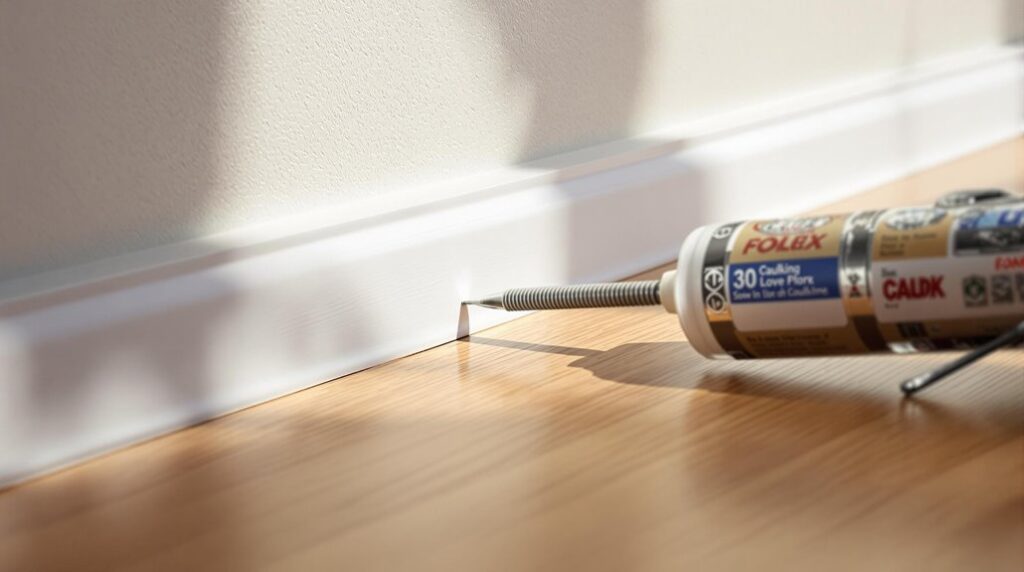
Proper Caulk Application Techniques for Clean Lines
Perfect application technique starts with meticulous surface preparation—the foundation that determines whether your caulk line looks professional or amateurish. I’ll clean the gap thoroughly with a damp cloth, sand both surfaces smooth, then vacuum away all dust. Complete drying prevents bonding failure, as proper preparation techniques ensure a strong bond between the caulk and surfaces.
For controlled application, I cut the nozzle at 45 degrees and hold my gun at the same angle. I’ll apply steady pressure while moving at constant speed, starting with a thin 3mm bead. Masking tape creates razor-sharp edges.
Immediate smoothing with a damp finger pushes caulk into gaps while eliminating air pockets. I’ll remove tape before setting and allow 24 hours curing time. After the caulk has fully dried, I’ll check for any sinking areas along the skirting board and add more caulk if necessary. Finally, I’ll paint the cured caulk to match surrounding surfaces—never leave it white.
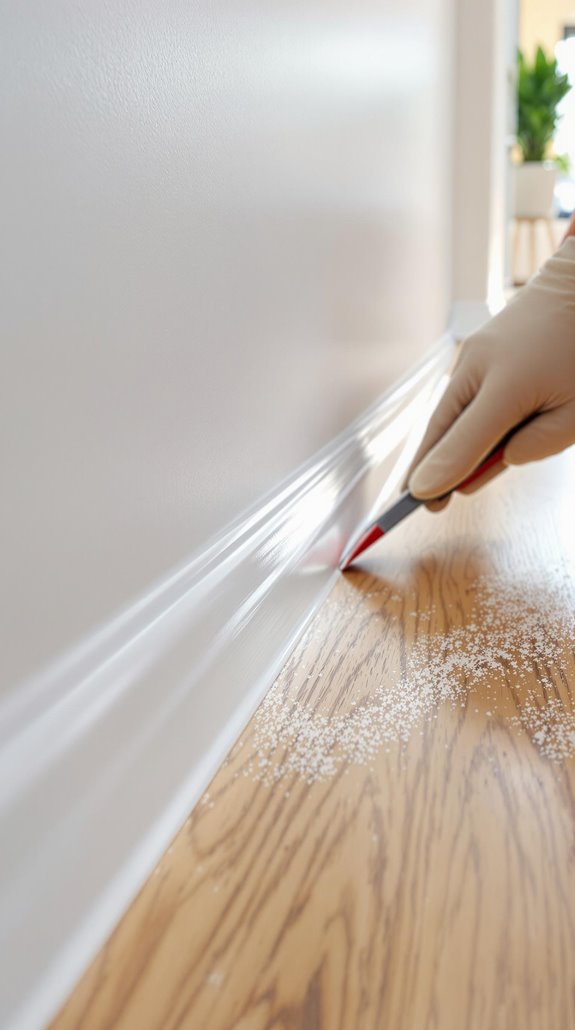
Professional Smoothing Methods for Seamless Finishes
Once caulk is applied, the smoothing process transforms a rough bead into a professional-looking seal that disappears into the joint. I’ll share the techniques that separate amateur from professional results.
Start with the right tools: a caulk smoothing tool, your finger, or a damp sponge. Dip your chosen tool in soapy water—this prevents sticking and creates fluid motion. Apply light, consistent pressure while dragging along the bead in steady sections. Don’t stop mid-stroke; maintain continuous motion for seamless changes.
Remove painter’s tape immediately while the caulk remains wet. Wipe excess material with a soft cloth before it skins over. Work quickly but deliberately—you’ve got about 10 minutes before most caulks become difficult to smooth. The goal is creating a bead that’s flush with both surfaces, eliminating visible ridges or gaps.
This meticulous approach creates a seamless finish that enhances the room’s overall appearance and gives your skirting boards a truly professional look.
Curing Time and Quality Inspection Guidelines
After achieving that perfect bead, patience becomes your most important tool. I can’t stress enough that rushing the curing process will compromise your entire project. While most caulks feel dry within 30 minutes to 2 hours, true curing takes much longer.
Here’s what you need to know: silicone caulk requires 24 hours, acrylic latex needs 24 hours to 7 days, and polyurethane demands 10-12 days for complete cure. Temperature, humidity, and application thickness all affect these times. Maintaining a consistent room temperature between 40-80°F will help promote quicker and more reliable drying results.
To test if it’s ready, lightly scratch the surface—if there’s no indentation, you’re good. Don’t paint or add more caulk until it’s fully cured, or you’ll risk poor adhesion, shrinkage, and water damage.
Painting Over Caulk for Invisible Repairs
When your caulk has fully cured, the real magic happens during the painting phase—this is where amateur work separates from professional-grade results.
I match my paint color precisely to the skirting boards, not the walls, for truly camouflaged repairs. Using the same paint type—like eggshell for wood surfaces—ensures uniform sheen across both caulk and skirting. Selecting the right flooring material can also enhance the overall aesthetic of your room.
I apply multiple thin coats with angled brushes, feathering paint from skirting onto caulk for gradual shifts that mask edges completely. Between coats, I sand lightly for ultra-smooth texture matching.
For gaps exceeding 5mm, I use sandable filler instead of caulk, then treat filled areas as skirting during painting. This maintains consistent properties and delivers those invisible repairs that’ll have everyone wondering how you achieved such professional results.
I use the same cutting-in technique when painting over caulk as I would for regular painting work, ensuring smooth, professional lines without tape marks that could compromise the finish.
Common Mistakes to Avoid When Caulking Skirting Boards
Although caulking skirting boards seems straightforward, I’ve seen countless DIY projects fail because homeowners rush through critical steps or overlook fundamental preparation requirements. Don’t skip surface cleaning—dust and old caulk residues create barriers that weaken bonding. I always wipe surfaces with a damp cloth and guarantee complete drying before starting. Ensuring a clean surface not only enhances adhesion but also contributes to the overall safety standards required in maintaining a decent home.
Choose the right caulk for your environment. Moisture-incompatible products in bathrooms crack prematurely, while cheap options fail under temperature shifts. Apply consistent pressure on your caulk gun, keeping the nozzle angled below 45° for better control. Smooth within 10-15 minutes using moistened tools—delayed smoothing leaves ridges and weakens adhesion.
Never paint before 24-hour curing, and remove painter’s tape while caulk remains wet to prevent pulling sections away. Poor sealing around skirting boards creates entry points for insects and rodents, compromising your home’s pest protection.
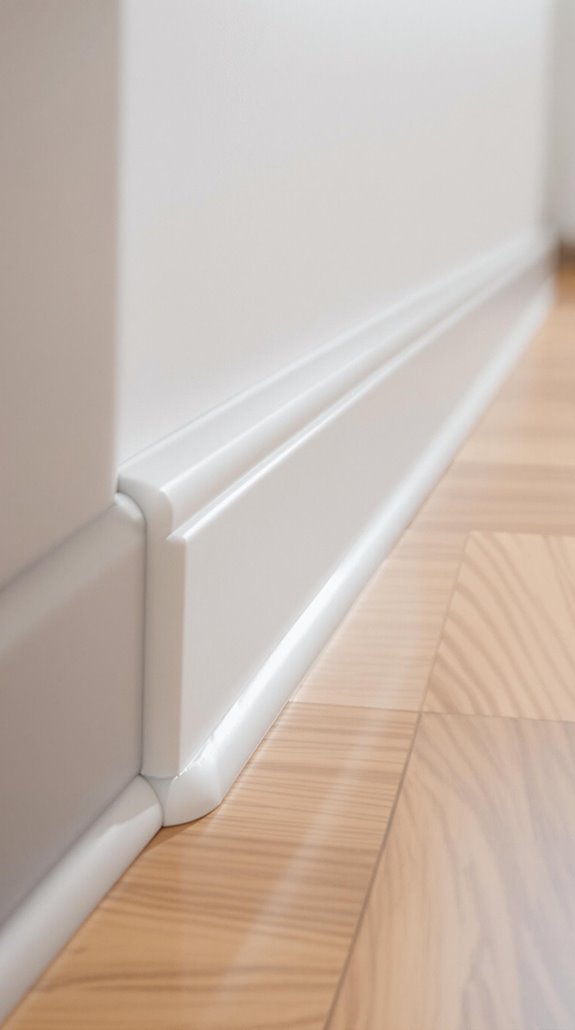
Selecting Between White and Clear Caulk Options
Beyond mastering proper application techniques, your caulk color choice greatly impacts both the visual outcome and long-term performance of your skirting board project. I’ll guide you through this essential decision.
Choose white caulk when you’re working with white walls or white skirting boards – it creates that seamless, professional appearance we’re all after. White’s also paintable after curing, letting you match your trim perfectly. However, it’ll show dirt more prominently on darker surfaces.
Clear caulk excels with natural wood, tile, or colored materials where you want near-invisibility. It conceals gaps without color clashes and resists showing dirt on darker surfaces. Clear’s your best bet for multi-material changes. For wooden skirting boards, timber-coloured caulk offers an excellent alternative that matches the natural grain variations.
Remember: clear caulk isn’t paintable, so only select it when the natural finish is your final goal.
Dealing With Large Gaps and Uneven Surfaces
Large gaps and uneven surfaces present the trickiest challenges you’ll face when caulking skirting boards, but they’re entirely manageable with the right approach.
For gaps exceeding 1/4 inch, you’ll need foam backer rod first. Choose a diameter 25% larger than your gap and insert it 1/8 inch below the surface. This prevents shrinkage and eliminates excessive caulk use.
When applying, hold your caulking gun at a 45-degree angle and maintain steady pressure without stopping mid-run. Use a rigid putty knife to press caulk into deep recesses, then smooth immediately with a wet finger or damp sponge. For concave or convex junctions, profiling tools work best.
Always overfill slightly to account for curing shrinkage, and feather edges for invisible connections. Before beginning any work, ensure you vacuum and wipe down all surfaces to remove dirt and debris for optimal adhesion.
Maintenance Tips for Long-Lasting Caulk Performance
Proper caulk maintenance determines whether your skirting board joints remain flawless for years or require frequent repairs. I’ll share proven techniques that preserve your investment.
Clean caulked joints monthly with a damp cloth, removing dust and grime that accelerate degradation. Inspect every six months for cracks, shrinkage, or separation—catching issues early prevents costly repairs. Regular inspection can also help you identify common issues that might arise from seasonal changes.
Address minor defects immediately. Small cracks expand rapidly, so fill them with matching caulk before they worsen. For touch-ups, scrape loose material first, then apply fresh caulk smoothly.
Control moisture through proper ventilation. Excessive humidity causes mold growth and premature failure. Allow full curing time—24 hours minimum—before painting or adding more caulk. Choose moisture-resistant caulk for bathrooms and kitchens where humidity levels remain consistently high.
These maintenance habits extend caulk life considerably, keeping your skirting boards looking professional long-term.
Conclusion
I’ve covered the essential techniques you’ll need for professional-quality skirting board caulking. You’ll achieve clean, durable results by properly preparing surfaces, selecting appropriate materials, and applying consistent technique. Don’t rush the process—take time for proper smoothing and allow full curing. Regular maintenance checks will extend your caulk’s lifespan considerably. Remember that practice improves your skills, so start with less visible areas if you’re inexperienced. Quality preparation and patience are your keys to success.
References
- https://mdfskirtingworld.co.uk/blog/caulking-skirting-boards-a-how-to-guide/
- https://madebymatt.co/how-to-caulk-skirting-boards/
- https://siliconedirect.co.uk/blogs/ideas-advice/how-to-caulk-skirting-boards-the-essential-guide
- https://www.homebuilding.co.uk/advice/caulking-skirting-boards
- https://www.youtube.com/watch?v=-ETYMFbtaTk
- https://www.youtube.com/watch?v=T1iGrP9bKpA
- https://www.youtube.com/watch?v=Ygs7oe_pxK4
- https://www.mdfskirtingmouldings.co.uk/blogs/news/how-to-caulk-skirting-boards
- https://qualitysealaustralia.com.au/effective-caulking-skirting-boards/
- https://www.youtube.com/watch?v=fLZGKHON_68