I’ve tackled countless replastering projects, and I’ll tell you straight—most DIY disasters stem from rushing the prep work. You’ll need a hawk, steel trowel, and devil float at minimum, but having the right tools means nothing if you’re mixing plaster incorrectly or applying it to an unprepared surface. The difference between a professional-looking finish and visible ridges comes down to mastering three critical techniques that separate weekend warriors from skilled tradespeople.
Key Takeaways
- Clean surfaces thoroughly and apply diluted PVA primer in two coats before plastering for proper adhesion.
- Mix plaster to cake icing consistency using 12.5 liters water per 25kg bag for optimal workability.
- Apply first coat at 2mm thickness with 45-degree trowel angle, then flatten after 20 minutes.
- Use cross-troweling technique for second coat while first remains damp, then burnish for mirror-like finish.
- Sand with 120-grit then 220-grit paper after curing, wait 7-10 days before final decorating.
Preparing Your Wall Surface for Optimal Plaster Adhesion
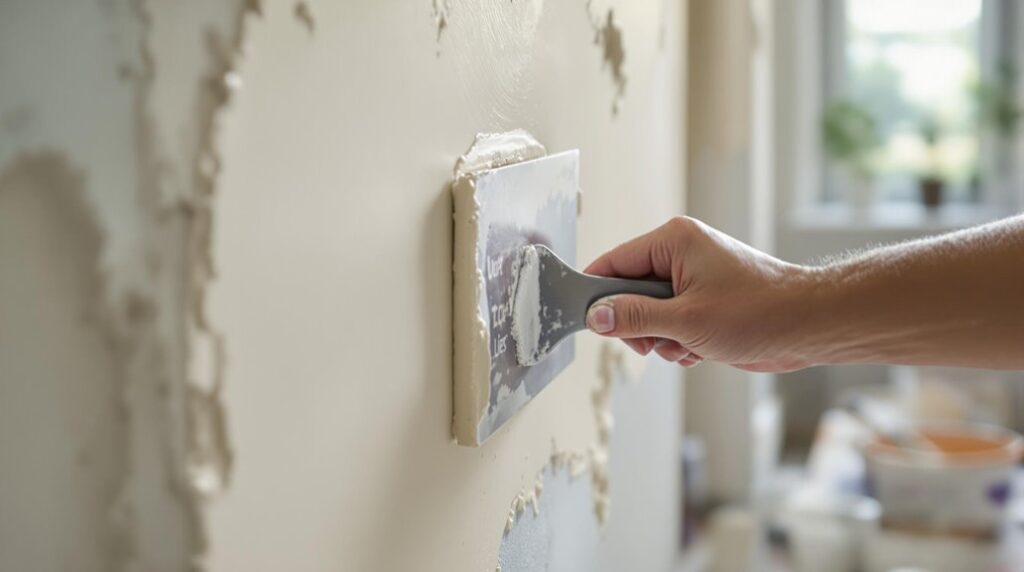
A successful replastering project hinges on meticulous surface preparation—skip this step, and you’ll watch your fresh plaster fail within months. I’ll walk you through the essential prep work that separates amateur bodge jobs from professional-grade results.
Start by removing all dust, debris, and grease using a stiff brush and degreasing solution. Fill every crack and hole with proper filler, then sand smooth once cured. Remove any loose material—it’s better to overdo this than discover flaking later. Additionally, addressing any hairline cracks in the plaster before applying new layers can prevent future issues and ensure a smoother finish.
Apply diluted PVA primer in two coats, allowing the first to dry completely before the second. The final coat should be tacky when you start plastering. Mask surrounding areas with tape and dust sheets. This groundwork guarantees your plaster bonds permanently, giving you that flawless finish we’re all after.
Proper preparation also creates a durable barrier against weather elements, significantly improving the longevity of your plastered walls.
Mixing Plaster to the Perfect Consistency Every Time
While perfect surface prep sets the foundation, botched plaster mixing will sabotage your entire project before you’ve even touched the wall. I’ll walk you through the exact ratios that deliver professional results every time.
Start with 12.5 liters of clean water per 25kg bag—forget British Gypsum’s 11.5L recommendation. Pre-measure water in a flexible mixing tub, then gradually sift plaster into the bucket while mixing. Never reverse this order or you’ll create lumps that’ll haunt your finish.
Use a mixer drill to achieve thick, creamy consistency resembling cake icing. Your plaster should hold shape without dripping when trowel-scooped. Begin with a heap of plaster on top of the water surface before mixing to ensure proper integration. It’s important to monitor for early detection of any issues like subsidence while working on your home. Mix only what you can apply within your working timeframe—typically 5-45 minutes depending on conditions.
Mastering the First Coat Application Technique
Loading your trowel correctly determines whether you’ll achieve professional results or create a frustrating mess that requires scraping and restarting. I’ll show you the technique that separates amateur attempts from skilled work.
Hold your trowel at a 45-degree angle and load plaster from your hawk board. Apply the first coat at 2mm thickness using long, fluid motions with firm pressure. Don’t worry about minor ridges – focus on eliminating bulges and maintaining consistent coverage. Keep the leading edge of your trowel positioned 10-15mm away from the wall surface to prevent dragging and ensure smooth application. Understanding regional price variations can also help you budget effectively for materials.
Press plaster into corners and bottom edges, filling all hollows completely. After 20 minutes, flatten the coat with your clean trowel using firm pressure and long movements.
Here’s the essential detail: when plastering multiple walls, run plaster into the angles between coats and wash your tools before applying the second coat.
Smoothing Out Imperfections Like a Professional
Even the most carefully applied first coat will reveal imperfections that separate amateur work from professional results. I’ll show you how to tackle these like a seasoned plasterer.
Within 5 minutes of application, mist problem areas lightly and smooth trowel marks with gentle strokes. Fill low spots immediately with spare plaster before the layer sets. For ridges, press your float firmly at stroke ends to flatten them out. A good repair technique can greatly enhance the overall quality of your finish.
After 15 minutes, skim excess plaster using cross-hatching movements—horizontal passes followed by vertical ones. This redistributes material evenly across your surface. Use angled lighting to spot missed bumps or grooves that need attention.
For final polishing, work your damp trowel in circular motions once the plaster’s set. This creates that glass-like finish that screams professional quality. Remember that multiple coats are typically required to achieve the best results and most durable finish.
Applying the Second Coat for Enhanced Durability
That professional finish you’ve achieved with your first coat sets the stage perfectly for the second application—the layer that transforms good plasterwork into bulletproof durability. I’ll apply this vital coat while the first remains slightly damp, maintaining that 15-minute window for ideal adhesion. Using half the plaster quantity, I’ll keep thickness at 1-2mm, working in swift arcs with my trowel at 30-45 degrees. Cross-troweling eliminates air pockets while filling micro-imperfections from the first layer. It’s also important to consider that proper insulation can significantly enhance a home’s overall energy efficiency, leading to substantial cost savings on energy bills. I’ll maintain damp tools and monitor viscosity carefully—fresh batches only. This double-coating creates a monolithic surface that’s twice as durable, resistant to impact and moisture ingress. Complete within 20-30 minutes for seamless bonding. Once the plaster begins to set, I’ll polish the surface with a damp trowel to achieve that perfectly smooth finish ready for decoration.
Achieving a Flawless Finish Through Proper Polishing
While your second coat provides the structural foundation, the polishing phase determines whether you’ll achieve that coveted mirror-like finish or settle for amateur results. I’ll grab my clean steel trowel and work it at a 45-60° angle to compress the plaster into itself. This burnishing technique requires firm pressure applied in cross-hatch patterns across small 1m² sections. I’m moving the trowel in varied directions—never working the same area twice without changing angle. The magic happens during those dry-to-wet shifts where I’ll blend layers seamlessly. I’ll repeat this burnishing process 3-4 times per section, watching the luster deepen with each pass. Any rough spots get immediate attention before the plaster sets completely. Between each burnishing pass, I’ll ensure adequate drying time to prevent compromising the finish integrity and maintain the structural quality of each layer. Additionally, proper planning can help ensure that you stay within your realistic budget during this renovation process.
Curing and Final Touches for Long-Lasting Results
Once I’ve achieved that polished surface, the curing phase becomes critical for preventing structural failures that’ll haunt me months later. I maintain room temperature between 15–25°C, avoiding direct heat sources that create uneven drying and compromise integrity. My moisture meter‘s my best friend here—0% readings confirm readiness for mist coats. It’s also essential to be aware of moisture ingress during this process, as it can lead to significant damage if not addressed.
I check for uniform color change across surfaces, pressing gently to test firmness without indentation. Darker patches mean residual moisture, so I wait. When hairline cracks appear, I know I’ve rushed the process or have environmental imbalances.
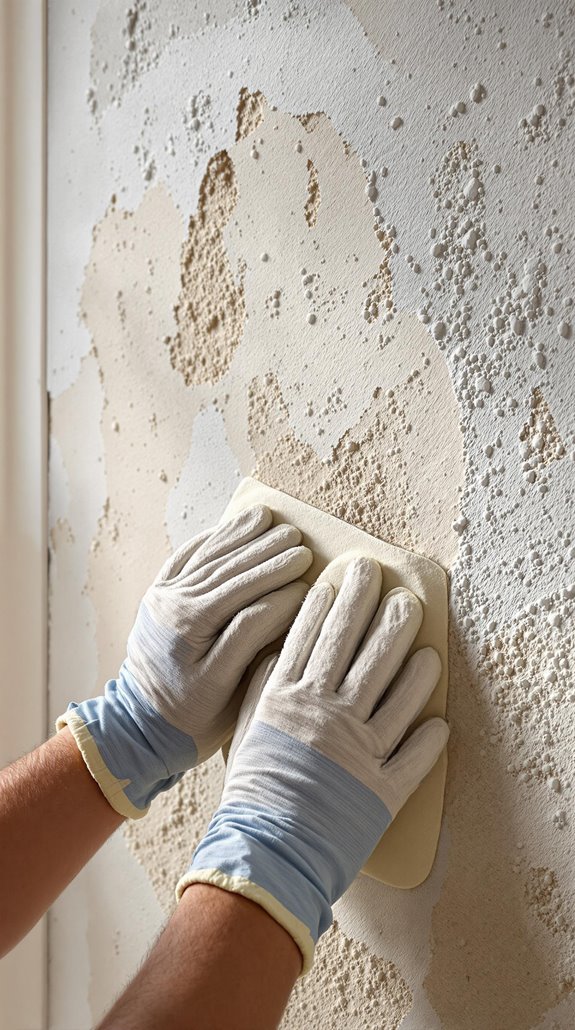
For sanding, I start with 120-grit paper, progressing to 220-grit using broad circular motions. Cross-lighting inspections reveal subtle imperfections my eyes miss. I schedule final decorating 7–10 days post-curing for ideal adhesion. I keep windows open throughout the process to maintain proper air circulation, which accelerates drying and prevents moisture-related issues.
Conclusion
I’ve covered the essential techniques for achieving professional replastering results. Your success depends on proper surface preparation, consistent plaster mixing, and methodical application. Don’t rush the process—timing between coats is critical for ideal adhesion. Use quality tools: a clean hawk, flexible trowel, and fine-grit sandpaper. Monitor your plaster’s workability throughout application. Follow these technical steps precisely, and you’ll achieve the smooth, durable finish that transforms your walls into a perfect canvas for decoration.
References
- https://www.diy.com/ideas–advice/building–hardware/interior-walls–ceilings/how-to-plaster-a-wall
- https://www.youtube.com/watch?v=A0adhaxkpSg
- https://www.homebuilding.co.uk/advice/how-to-plaster-a-wall
- https://www.kezzabeth.co.uk/2019/09/how-to-diy-plaster-complete-beginner-guide.html
- https://www.youtube.com/watch?v=zssLiRU4NJM
- https://www.allweathercoating.co.uk/wall-coating/how-to-prepare-a-wall-for-plaster-application/
- https://abdrylining.com/preparing-plaster-walls-for-painting/
- https://clairedouglasstyling.co.uk/post/diy-skimming-wall-prep
- https://www.mybuilder.com/questions/v/19952/painting-onto-new-plaster-do-i-need-to-sand-walls-before-painting
- http://plasteringforbeginners.co.uk/preparing-walls-for-plastering/