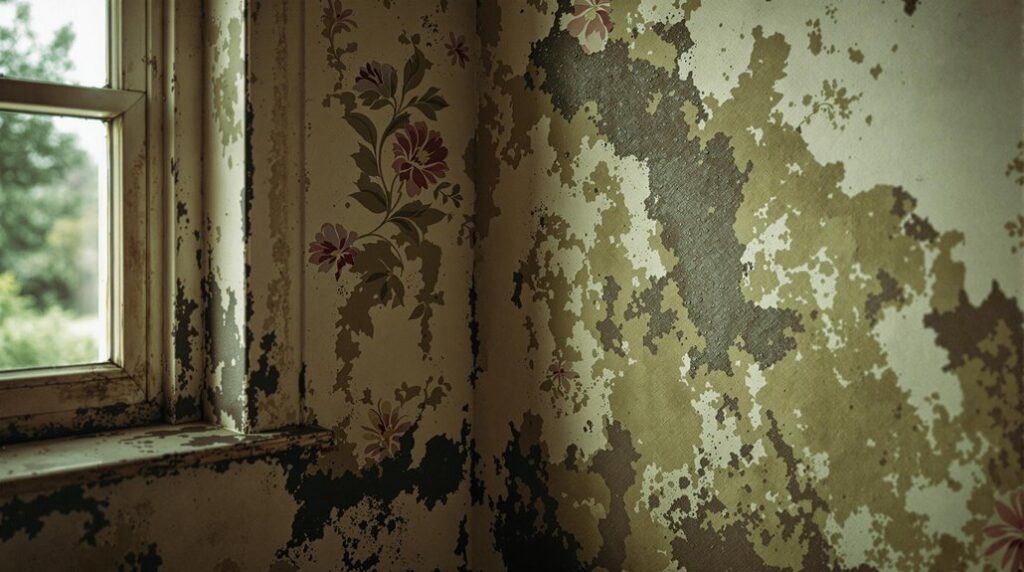
I’ve seen countless homeowners discover that dark, creeping stain behind their wallpaper—and the sinking realization that follows. Mold doesn’t just appear overnight; it’s been quietly establishing itself in the perfect storm of moisture and poor ventilation that most homes unknowingly provide. While you might think scrubbing the surface will solve your problem, there’s a systematic approach that addresses the root cause and prevents future growth. The key lies in understanding what’s actually happening beneath your walls.
Key Takeaways
- Maintain 30-50% humidity levels using dehumidifiers and ensure proper ventilation with exhaust fans to prevent moisture buildup.
- Clean minor mold spots with 1:1 white vinegar solution on non-porous wallpapers, testing hidden areas first.
- Replace wallpaper immediately if mold coverage exceeds 10 square feet or if peeling and bubbling occur.
- Address underlying moisture sources like leaks, condensation, and poor ventilation to prevent mold from returning.
- Use moisture-resistant wallpaper and apply quality primers with sealers like Kilz before installation in humid areas.
Why Mold Thrives Behind Your Wallpaper

When wallpaper creates an airtight seal against your wall surfaces, it transforms into an unintended moisture trap that accelerates mold growth. I’ve seen this pattern countless times in homes lacking proper vapor barriers, especially those built before the 1960s where wallpaper becomes the primary moisture barrier.
The trapped moisture comes from multiple sources you’re likely dealing with: indoor humidity from cooking and showering, condensation from temperature differences, and hidden leaks from plumbing or roofing. Additionally, controlling indoor humidity is essential to prevent mold growth, as excessive moisture provides an ideal environment for spores to thrive. Your wallpaper adhesive compounds the problem by retaining moisture and providing organic nutrients that mold spores feast on.
Poor ventilation makes everything worse. When humid air stagnates against wallpaper surfaces, you’re creating the perfect breeding ground for mold colonies. Once established, mold spreads rapidly through the drywall and insulation beneath, making containment increasingly difficult.
Early Warning Signs of Wallpaper Mold Problems
Five distinct categories of warning signs can alert you to developing mold problems behind your wallpaper before the situation becomes a major remediation project.
First, you’ll notice visual changes like discoloration, bubbling, or peeling wallpaper with dark spots appearing on surfaces. Second, persistent musty odors that won’t disappear despite cleaning efforts signal hidden mold growth. Third, structural damage becomes evident through water stains, warped walls, or deteriorating adhesion where moisture has compromised building materials.
Fourth, health symptoms including runny noses, itchy eyes, and breathing problems often develop when you’re regularly exposed to mold spores. Finally, environmental conditions like high humidity, poor ventilation, or recent water damage create perfect breeding grounds for mold colonies. Check around baseboards and corners where these odors tend to concentrate more intensely.
Recognizing these early indicators helps you address problems before they escalate into costly, extensive remediation projects.
Humidity Control: Your First Line of Defense

While mold thrives in humid environments, controlling moisture levels gives you the most effective weapon against wallpaper contamination. I recommend maintaining 30-50% humidity levels using whole-house dehumidifiers for extensive coverage. Target high-moisture zones like basements with portable units featuring auto-drain capabilities. Proper insulation can also play a role in creating a thermal barrier that helps reduce indoor humidity levels.
You’ll need proper ventilation timing—run bathroom exhaust fans during showers plus 20 minutes after. Install 600+ CFM range hoods in kitchens to capture cooking steam. Only open windows when outdoor dew points drop below 55°F to prevent humidity influx.
Deploy passive moisture absorbers like baking soda bowls in closets and damp corners. Monitor humidity hourly with hygrometers placed near wallpaper-prone walls. Remember, consistent moisture control prevents mold establishment better than any remediation effort. Additionally, fix leaks in roofs, walls, or plumbing immediately to eliminate direct moisture sources that bypass your humidity control systems.
Ventilation Strategies That Actually Work
Three critical ventilation strategies will transform your wallpaper protection efforts from guesswork into systematic moisture control.
First, I’ll establish mechanical ventilation as your foundation. Install exhaust fans in bathrooms and kitchens, running them during and after moisture-generating activities. Service these systems annually and clean filters monthly to maintain peak performance. Consider integrating MVHR systems to enhance energy efficiency in modern homes.
Second, I’ll combine natural ventilation with your mechanical systems. Open windows strategically to create cross-ventilation, positioning them across rooms for maximum airflow. This approach exchanges moist indoor air with drier outdoor air.
Third, I’ll implement humidity monitoring for precision control. Use hygrometers to track levels between 30-50%, deploying dehumidifiers in high-risk zones. Keep furniture spaced apart from walls to prevent air circulation blockages that can create moisture pockets. Integrate ventilation with humidity sensors for automated responses, ensuring your wallpaper stays protected through consistent moisture management.
Safe and Effective Mold Removal Techniques
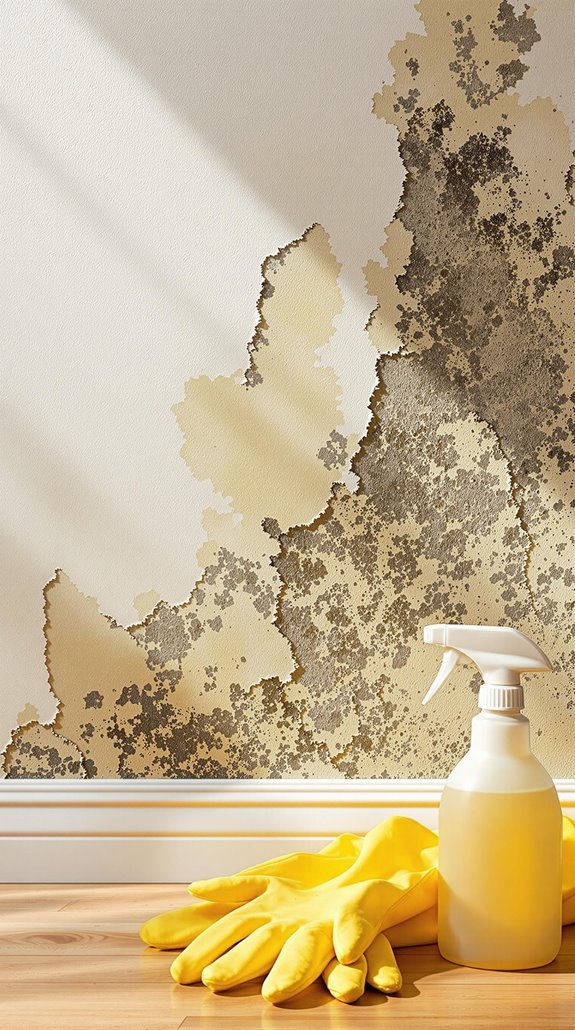
When mold appears on your wallpaper despite proper ventilation, I’ll guide you through proven removal techniques that protect both your walls and your health.
Start with natural solutions we all trust. I recommend mixing white vinegar and water (1:1 ratio) for its antifungal properties. Apply it, scrub gently in circular motions, then wipe clean. For stubborn mold, you’ll need a bleach solution (1:10 ratio with water). Always test on hidden areas first to prevent discoloration. Keeping your home well-ventilated helps reduce high humidity levels, which is crucial for preventing mold growth.
Before cleaning, dust or vacuum walls to avoid smearing dirt. Never oversaturate—blot excess moisture immediately. If you’re dealing with washable wallpaper, warm soapy water works well with gentle scrubbing.
Remember: address underlying moisture sources, or you’ll face recurring problems. Mold exposure can trigger breathing difficulties and worsen existing asthma symptoms. We’re building lasting solutions together.
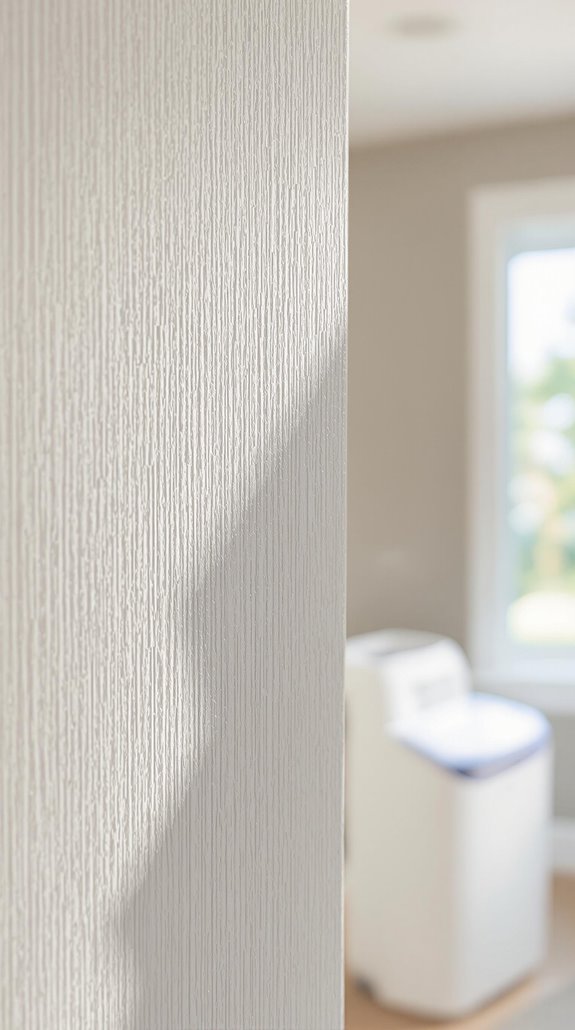
Choosing the Right Wallpaper for High-Moisture Areas
Choosing moisture-resistant wallpaper materials prevents the mold problems we just tackled from returning. I recommend vinyl wallpaper for high-moisture areas like bathrooms because its waterproof plastic coating blocks moisture penetration completely. You’ll find it resists mold growth and handles frequent cleaning without damage. Additionally, internal wall insulation can complement your efforts by enhancing the overall energy performance of your home.
Vinyl-coated wallpaper offers another excellent option, providing moisture protection while maintaining breathability. It’s perfect for spaces with moderate humidity levels where you want both function and aesthetic appeal.
For extreme conditions, I suggest fiberglass wallpaper. Its waterproof composition handles poor ventilation and constant humidity exposure. Non-woven varieties work well in powder rooms with lower moisture levels. These materials are specifically designed to withstand the challenging conditions found in different bathroom environments.
Peel-and-stick waterproof options give you flexibility for rental properties or DIY projects. Choose materials that match your specific moisture conditions for lasting results.
Professional Installation Tips to Prevent Future Growth
Even the best moisture-resistant wallpaper won’t prevent mold if you install it incorrectly. I recommend hiring experienced commercial installers who understand moisture-sensitive applications. They’ll measure wall moisture levels with a meter, ensuring they’re below 4% residual humidity before starting. Properly assessing building regulations is also essential to ensure compliance during the renovation process.
Here’s what proper installation involves: applying moisture-resistant primer first, followed by two coats of high-quality sealer from brands like Kilz or Zinsser. The installer should let each coat dry completely and use humidity-compatible adhesives following manufacturer guidelines.
During installation, maintain indoor humidity at 40-50% with dehumidifiers and promote airflow with fans. If walls are wet, dry them within 24-48 hours using air injection systems when necessary. Remember that mold can grow behind wallpaper, so thorough inspection of the wall surface before installation is crucial. This professional approach prevents future mold growth and protects your investment.
When to Replace vs. Clean Moldy Wallpaper
Although discovering mold on wallpaper feels alarming, you don’t always need to replace it—the key lies in accurately evaluating the damage extent and material type.
I recommend cleaning when you’ve caught minor surface spots early on non-porous vinyl-coated wallpapers. Use a 1:1 white vinegar solution, gently dabbing without scrubbing. Test hidden sections first to prevent discoloration.
However, replacement becomes necessary when coverage exceeds 10 square feet, you notice peeling or bubbling, or detect persistent musty odors. Porous materials like paper or grasscloth absorb spores deeply, making cleaning ineffective. If you have respiratory conditions or young children at home, prioritize replacement for health safety. Remember that mold may grow on hidden surfaces such as the drywall behind your wallpaper, requiring professional investigation even after visible removal.
Always address underlying moisture issues first, regardless of your chosen approach—otherwise, you’ll face recurring problems.
Hidden Water Damage: What Lies Beneath

Water damage often lurks behind walls long before visible signs appear on wallpaper surfaces. I’ve found that musty odors and subtle discoloration are your first clues that moisture’s infiltrating your home’s structure. You’ll want to check for soft or warped drywall, peeling edges, and unexplained stains.
Additionally, it’s crucial to be aware that early detection of damp can prevent structural damage and health problems. Professional detection methods I recommend include thermal imaging cameras that reveal temperature variations and acoustic detectors that amplify water sounds within walls. Smart leak detectors now offer Wi-Fi connectivity for real-time alerts, while endoscopic cameras provide direct visual access through small wall openings. Your water meter can also serve as a detection tool by recording readings before bed and checking again in the morning for any unexplained changes.
Don’t ignore these warning signs. Hidden water damage compromises structural integrity, creates mold hazards, and reduces your home’s value. Early detection using moisture meters or professional acoustic correlators can save you thousands in repairs while protecting your family’s health and your investment.
Long-Term Monitoring and Maintenance Solutions
Prevention beats remediation every time, which is why I’ve developed extensive monitoring and maintenance protocols that stop mold before it starts. I install smart sensors for real-time humidity tracking and maintain indoor temperatures between 18–22°C to minimize condensation. My weekly routine includes vacuuming wallpaper with soft brush attachments and monthly inspections using flashlights in shadowed areas. Regular maintenance can also help homeowners avoid the typical renovation costs associated with water damage repairs.
I schedule bi-annual professional inspections for hidden mold detection and analyze seasonal humidity patterns to adjust dehumidifier usage proactively. Every 2–3 years, I reapply mold-inhibiting sealants per manufacturer guidelines. When wallpaper shows persistent mold despite remediation efforts, I replace it immediately. During cleaning sessions, I ensure proper ventilation by opening windows or using exhaust fans to prevent moisture buildup. This systematic approach transforms reactive homeowners into proactive defenders against moisture damage.
Conclusion
I’ve outlined the essential strategies you need to eliminate wallpaper mold permanently. Control humidity between 30-50%, improve ventilation, and inspect regularly for early signs. Use vinegar or bleach solutions for removal, and don’t ignore hidden water damage behind walls. Choose moisture-resistant wallpaper in vulnerable areas, and maintain consistent monitoring. Remember: prevention’s always cheaper than remediation. Follow these technical solutions systematically, and you’ll banish mold problems for good while protecting your home’s structural integrity.
References
- https://homeimagedirect.com/blog/mould-on-your-wallpaper-how-to-clean-and-get-rid-of-it-for-good
- https://www.homebuilding.co.uk/advice/mould-on-wallpaper
- https://romandecoratingproducts.com/blog/moisture-and-wallpaper-best-practices-for-avoiding-bubbling-and-peeling/
- http://www.branchenvironmental.com/how-wallpaper-may-lead-to-mold/
- https://www.ultra-fresh.com/mold-behind-wallpaper
- https://www.advantaclean.com/ft-lauderdale-fl/about-us/blog/signs-of-hidden-mold-behind-wallpaper-and-how-to-detect-it/
- https://dfrancowallpaper.com/there-is-mold-behind-my-wallpaper/
- https://www.servicemasterrestore.com/servicemaster-fire-and-water-restoration-services/why-us/blog/2024/april/5-signs-you-have-mold-inside-walls-and-how-to-deal-with-it/
- https://www.housedigest.com/1768248/signs-of-mold-behind-wallpaper-what-to-do/
- https://rainbowrestores.com/blog/early-signs-mold