I’ve transformed countless attics into stunning bathroom retreats, and I’ll show you exactly how to turn your overlooked space into a luxurious sanctuary. You’ll need specific fixtures, strategic lighting placement, and clever workarounds for those tricky sloped ceilings. The key lies in understanding which corners work best for your plumbing layout and how to maximize every square foot. Before you start sketching layouts though, there’s one critical structural consideration that’ll determine your entire project’s success.
Key Takeaways
- Install corner sinks and wall-mounted toilets to maximize floor space while maintaining functionality in compact attic layouts.
- Add tubular skylights and layered LED lighting with dimmers to brighten sloped ceilings and create luxurious ambiance.
- Convert to a wetroom design to eliminate bulky shower enclosures and make the most of irregular attic dimensions.
- Choose premium fixtures like waterfall shower heads, freestanding bathtubs, and heated flooring for a spa-like retreat experience.
- Install proper ventilation with exhaust fans and maintain 50/50 intake-to-exhaust ratios to prevent moisture buildup and mold growth.
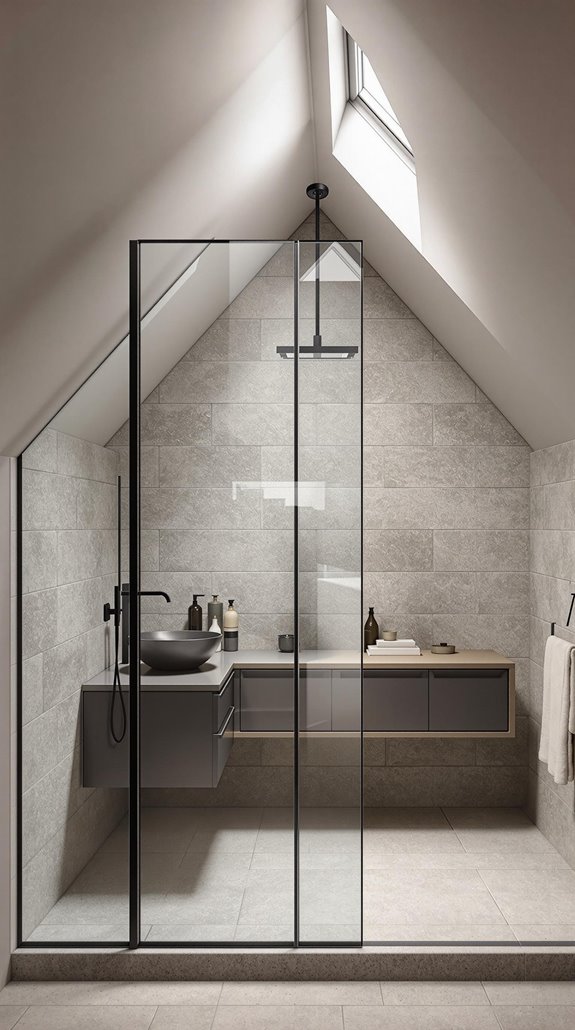
Maximizing Space With Smart Layout Solutions
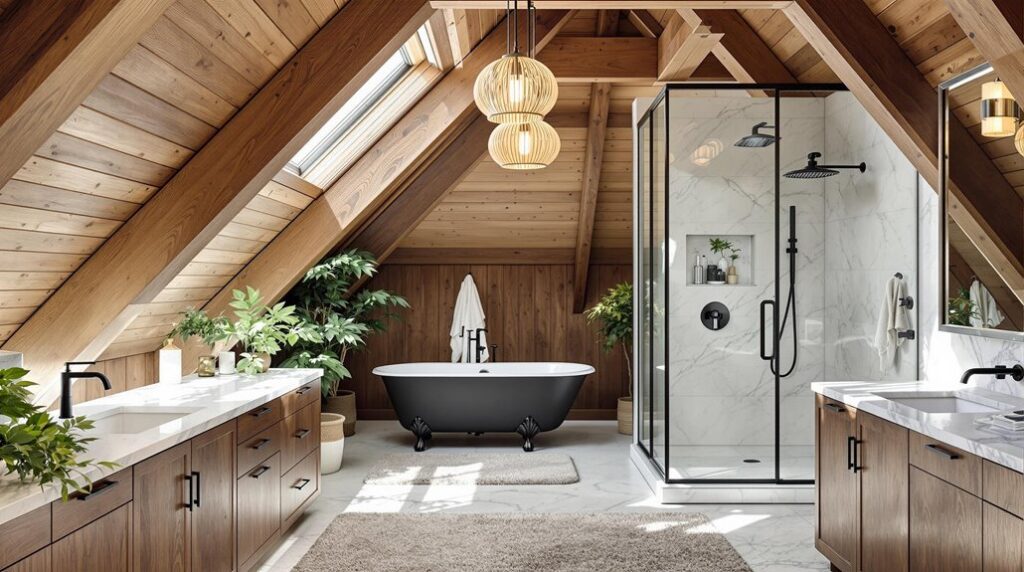
When working with bathroom loft spaces, you’ll face unique challenges that standard layouts can’t address. I recommend starting with corner placement—position your sink in angled spaces and tuck showers into triangular floor areas. You’ll maximize every square foot this way. Additionally, consider incorporating clever storage solutions that can help keep your space organized and clutter-free.
Replace swing doors with sliding barn doors to eliminate clearance issues. I’ve found wall-mounted toilets create surprising floor space while simplifying cleaning routines. Choose narrow-profile fixtures that don’t sacrifice comfort for space.
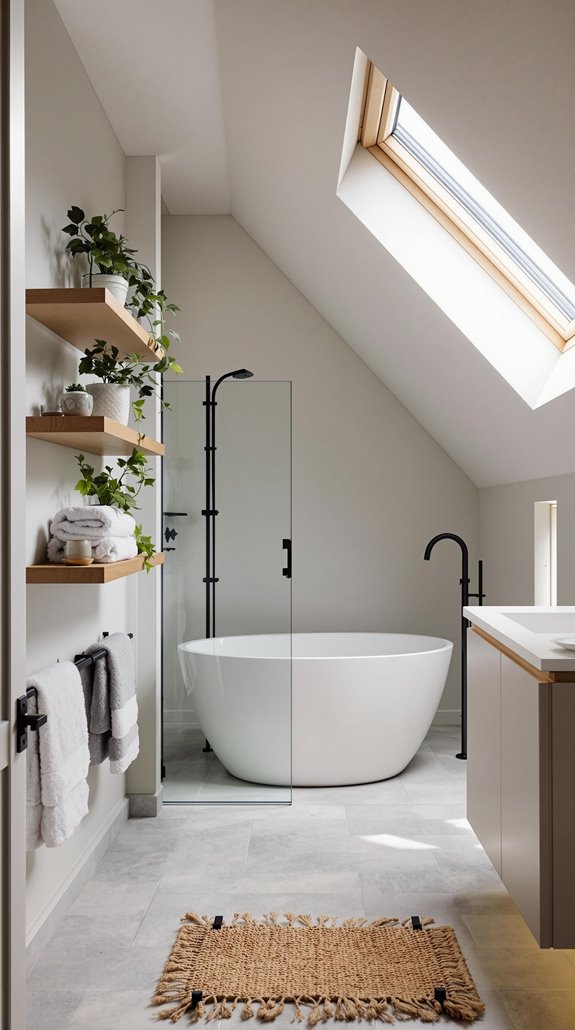
Consider wetroom configurations in low-ceiling zones—you’ll eliminate bulky shower enclosures entirely. Position freestanding tubs beneath eaves to keep central areas open. Install floating vanities with open undersides; they’ll make your space feel larger while providing essential storage underneath. Add tall cabinets that draw the eye upward and create an illusion of greater height in your loft space.
Illuminating Your Attic Bathroom With Natural and Artificial Light
Since attic bathrooms often struggle with inadequate lighting due to their unique architectural constraints, I’ll show you how to create a bright, well-lit space that maximizes both natural and artificial illumination.
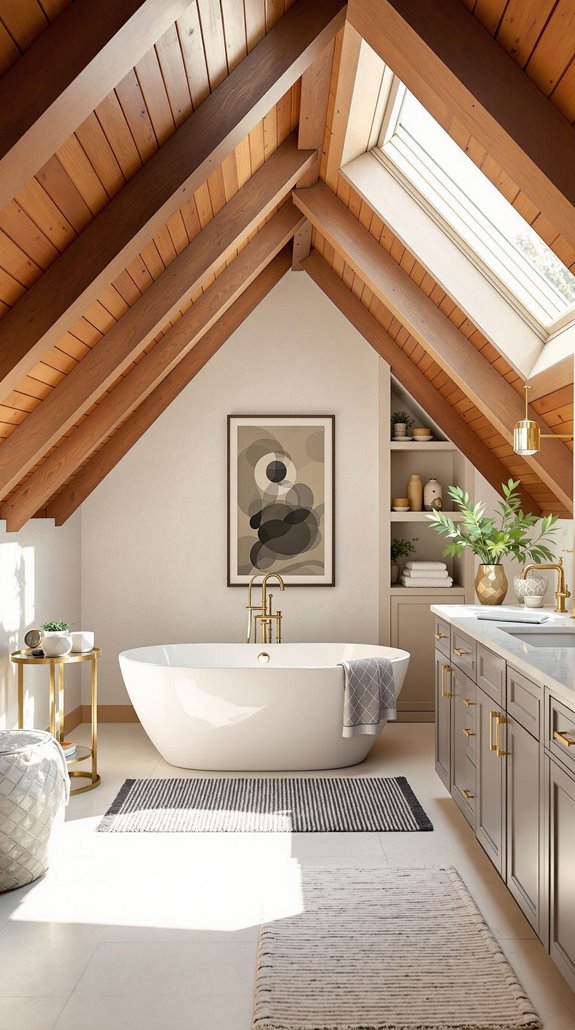
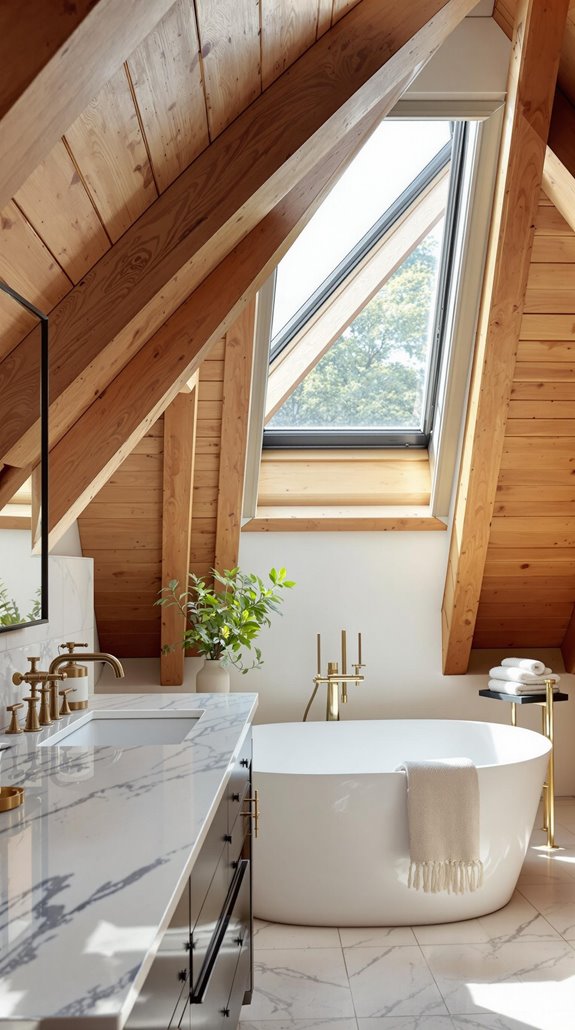
Start by installing tubular skylights with advanced light-capture technology on your sloped ceilings. Choose frosted glazing to maintain privacy while flooding the space with daylight. Position these strategically to create window-like illumination effects, as maximizing window spaces is essential for enhancing natural light.
Next, layer your artificial lighting. Install adjustable LED recessed spotlights in darker corners and match their color temperature to natural sources. Add dimmers linked to daylight sensors for automatic adjustment throughout the day. Consider statement chandeliers as focal points that serve as functional art pieces while creating a magical atmosphere.
Amplify brightness using high-reflectance Spectralight® tubing and mirrored backsplashes. Choose light-colored walls and matte finishes to minimize glare while maximizing ambient brightness in your compact retreat.
Mastering Sloped Ceiling Challenges for Functional Design
Although sloped ceilings create unique spatial challenges, I’ll guide you through strategic design solutions that transform these architectural constraints into functional advantages.
First, I’ll help you maximize space through wetroom conversion. Remove bulky shower enclosures and install floating vanities to open up floor area. Position your showerhead at the ceiling’s apex for maximum headroom.
Next, customize fixtures strategically. Commission bespoke walk-in showers for irregular dimensions, and place freestanding tubs under low-slope zones. Wall-hung vanities save precious space while frameless glass panels maintain openness. It’s essential to ensure that any renovations comply with permitted development rights to avoid potential legal issues.
For storage, embed built-in cabinets beneath lowest ceiling points and design custom shelving in unused angles. These renovations can boost your home’s property value by approximately 5%. Finally, ascertain compliance by allocating 50% of floor area to zones with 7-foot ceilings minimum.
Selecting Premium Fixtures for Ultimate Luxury
Beyond conquering your sloped ceiling constraints, I’ll show you how to select premium fixtures that transform your bathroom loft into a luxury retreat.
Start with your shower as the centerpiece. I recommend waterfall shower heads with glass enclosures and large-format tiles for seamless aesthetics. Add integrated bench seating for ergonomic function.
Choose freestanding bathtubs strategically. Position clawfoot or sculptural designs under skylights, avoiding structural beams. Deep soaking depth guarantees full-body immersion. Freestanding units create an airy feel in limited spaces.
Design bespoke vanity solutions tailored to attic angles. Use natural stone countertops like marble or quartz, plus undermount sinks for seamless cleaning. LED-lit mirrors with anti-fog features enhance functionality.
Complete your luxury upgrade with brushed brass hardware, heated flooring systems, and smart controls for voice-activated temperature settings.
Strategic Material and Color Choices for Visual Impact
With the right material and color combinations, your loft bathroom transforms from cramped attic space into a visually stunning retreat. I’ll show you how to create maximum impact through strategic choices.
Start with exposed beams and polished concrete finishes for that industrial foundation. You’ll want to balance this edginess with warm wooden accents – they’ll create a comforting, natural atmosphere that prevents the space from feeling cold.
For color schemes, navy creates luxurious coziness while white opens up tight spaces. I recommend combining these with your wood elements for depth. Consider hexagonal ceramics on walls to add sophisticated texture and visual interest to your design.
Focus on textural contrasts by mixing glass, metal, stone, and wood. Your shower enclosure should use glass to maintain light flow, while marble backsplash tiles add sophistication. This interplay of materials creates visual interest without overwhelming your compact space.
Essential Structural and Plumbing Considerations
Before you install that dream soaker tub or rainfall shower, you’ll need to address the structural realities hiding beneath your attic’s surface. I’ll walk you through the essential groundwork that transforms your vision into reality.
First, evaluate your floor joists. Most attic floors handle only dead loads—they’ll need reinforcement for live loads like fixtures and foot traffic. Position your heaviest elements above existing load-bearing walls, and use lightweight materials wherever possible. A fiberglass shower beats cast-iron every time. Additionally, consider having a structural survey conducted to identify any potential issues that could arise from subsidence.
Next, plan your plumbing strategically. Locate your bathroom above existing kitchen or bathroom spaces to minimize pipe runs and wall damage. You’ll need proper drain venting through your roof and insulated supply lines to prevent freezing. Don’t forget access panels for future maintenance—your future self will thank you. Professional work guarantees compliance with codes and ensures all necessary permits are properly obtained.
Creative Storage Solutions for Compact Attic Spaces

Although attic bathrooms present unique spatial challenges, clever storage solutions can transform every awkward angle into functional space. I’ll show you how to maximize your compact loft bathroom with strategic storage approaches.
First, tackle those sloped walls with pull-out drawers that utilize knee wall depth. Install recessed medicine cabinets carved directly into angled surfaces, and add hinged panels that open to reveal hidden compartments in low-ceiling zones.
Next, optimize vertical space with floor-to-ceiling shelves above toilets and wall-mounted cabinets that free up precious floor area. Consider ladder-style shelving to access vertical dead space. Create stepped shelving systems that transform awkward angles into visually interesting displays while maximizing storage capacity.
For fixtures, choose wall-mounted faucets with shallow vessel sinks, corner sinks for triangular layouts, and wall-mounted toilets requiring less clearance. Replace swing doors with sliding barn doors or pocket doors that disappear into wall cavities when opened.
Ventilation Strategies to Combat Moisture Issues
While maximizing storage in your compact attic bathroom, you’ll need to address the moisture challenges that come with poor ventilation in these enclosed spaces. I’ll guide you through essential ventilation strategies that work.
Install soffit vents at your attic’s lowest points for cool air intake, then position ridge vents at the peak for hot air exhaust. Maintain a 50/50 ratio between intake and exhaust areas—this balance is vital for ideal airflow. Regularly maintaining your ventilation system can prevent excess moisture buildup****, which contributes to mold growth in tight spaces.
Size your bathroom exhaust fan based on CFM matching your room’s square footage. Mount it near your shower for immediate steam evacuation, and make certain it vents directly outdoors, never into the attic. Proper ventilation not only manages moisture but also enhances energy conservation by reducing the workload on your HVAC system.
Clean fan grilles quarterly and inspect vents biannually for obstructions. These maintenance steps prevent moisture buildup that damages your beautiful loft retreat.
Professional Installation Tips for Wet Room Success
When transforming your bathroom loft into a wet room, proper professional installation becomes the difference between a luxurious retreat and a costly disaster. I’ll guide you through the essential steps that separate amateur attempts from professional results.
First, I position drains strategically, cutting precise openings in your concrete floor and sealing them with manufacturer-recommended methods. You’ll need that critical 1:60 gradient sloping toward drains—I verify this with spirit levels during screed application. Additionally, ensuring the proper drainage system is in place is crucial to guarantee long-term functionality.
Next, I apply tanking membranes extending 200mm beyond wet areas, using C1/C2 cementitious adhesives meeting BS EN 12004 standards. Wall-mounted fixtures maximize your floor space while glass partitions contain water effectively. I always ensure adequate drainage is prioritized during planning to prevent water pooling that could compromise your loft’s structural integrity.
Finally, I install tiles using solid-bed methods and test drainage systems thoroughly—ensuring your loft sanctuary performs flawlessly for years.
Conclusion
I’ve walked you through every critical step to transform your attic into a luxurious bathroom retreat. You’ll need to tackle structural assessments first, then focus on smart layouts that work with sloped ceilings. Don’t skip proper ventilation planning—it’s essential for preventing moisture damage. Install premium fixtures strategically, maximize natural light with skylights, and choose materials that visually expand the space. Follow these practical steps methodically, and you’ll create an stunning attic bathroom that adds serious value to your home.
References
- https://www.realhomes.com/features/attic-bathroom-ideas
- https://www.granddesignsmagazine.com/bathroom/loft-bathroom-ideas/
- https://www.sanctuary-bathrooms.co.uk/journal/can-you-put-bathroom-your-loft-everything-you-need-know-about-loft-bathroom-conversion
- https://www.houzz.com/discussions/3931452/attic-master-bedroom-remodel-ideas
- https://pl.pinterest.com/piotrszutkowski/ideas-for-the-attic-bathroom/
- https://www.homestyler.com/article/transforming-your-attic-bathroom
- https://www.lorddecor.com/blog/attic-bathroom
- https://www.blockrenovation.com/guides/attic-bathrooms-ideas-design-variables-block-renovation
- https://www.houzz.com/magazine/11-tips-for-building-a-bathroom-in-the-attic-stsetivw-vs~30660988
- https://www.backsplash.com/attic-bathroom-ideas-creative-design-solutions-for-attics/