I’ve installed dozens of log burners throughout my career, and I’ll tell you that proper placement makes the difference between a mediocre heating solution and a stunning focal point that transforms your entire living space. Most homeowners rush into purchasing without considering critical factors like flue positioning, safety clearances, and heat distribution patterns. Before you commit to any specific model or location, there’s a systematic approach that’ll save you thousands and guarantee peak performance for decades.
Key Takeaways
- Choose a spacious, centrally-located room and position the stove 36 inches from windows for optimal heat distribution.
- Select stylish hearth materials like stone, brick, or stainless steel and coordinate colors to unify your space.
- Install integrated log storage designs near your stove to enhance both functionality and visual appeal.
- Position mantel shelves at least 450mm above the stove using heat-resistant materials for safety and decoration.
- Use cast iron surrounds for excellent heat retention while allowing closer placement and enhanced aesthetic appeal.
Planning Your Perfect Log Burner Placement
When planning your log burner installation, you’ll need to evaluate several critical factors that directly impact both safety and performance. I recommend choosing a spacious, centrally-located room to maximize heat distribution throughout your home. You’ll want to prioritize areas with good ventilation while avoiding spaces prone to smoke accumulation.
Position your stove at least 36 inches from windows and doors, and install non-combustible floor pads extending 18+ inches beyond all sides. Consider proximity to exterior walls for simplified chimney routing – this’ll save you significant installation costs. Additionally, ensuring proper structural integrity is vital to prevent any potential issues that could arise from the installation.
Ensure your flooring can support the stove’s weight, and verify adequate ceiling clearance for proper pipe routing. Installing a modern Ecodesign compliant stove will provide superior energy efficiency compared to older models. Check local building codes early, as clearance requirements vary by material and location.
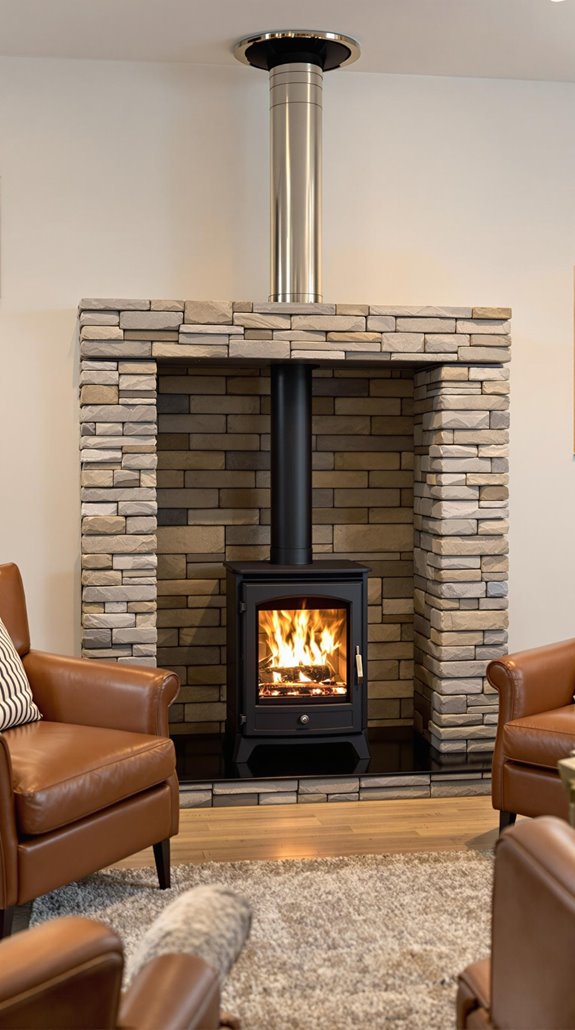
Choosing the Right Flue and Ventilation System
Once you’ve determined your log burner’s location, selecting the proper flue and ventilation system becomes your next vital decision. I’ll guide you through the key components that’ll guarantee safe, efficient operation.
For wood burners, you’ll need Class A insulated chimney pipes that handle high temperatures. Your existing masonry chimney requires a flexible stainless steel liner—unlined chimneys aren’t safe for wood burning. Single-wall stove pipes connect your unit to the chimney but demand 18-inch clearance from combustibles. Proper garage insulation can further enhance the overall energy efficiency of your home.
Ventilation control is essential. I recommend focusing on controllable air vents, particularly top vents for ideal wood combustion. Primary vents ignite fires, while secondary vents sustain efficient burning. Modern stoves feature multiple vents for precise air management throughout different burn phases. Always ensure professional installation for optimal performance and safety compliance.
Essential Safety Clearances and Fire Protection
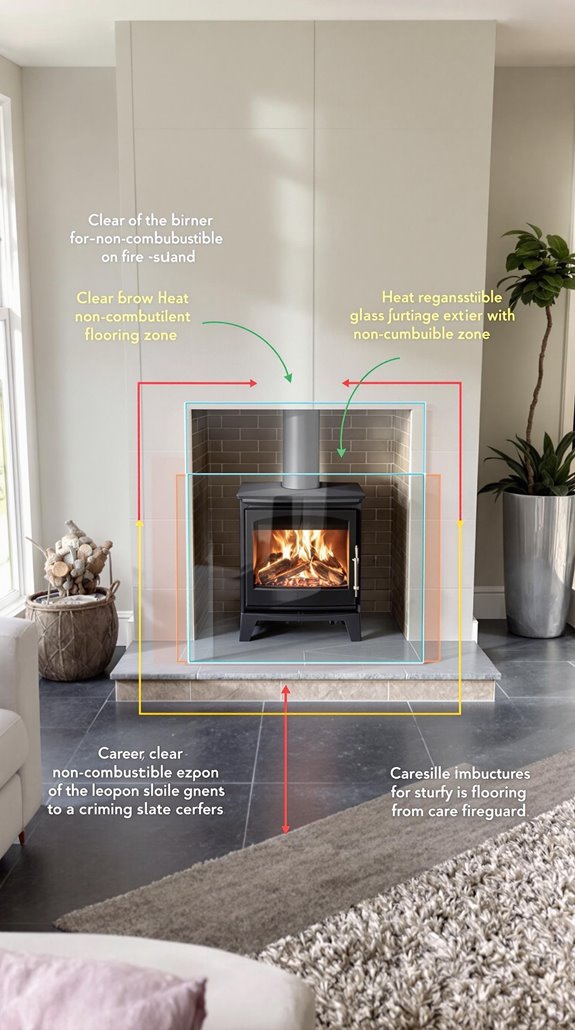
After establishing your flue and ventilation system, you’ll need to address the safety clearances and fire protection measures that determine your log burner’s safe operation. I’ll guide you through the essential requirements that keep your installation compliant and safe.
You must maintain minimum clearance distances: 300mm in front and 150mm on each side and rear. These measurements guarantee proper ventilation and prevent heat damage to surrounding materials. Additionally, having appropriate insurance coverage can protect you from financial losses in case of any unexpected incidents related to your installation. Your hearth requirements are equally critical—you’ll need a non-combustible surface covering at least 840mm x 840mm, extending 300mm forward and 150mm to the sides.
Don’t overlook building regulations compliance. Submit applications to Building Control or use HETAS-registered installers for self-certification. This confirms your installation meets Approved Documents F, J, L, G, and P requirements. Installing a carbon monoxide alarm is mandatory to detect harmful gas emissions and ensure occupant safety.
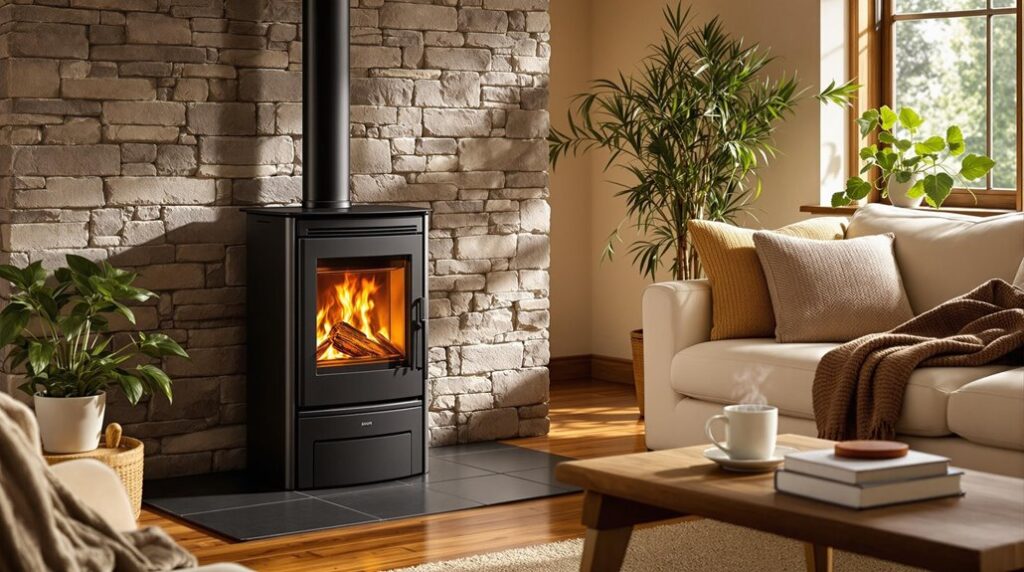
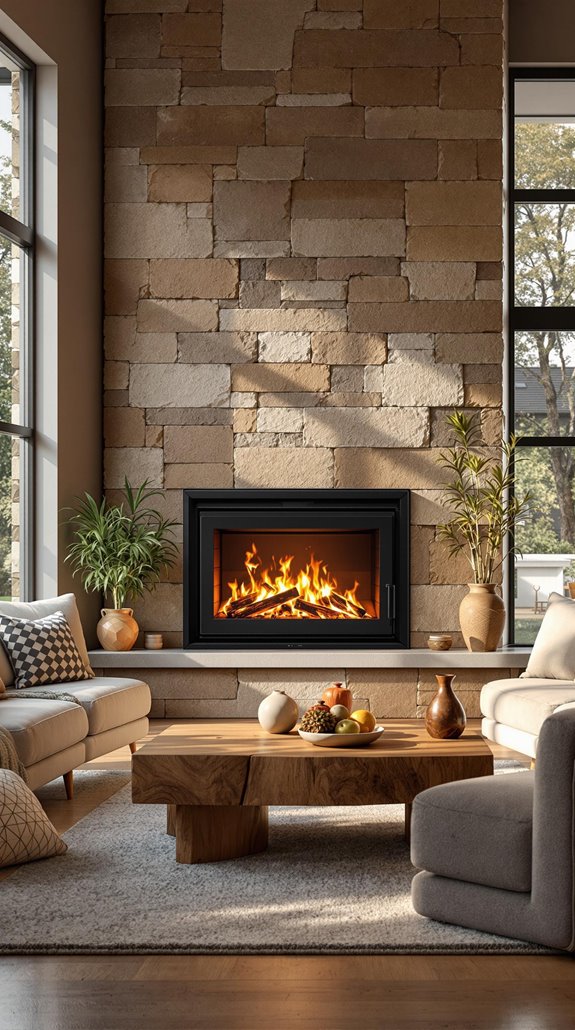
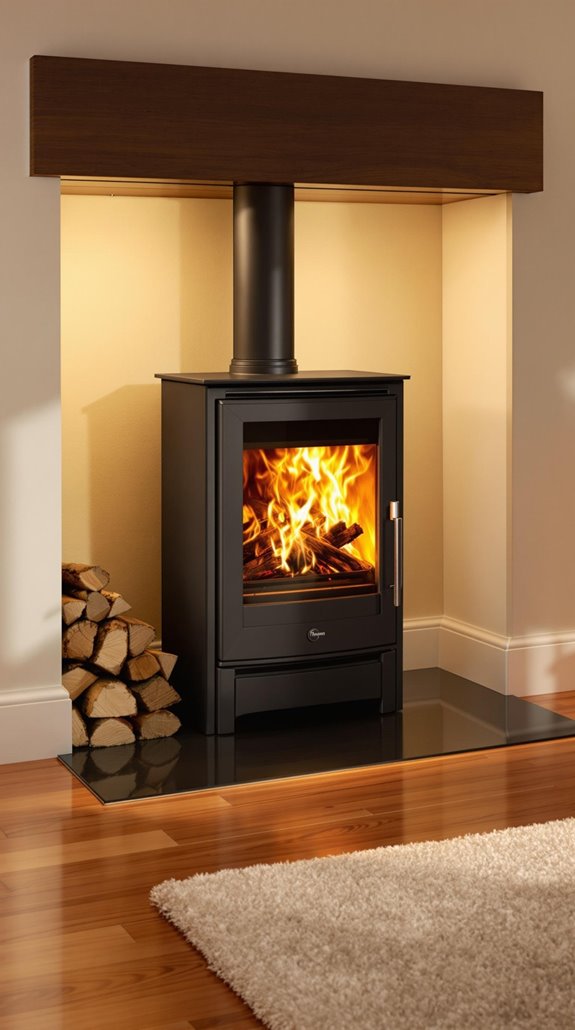
Creating Beautiful Hearth and Wall Designs
Beyond meeting safety requirements, your hearth and wall design transforms your log burner from a functional appliance into a stunning focal point that defines your living space. I’ll guide you through creating designs that blend function with beauty.
Material selection sets your foundation. Stone or brick hearths deliver rustic charm, while stainless steel surrounds create sleek modern appeal. Painted timber beams add warmth and integrate seamlessly with color schemes. Cast iron surrounds work exceptionally well with log burners, offering excellent heat retention while allowing closer placement to the stove. Additionally, it’s essential to consider local regulations that may impact your renovation choices, ensuring your design remains compliant.
Color coordination unifies your space. Monochromatic schemes like rich chocolate tones connect surrounds to walls, while glossy black finishes with brass accents elevate contemporary elegance.
Complete your design with purposeful accents. A decorative large mirror above the mantle creates that coveted cozy feel, while textured throws and natural elements reinforce your chosen theme perfectly.
Professional Installation and Connection Tips
While proper hearth design creates visual appeal, the technical installation determines whether your log burner operates safely and efficiently for years to come. I’ll share the essential connection methods that guarantee your investment performs flawlessly.
Start by extending a 5-foot flexible stainless steel tube from your stove through the damper into the first flue tile. For unlined chimneys, you’ll need to line the entire height with 6-inch stainless steel pipe matching your flue collar size. Create a proper seal below the fireplace damper using a metal pan with furnace cement or high-temperature silicone. It’s also crucial to consider the overall installation costs, as they can vary significantly based on your specific setup.
Don’t forget the spark-arresting cap on top – it’s mandatory for safety. These professional-grade connections separate amateur installations from systems that’ll serve your family reliably through countless cozy evenings. Always ensure your chimney cap is properly installed to prevent rainwater, birds, and debris from entering the chimney system.
Stylish Decorative Ideas Around Your Log Burner
Once you’ve secured proper installation, transforming the area around your log burner into a stunning focal point requires strategic decorative choices that balance aesthetics with heat safety. It’s important to remember that fireplaces can enhance ambiance and create a warm atmosphere in your living space.
I’ll position your mantel shelf at minimum 450mm above the stove, using heat-resistant materials and incorporating a heat shield for protection. You can style it with ceramics, framed art, or seasonal decor.
For the surround, I recommend vertical wood-effect tiles paired with natural stone cladding to create textural contrast. Consider elevating your stove on a purpose-built tiered platform—this mirrors traditional hearth design while maximizing flame visibility.
Choose integrated log storage designs with matching stands in autumnal spice finishes. Position seating to face your stove directly, and install downward accent lighting to highlight the logs beautifully. Wide stove surrounds help define distinct areas in open spaces, functioning as both a heating source and a room divider.
Maintaining Your Log Burner for Long-Term Performance
Although your log burner’s stunning appearance and cozy warmth take center stage, proper maintenance guarantees you’ll enjoy consistent performance for decades. I’ll share the essential tasks that’ll keep your system running efficiently.
Remove ash buildup daily while leaving a thin insulating layer, and clean your glass weekly using a damp rag dipped in ashes—it’s completely chemical-free. Inspect your firebricks monthly for cracks and check door seals seasonally for wear. Always burn your stove with draft control wide open for 10-15 minutes daily to minimize soot accumulation.
Schedule professional chimney cleaning annually and burn only dry, seasoned wood to reduce dangerous creosote buildup. Ignoring these maintenance tasks can lead to expensive repairs or complete replacement of your system. These straightforward maintenance steps assure your log burner remains both beautiful and safe for years ahead.
Conclusion
I’ve covered the essential technical aspects you’ll need for a successful log burner installation. From proper placement calculations to flue specifications and safety clearances, you’re now equipped with practical knowledge to tackle this project. Don’t skip the professional consultation for gas connections and building regulations compliance. Remember, your maintenance schedule directly impacts performance and safety. With these technical foundations mastered, you’ll create an efficient heating system that transforms your living space into a warm, stylish retreat.
References
- https://www.directstoves.com/our-blog/guide-to-wood-burning-stove-installation/
- https://www.youtube.com/watch?v=sw2vgldTxSo
- https://www.rockfordchimneysupply.com/blogs/articles-info-do-it-yourself-contractor-chimney-info/diy-how-to-install-a-wood-burning-stove
- https://www.thisoldhouse.com/fireplaces/21314810/wood-burning-stove-installation
- https://www.youtube.com/watch?v=sGSmPLYXx94
- https://xclusivekitchens.co.uk/blog/the-ultimate-guide-to-media-walls-for-log-burners/
- https://www.thespruce.com/wood-stove-installation-8411800
- https://blog.sintef.com/energy/the-10-commandments-of-wood-burning-stoves/
- https://www.fireplacedoorsonline.com/the-ultimate-chimney-pipe-buying-guide.html
- https://www.directstoves.com/our-blog/how-to-use-your-log-burner-vents/