I’ve helped homeowners tackle dozens of kitchen conservatory projects, and I’ll tell you upfront—most fail because they ignore critical thermal bridging and structural load calculations. You’re not just adding glass walls to your existing kitchen; you’re creating a complex junction between your home’s envelope and a fundamentally outdoor structure. The building regulations alone will challenge your timeline, but there’s a systematic approach that sidesteps the common pitfalls I see contractors make.
Key Takeaways
- Plan for building regulations early, ensuring glazed areas don’t exceed 25% of floor space and roof glazing stays under 75%.
- Maximize natural light by positioning workstations near windows and installing skylights while using high-gloss finishes to reflect brightness.
- Create five functional zones for storage, prep, cooking, cleaning, and plating with 42-48 inches of clearance around islands.
- Choose aluminium bifold doors for strength and low maintenance, or timber options to maintain your home’s character.
- Install stone or ceramic tile flooring with separate underfloor heating controls for durability and independent temperature management.
Understanding Conservatory Kitchen Extension Requirements and Design Basics
When planning a conservatory kitchen extension, you’ll need to navigate two distinct regulatory frameworks that often overlap in complex ways. I’ll break down the essential requirements you must understand before breaking ground.
First, determine if you need planning permission. Most conservatories fall under permitted development rights, but extensions exceeding 25% glazed floor area require formal applications. I recommend consulting your local authority early to avoid costly delays. Understanding the regional price variations can also help you budget effectively for your project.
Building regulations present the bigger challenge. Your glazing can’t exceed 25% of the new extension’s floor area, and you’ll need formal submissions for highly glazed kitchen extensions. Removing internal doors triggers mandatory building regulation approval, requiring collaboration with structural engineers. Underfloor heating systems are typically the preferred choice for kitchen conservatory extensions due to their efficiency and space-saving benefits.
Traditional conservatories with external wall separation won’t work for open-plan kitchens—consider orangery designs instead.
Maximizing Space and Light in Compact Kitchen Extensions
Although compact kitchen extensions present unique spatial challenges, strategic lighting and design choices can transform cramped quarters into bright, functional spaces that feel considerably larger than their actual footprint. Additionally, converting a conservatory can significantly increase property value, making it a worthwhile investment.
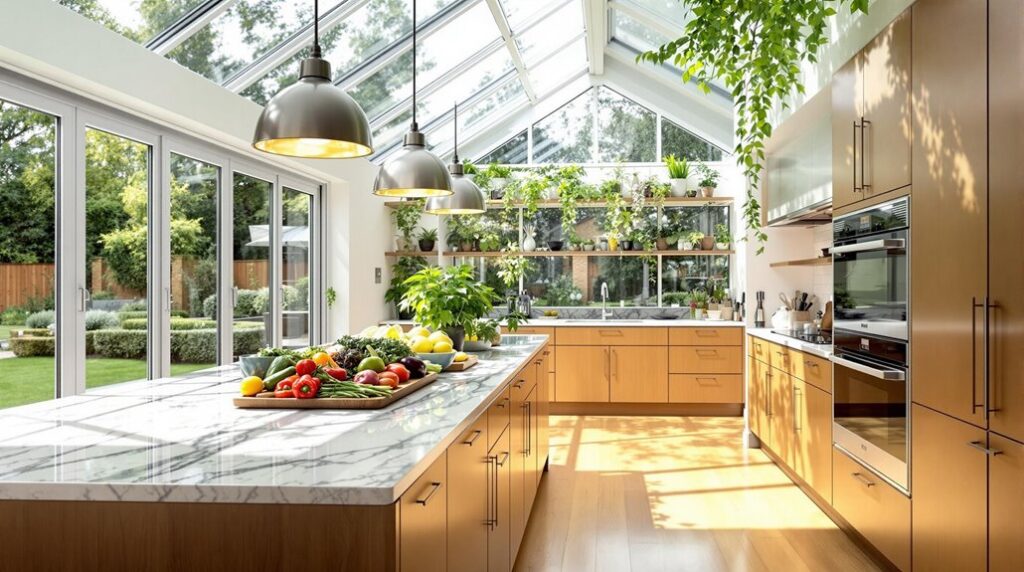
I recommend installing 1-3 slim-cage pendant lights for vertical emphasis while incorporating flush-mount fixtures above sinks to eliminate shadows. You’ll want to position your primary workstation near windows and use light-filtering sheer blinds to maximize natural light penetration. For your conservatory roof, skylights flood the space with overhead daylight.
Choose high-gloss cabinet finishes and light-colored countertops like marble to reflect both natural and artificial light. Install mirrored glass tiles as backsplashes to amplify illumination. Wall sconces provide additional illumination while saving countertop space in areas where surface area is at a premium. Extend cabinets ceiling-high and use vertical tile patterns to create height illusions that draw the eye upward, making your extension feel exponentially more spacious.
Creating Functional Layouts With Kitchen Islands and Work Zones

While the traditional work triangle connecting your sink, stove, and refrigerator served kitchens well for decades, today’s conservatory extensions demand more sophisticated zone-based layouts that’ll reduce your cross-kitchen movement by 30% and accommodate multiple cooks simultaneously. Incorporating open-plan layouts can also enhance the sense of space and connectivity within your kitchen.
I recommend establishing five distinct zones: storage near your refrigerator, prep with cutting boards and spices, cooking around your cooktop, cleaning at the sink, and plating near dining areas. Your island becomes the multifunctional hub, centralizing prep tasks while providing zone-specific storage through integrated cabinets.
Maintain 42-48 inches of clearance around your island‘s perimeter to prevent workflow obstruction. Install task lighting—under-cabinet LEDs in prep zones, pendant lights over islands. For multiple cooks, incorporate duplicate zones like separate prep sinks to eliminate interference and maximize efficiency. Keep tall cabinets and full-height fixtures positioned outside primary work zones to maintain clear sightlines and unobstructed movement patterns.
Choosing the Right Doors and Access Solutions for Indoor-Outdoor Living
Your door selection determines whether your conservatory extension achieves true indoor-outdoor living or remains a fragmented space with visual barriers. I’ll guide you through solutions that maximize light while maintaining functionality.
For expansive openings, aluminium bifold doors deliver strength and low maintenance, while timber options preserve your home’s character. Consider corner sliding systems for L-shaped extensions—they eliminate bulky frames and create unobstructed sightlines. Incorporating a glass roof not only enhances the overall aesthetic but also significantly brightens the space.
Smart glass technology transforms street-facing kitchens, providing instant privacy control when needed. Pair this with flush threshold designs to remove visual breaks between indoor and outdoor flooring. Solar control coatings help maintain comfortable temperatures throughout the year while preventing overheating from intense sunlight.
Maximize light transmission with extra-clear glass and slim-profile aluminum frames. Position doors at angles to avoid direct street views while capturing multidirectional illumination—essential for maintaining your kitchen’s workflow efficiency. By choosing the right materials and configurations, you can create a seamless transition that emphasizes the beauty of both your indoor and outdoor areas.
Essential Lighting Strategies for Glass-Roofed Kitchen Spaces
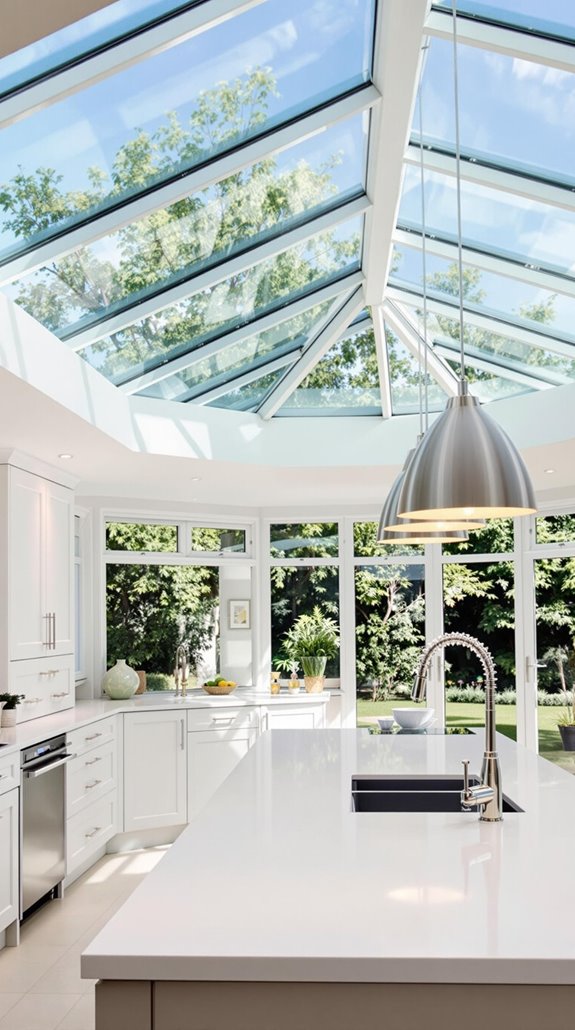
How do you balance abundant natural light with controlled artificial illumination in a glass-roofed kitchen? I’ll show you the layered lighting approach that transforms your conservatory kitchen into a functional workspace.
First, maximize your glass roof’s potential by positioning work surfaces perpendicular to overhead glazing. Install UV-protective film to prevent fading while maintaining brightness. Add reflective surfaces like light-colored quartz countertops to amplify natural light distribution. Layering different light sources is essential for creating a well-lit environment.
For task lighting, mount LED strips beneath upper cabinets using light rail molding for clean installation. Position fixtures one-third into cabinet depth to eliminate shadows on work surfaces. Place recessed downlights 18 to 24 inches from walls to minimize shadows on countertops during meal preparation.
Create ambient evening lighting with dimmable recessed downlights in grid patterns. Install motion sensors for pathway lighting and choose fixtures with high lumens-per-watt ratings for energy efficiency.
Material Selection and Building Regulation Compliance
Before you select materials or break ground, understanding building regulations will save you costly mistakes and project delays. I’ll guide you through the critical compliance requirements that’ll keep your project on track.
Your glazing can’t exceed 25% of your conservatory’s floor area—this includes windows, doors, and roof panels. Calculate your floor area first, then work backwards to determine maximum glazing allowances. For exemption eligibility, keep your conservatory under 30m² and guarantee roof glazing covers ≤75% of the roof area. It’s essential to remember that building control approval may be necessary for any significant structural changes.
Choose stone or ceramic tiles for flooring—they’re durable and work perfectly with underfloor heating systems. All glazing must meet British Standard 6206 safety requirements, so specify strengthened or laminated glass when ordering. Make solid walls comprise ≥50% of your structure to reduce glazing dependency. Install separate controls for your heating system to maintain independence from your home’s main system.
Conclusion
I’ve outlined the technical framework for your kitchen conservatory extension, covering regulatory compliance, structural glazing systems, and mechanical solutions. You’ll need to coordinate building control approval, specify appropriate U-values for thermal performance, and integrate proper ventilation systems. Don’t overlook the importance of selecting compatible materials and implementing zoned heating controls. With careful attention to these technical details, you’ll achieve a functional, regulation-compliant space that maximizes both natural light and operational efficiency.
References
- https://www.greenmatch.co.uk/conservatory/kitchen
- https://resi.co.uk/advice/kitchen-extensions/kitchen-conservatory-extension
- https://www.homebuilding.co.uk/ideas/kitchen-conservatory-ideas
- https://www.realhomes.com/design/small-kitchen-extension-ideas
- https://www.pinterest.com/atkinson9837/conservatory/
- https://powerpillar.co.uk/building-a-kitchen-conservatory-extension/
- https://www.oakleygreen-conservatories.co.uk/can-you-extend-your-kitchen-with-a-conservatory/
- https://www.homebuilding.co.uk/advice/kitchen-conservatory-extensions
- https://devisarchitecture.com/home-extensions/ultimate-guide-to-kitchen-extensions-uk/
- https://www.colorcord.com/blogs/lighting-design-blog/6-kitchen-lighting-ideas-for-small-kitchens