I’ve transformed countless wardrobes using IKEA’s PAX system, and I’ll show you how to achieve that expensive built-in look without the custom price tag. You’ll need specific measurements, the right tools, and a systematic approach to make this hack work seamlessly. The secret isn’t just buying PAX units—it’s knowing how to modify, secure, and finish them properly. Once you understand my proven method, you’ll wonder why anyone pays thousands for custom closets.
Key Takeaways
- Replace standard hardware with quality handles in finishes like brass or matte black for an instant upgrade.
- Build a custom plinth platform using plywood to elevate units and create a built-in appearance.
- Add crown molding and baseboards around the frame to achieve a seamless, custom closet look.
- Install sensor LED lights that activate when doors open for enhanced functionality and modern appeal.
- Use color drenching or cladding materials to transform the basic PAX into a high-end wardrobe design.
Planning Your Custom Built-In Wardrobe Layout

Before you plunge into purchasing Ikea Pax units, you’ll need to create a thorough layout plan that maximizes your space and storage needs. I’ll walk you through the essential steps that’ll set you up for success.
Start by measuring your room’s dimensions, including doors, windows, outlets, and vents. Record these measurements carefully—you don’t want design conflicts later. Make sure to check for adequate door clearance so your wardrobe doors can open fully without hitting walls or furniture. Additionally, it’s vital to understand building regulations that may affect your installation process. Next, map your internal storage needs based on your clothing types. Do you need more hanging space for dresses or shelves for folded items?
Create a detailed floor plan to visualize your constraints and opportunities. Decide between wall-to-wall designs for maximum storage or standalone units for flexibility. Remember, you can divide walls into manageable sections of 32″ width per unit for easier construction and customization.
Essential Tools and Materials for the Project
With your layout plan finalized, you’ll need to gather the right tools and materials to transform those Ikea Pax units into a professional-looking built-in wardrobe.
Start with your basic building materials: Pax wardrobe frames, 2×4 lumber for base construction, and plywood for custom backs. You’ll also need trim materials like baseboard matching your room’s existing style and crown molding for that finished look.
For fasteners, grab construction screws, cabinet screws, and 18-gauge brad nails. Don’t forget Liquid Nails adhesive and wood filler for seamless joints.
Your essential tools include a drill, miter saw for precise cuts, and a multi-tool for adjustments. A box cutter will also be essential for cutting the caulk bead between your existing baseboard and wall during the preparation phase. Round out your supplies with paint, sandpaper, and caulk. Having everything ready beforehand keeps your project moving smoothly.
Creating a Stable Foundation With Plinth Construction
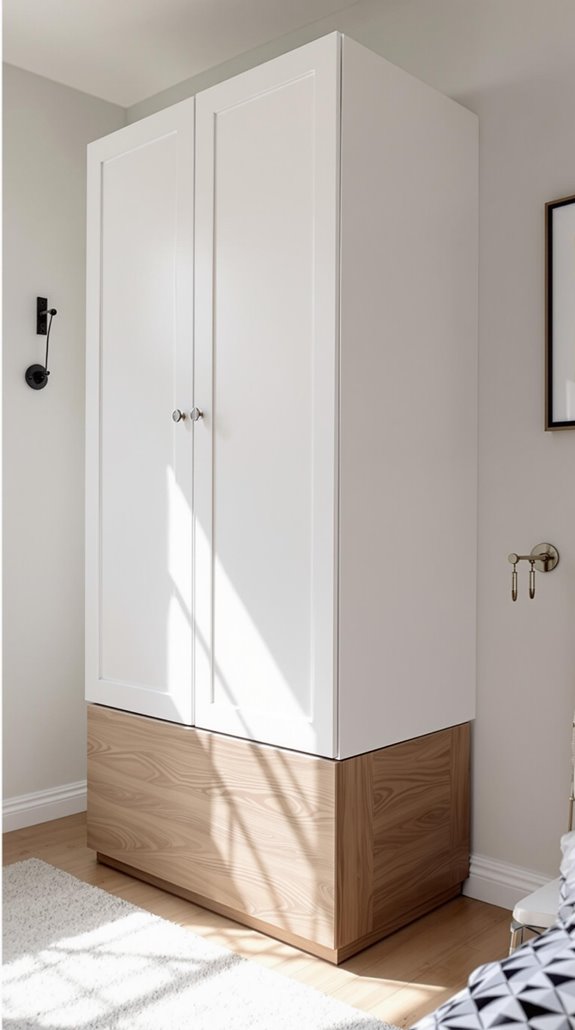
Since your Pax units need a rock-solid foundation to look like genuine built-ins, you’ll construct a plinth platform that elevates the wardrobes and creates that seamless, professional appearance.
I’ll build mine using sturdy plywood cut to match my wardrobe dimensions exactly. You’ll need timber that can support 200+ kg per unit, so don’t skimp on quality. I’m creating a custom 13cm height to clear my skirting boards perfectly. Insulating your garage can also provide energy efficiency benefits, ensuring that your space remains comfortable year-round.
First, I’ll mark cutting lines precisely using my room measurements. Then I’ll trim support strips and side panels with my circular saw, keeping cuts under 39mm to preserve dowel functionality. For clean corners, I’ll use 45° miter cuts on trim pieces. This foundation distributes weight evenly and prevents floor damage while giving you that built-in look.
Remember that assembly in situ is necessary when working with height constraints, so plan your construction sequence accordingly.
Securing PAX Units for Professional Installation
Once your plinth foundation is complete, you’ll need to prepare the wall surface for a flush, professional installation. I’ll remove baseboard sections using an oscillating tool – this creates that seamless built-in look we’re after. Additionally, ensuring a smooth wall surface is crucial for achieving the best results with gypsum plaster, which is commonly used in modern interiors.
Next, I assemble PAX frames horizontally on protected flooring, following IKEA’s instructions precisely. Two people make lifting these heavy units much easier. Before securing anything, I clamp multiple units together and align those pre-drilled holes using IKEA’s connectors.
For wall anchoring, I use snap toggle bolts rated for 238 pounds when studs aren’t available. I position brackets at the hashtag markers, drill pilot holes carefully, and secure everything properly. Safety’s essential here – every frame gets anchored to prevent tipping, especially units over 2.36 meters tall.
The entire assembly process typically requires three days to complete properly, so plan accordingly and don’t rush the installation steps.
Filling Gaps and Achieving Wall-to-Wall Integration
After securing your PAX units to the wall, you’ll need to address the gaps and visual breaks that separate a basic installation from a professional built-in look.
Start by removing existing baseboards where the units will sit. Use a box cutter to slice through caulk beads, then carefully detach sections. This allows your PAX to sit flush against the wall without interference.
Build a 2×4 frame platform to elevate units above baseboard level. Verify it’s level and secured to your subfloor for stability. Trim carpet if needed to align with unit depth.
Once positioned, reinstall baseboards around the unit using miter cuts for clean corners. Wrap baseboard around the front and sides, securing with screws every 12 inches. This creates that coveted built-in appearance you’re after. Use cover plates to fill any visible holes in the frames for a polished, custom appearance.
Upgrading Doors and Hardware for Premium Appearance
While PAX units offer excellent storage functionality straight from the box, their basic appearance often screams “budget furniture” rather than custom built-in. I’ve found that upgrading doors and hardware transforms these units into premium-looking wardrobes that rival expensive custom installations. In the UK housing market, buyers often seek new build homes that provide modern aesthetics and energy efficiency, which is similar to the transformation you can achieve with your wardrobe.
Start by selecting your door style – hinged doors work well for traditional access, while sliding doors save space in tight rooms. You can even skip doors entirely for an open wardrobe look. Remember to allow extra height clearance when measuring your space – you’ll need 1/2 inch for hinged doors and 2 inches for sliding doors.
Next, I recommend replacing standard hardware with quality handles. Choose finishes like brass or matte black to match your room’s fixtures. For the ultimate transformation, consider color drenching your entire unit in one bold color, or add cladding materials to achieve that coveted built-in appearance.
Finishing Touches With Trim and Paint Application
The real transformation happens when you add trim and apply paint to create that seamless, built-in appearance. I’ll start by applying bonding primer designed for laminate surfaces—this guarantees paint adhesion without extensive sanding. After lightly sanding with an orbital sander, I’ll vacuum and wipe everything clean with a microfiber cloth. Proper preparation is essential to ensure a long-lasting finish, just as proper insulation is vital for maintaining a comfortable home.
Next, I’ll cut and attach trim using miter cuts at corners for that polished look. I’ll nail the trim in place, then fill nail holes and gaps with wood filler. For angles greater than 45°, I’ll use the trick of clamping a scrap piece as a guide to achieve precise cuts. Paintable caulk goes into every seam where trim meets doors, walls, or ceiling—I’ll smooth it with my finger for clean changes.
Finally, I’ll apply Benjamin Moore Simply White in semi-gloss—it’s a perfect match to IKEA’s white finish. Two coats guarantee complete coverage.
Maximizing Storage With Interior Configuration Options
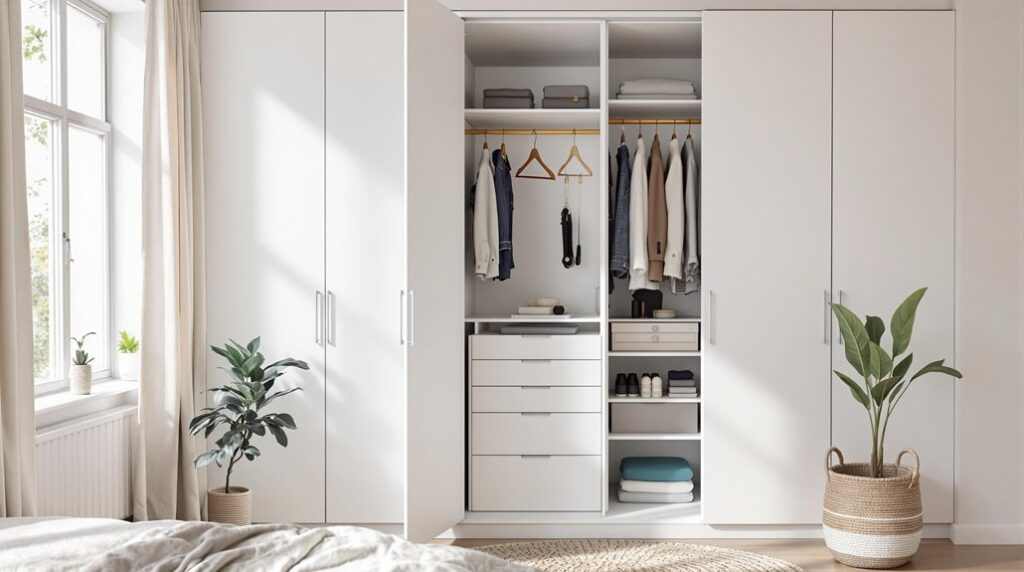
Once your PAX units are installed and painted, I’ll configure the interior components to maximize every inch of storage space. I’ll start by positioning KOMPLEMENT clothes rails at adjustable heights to accommodate your longest dresses and shortest shirts. Below hanging sections, I’ll add pull-out drawers for concealed storage and mesh baskets for easy access to bulkier items.
For shoes, I’ll install slanted shelves that display footwear while conserving space, paired with pull-out trays for organized pairs. I’ll dedicate specific zones for accessories using pull-out trays with felt-lined dividers for belts, ties, and jewelry.
Finally, I’ll add sensor LED lights that activate when doors open, creating focused illumination on functional zones while maintaining energy efficiency through smart home integration. The soft felt materials in these dividers prevent items from sliding around and creating unwanted noise when opening and closing compartments.
Conclusion
I’ve walked you through every step to transform your IKEA Pax units into a custom built-in wardrobe. You’ve learned to measure, construct a stable plinth, secure units properly, and finish with professional trim work. Don’t forget to configure your interior storage to maximize functionality. With these practical techniques and basic tools, you’ll achieve a high-end look without the premium price tag. Your budget-friendly wardrobe transformation is now complete!
References
- https://www.younghouselove.com/how-to-make-ikea-pax-wardrobes-look-built-in/
- https://www.youtube.com/watch?v=IGWXRna7Z18
- https://www.youtube.com/watch?v=JtsYSdfakkA
- https://stefanasilber.com/ikea-pax-hack/
- https://travelswithmyson.co.uk/2023/05/16/wardrobes-marie-kondo-meets-ikea-pax-hack/
- https://www.contempospace.com/blog/plan-your-custom-wardrobe/
- https://www.pickawood.com/eu/configurator/wardrobe2
- https://sawdustgirl.com/how-to-plan-and-design-a-built-in-closet/
- https://www.thededicatedhouse.com/built-in-wardrobe-guide/
- https://www.ikea.com/us/en/rooms/bedroom/how-to/how-to-design-your-perfect-pax-wardrobe-pub8b76dda0/