I’ve transformed countless worn-out tables into stunning centerpieces, and I’ll show you exactly how to achieve professional results with the right tools and techniques. Most people rush through the sanding process or skip essential preparation steps, which leads to disappointing finishes that chip and peel within months. The difference between amateur and professional results comes down to understanding three vital factors that determine whether your restored table will last decades or become another failed DIY project.
Key Takeaways
- Start with 80-grit sandpaper and progress systematically through 120-grit to 220-grit for a smooth, professional finish.
- Always sand with the grain direction using consistent pressure to avoid scratches and ensure even surface preparation.
- Choose oil-based polyurethane for durability and warmth, or water-based for faster drying and lighter appearance.
- Apply stain with microfiber pads, maintaining consistent timing per section and wiping excess immediately for even color.
- Perform thorough dust removal between each step and inspect for imperfections before applying the final protective coating.
Preparation and Cleaning Your Table
Before you can transform your table’s surface, you’ll need to properly prepare and clean every component to guarantee the sanding and varnishing process delivers professional results.
Start by disassembling your table—remove drawers, detachable parts, and all hardware like handles and knobs. This gives you complete access to every surface that needs attention.
Mix mild dish soap with warm water, then clean all exterior surfaces using a soft cloth. Scrub gently but thoroughly, paying special attention to built-up grime. Rinse with a damp washcloth to eliminate soap residue, then dry immediately with a towel. Proper cleaning not only improves appearance but also enhances energy efficiency during the varnishing process.
Don’t forget the interior surfaces—clean drawer walls, undersides of tabletops, and leg joints using the same soap solution. Use a soft-bristled brush for intricate carvings and tight corners. Allow everything to air dry completely before proceeding.
Set up your workspace in a well-ventilated area and gather your safety equipment including gloves and safety glasses to protect against splinters and fumes during the restoration process.
Essential Tools and Materials Needed
Having the right tools and materials transforms your table refinishing project from a frustrating struggle into a smooth, professional operation. I’ll guide you through the essential equipment that separates amateur attempts from craftsman-quality results.
For sanding, you’ll need manual blocks for intricate areas, an orbital sander for flat surfaces, and sandpaper ranging from 60 to 400+ grit. I recommend sanding discs compatible with power drills for efficient paint stripping. Additionally, using 3D printed materials can enhance the durability of your finished project.
Surface preparation requires chemical stripper, mineral spirits for cleanup, and tack cloth for dust removal. A putty knife handles scraping duties perfectly.
Your finishing arsenal should include oil-based polyurethane or tung oil, disposable brushes, cotton rags, and quality varnish for durability.
Don’t skimp on safety—respirators, goggles, rubber gloves, and proper ventilation protect you throughout the process. A well-lit workspace with a sturdy workbench or sawhorses provides the foundation for quality results.
Sanding Process Step-by-Step
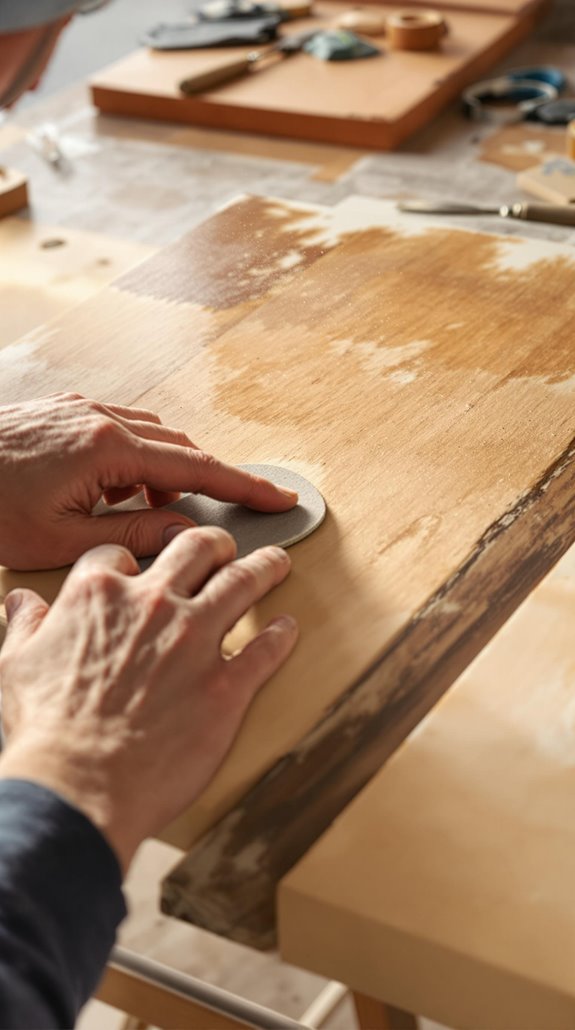
While proper preparation sets the foundation, the sanding process itself determines whether your table achieves that coveted professional finish. I’ll guide you through the essential steps that separate amateur work from pro-level results.
Test and Strip
Start by sanding a small test spot to check for veneer, then begin with 40-80 grit sandpaper to remove old finish completely.
Power Through
Use your orbital sander on flat surfaces, always moving with the grain direction while wearing your respirator for dust protection.
Progressive Refinement
Step through grits systematically: 80, then 100-120, finishing with 220-grit for smooth results. For areas with imperfections, fill them with wood filler before proceeding to the next grit level.
Detail Work
Hand-sand edges and legs carefully, maintaining consistent pressure and grain direction.
Final Inspection
Remove all dust thoroughly before moving to staining—your meticulous sanding work determines your final finish quality.
Choosing the Right Finish for Your Table
Your varnish selection makes or breaks the entire project—choose poorly and even perfect sanding won’t save your table’s appearance or durability. I’ve learned that each finish type serves specific purposes and environments.
Water-based polyurethane dries fastest and stays crystal clear, making it perfect for light woods and busy households. Oil-based polyurethane delivers superior durability with that warm amber glow we furniture restorers love—it’s my go-to for dining tables that’ll face daily abuse. In fact, material choice can significantly influence the overall outcome of your renovation project.
For outdoor pieces, spar varnish flexes with weather changes while blocking UV damage. Traditional alkyd varnish provides that classic glossy finish, though it yellows over time. Alkyd varnish excels at enhancing wood grain and giving furniture that rich, polished appearance.
Here’s the truth: satin sheen costs more but looks most professional. Skip the cheap stuff—quality varnish transforms amateur work into heirloom pieces.
Applying Stain for Perfect Color
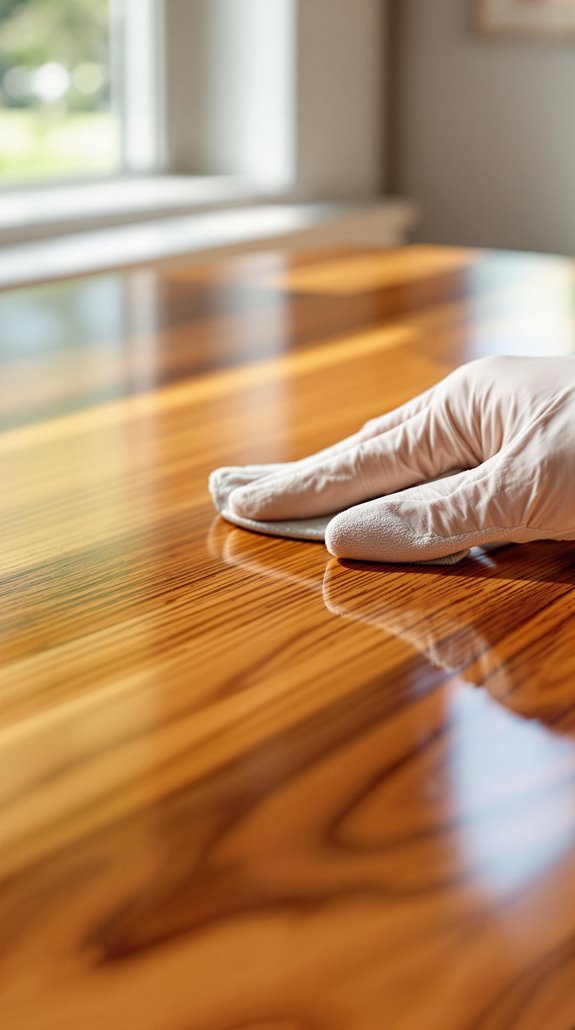
Once you’ve selected your finish, the stain you apply underneath determines whether your table looks professionally crafted or like a weekend mishap. I’ll walk you through the technique that separates the pros from the amateurs.
First, stir your stain gently with a stick—never shake it. Bubbles will ruin your finish. Dip your microfiber pad partially into the stain, then squeeze out excess. Work in manageable sections, applying liberally to open-pored woods like oak while pressing stain into those pores.
Here’s the critical part: maintain consistent timing per section. I use a timer to track application duration because longer contact deepens color. Wipe off excess immediately with a clean, dry microfiber cloth, following the grain direction. You’ve got 5-10 minutes maximum before blotchy absorption occurs.
Before you begin staining, always test the stain on an inconspicuous area first to ensure you’re happy with the color and absorption rate.
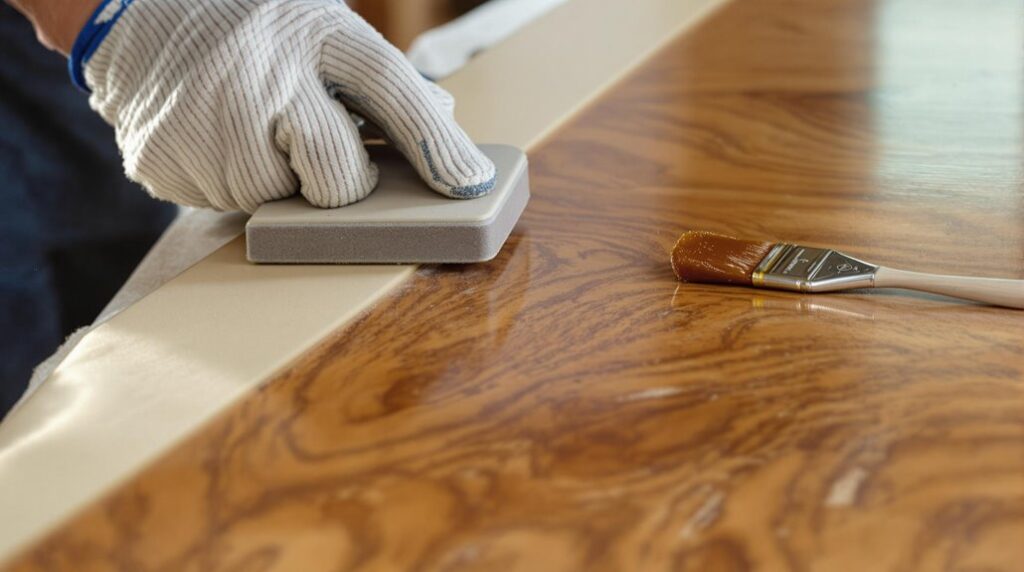
Applying Varnish for Durability
After your stain has fully dried, varnish becomes your table’s armor against daily wear and tear. I’ll guide you through selecting the right protection for your masterpiece.
For indoor tables, I recommend polyurethane varnish—it’s your best defense against scratches and moisture. Choose oil-based formulations over water-based variants for superior durability. Spar varnish works better for outdoor pieces needing UV protection.
I use premium natural-bristle brushes for streak-free application. Apply whisper-thin coats parallel to the wood grain, maintaining 1-2 mil thickness per coat. Work in ventilated areas below 85°F to prevent bubbling. This protective coating creates a clear, transparent barrier that enhances your table’s natural beauty while providing essential protection.
Sand between coats with 220-grit sandpaper after proper drying times. Apply minimum three coats for tabletops, allowing 72 hours for full cure before use.
Final Inspection and Touch-ups
The final varnish coat has cured, but your project isn’t complete until you’ve conducted a thorough quality assessment. I’ll examine every surface for dust, debris, or imperfections trapped in the finish. Any scratches, bubbles, or uneven texture gets addressed immediately with fine-grit sandpaper and localized touch-ups.
Next, I’ll test the table’s structural integrity by applying pressure to each corner and center point. All legs must sit evenly without rocking. I’ll tighten any loose hardware and verify that extensions or drawers function smoothly. This comprehensive inspection ensures the table meets quality standards and will provide long-lasting satisfaction for years to come.
For the final step, I’ll clean the surface with a lint-free cloth and apply furniture wax for added protection. The table needs proper curing time in a stable environment away from direct heat before it’s ready for use.
Conclusion
I’ve walked you through the complete process—from proper preparation to that final protective coat. With the right orbital sander, quality brushes, and progressive grit sequence, you’ll achieve professional results every time. Don’t rush the drying stages; patience separates amateur work from pro-level finishes. Your restored table won’t just look stunning—it’ll withstand daily use for years. Master these techniques once, and you’ll confidently tackle any furniture restoration project that comes your way.
References
- https://thefurniturehaven.co.uk/blogs/news/restoring-weathered-wood-furniture-a-comprehensive-guide
- https://uva.libguides.com/responsible-thesis/research-data-management
- https://www.frenchcreekfarmhouse.com/2023/10/how-to-refinish-wood-furniture.html
- https://quizlet.com/768615817/english-unit-6-the-research-process-mks-flash-cards/
- https://careandrepair.com/blog/the-basics-of-furniture-restoration-tips-from-a-handyman/
- https://www.extraspace.com/blog/home-organization/how-to-restore-furniture/
- https://discover.hubpages.com/living/Home-DIY-The-Complete-Guide-to-Refinishing-a-Table-or-Coffee-Table-Especially-If-Youre-a-Beginner
- https://theowlbox.com/blogs/the-owl-box-blog/mastering-the-art-of-furniture-restoration-tips-and-techniques
- https://woodgears.ca/table/refinish.html
- https://vintagefurniturefind.com/blogs/news/essential-tools-for-furniture-refinishing-what-every-diyer-needs