I’ve tackled this exact problem in countless UK kitchens, and I’ll show you three proven methods that’ll transform that annoying gap into a professional-looking finish. Whether you’re dealing with a standard 600mm cooker or an awkward space, I’ve got solutions that range from £5 temporary fixes to permanent installations. The key is choosing the right approach for your specific situation, and I’ll walk you through each option so you can decide which method will work best for your kitchen layout and budget.
Key Takeaways
- Measure gaps between stove sides and cabinets precisely, as standard UK stoves are 600mm wide with typical 5-10mm gaps.
- Use heat-resistant silicone gap covers that trim to fit and require no tools or adhesives for easy installation.
- Install custom-made stainless steel fillers with construction adhesive for permanent, professional-looking solutions that match existing cabinetry.
- Create budget-friendly temporary fixes using timber strips under £10, cut to size and secured with nails or screws.
- Maintain minimum 20-30mm clearance around stoves for ventilation and safety while ensuring proper alignment with 900mm worktop height.
Understanding Gap Dimensions and Kitchen Layout Requirements
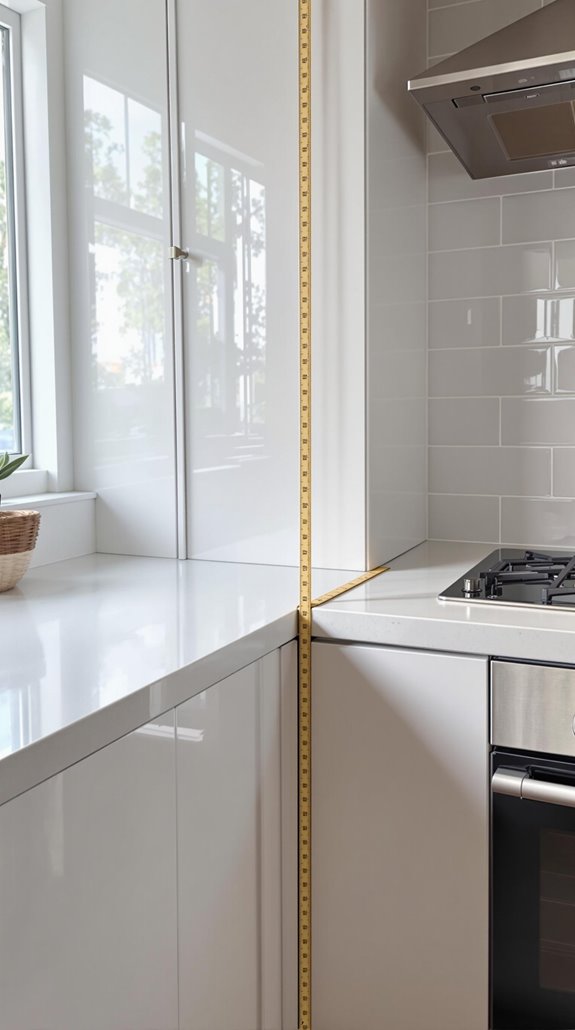
Before you can tackle filling the gap between your stove and cabinet, you’ll need to measure the space accurately and understand how standard kitchen dimensions affect your specific situation. I’ll guide you through the measurement process that every UK kitchen enthusiast should master.
First, measure horizontal gaps between your stove sides and adjacent cabinets using a tape measure. Standard UK stoves are 600mm wide, matching base cabinet widths, so gaps typically range from 5-10mm per side for proper installation tolerance. Next, check vertical alignment from stove top to worktop, considering the standard 900mm counter height. Maintaining proper kitchen spacing is crucial for an efficient workflow in your cooking area.
Your kitchen’s success depends on maintaining minimum 20-30mm clearance around the stove for ventilation and safety compliance. Remember that base cabinets have a standard depth of 560mm, which affects how your stove sits in relation to surrounding units. Document these measurements carefully—they’ll determine your filler material selection and installation approach.
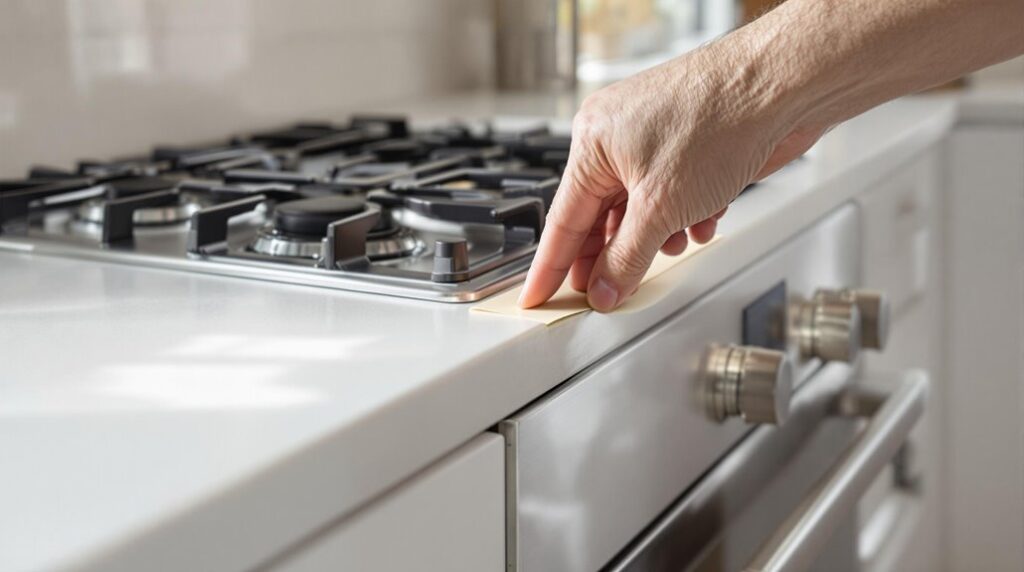
Silicone Gap Covers for Heat-Resistant Flexible Solutions
When you’re dealing with gaps that experience constant temperature changes, silicone gap covers provide the most versatile solution for your kitchen. I’ve found these covers endure high heat without warping while remaining flexible through seasonal temperature shifts.
You’ll appreciate the straightforward installation – simply trim universal sizes (21-25 inches) with scissors to fit your specific gap, then slot them directly into place. No tools or adhesives required. The non-slip surface keeps covers secure during stove movement.
For maintenance, I recommend wiping with a damp cloth or running through your dishwasher. The non-porous material repels oils and food particles while preventing debris from falling behind your stove. These covers also help with pest prevention by eliminating the hiding spots that attract insects and rodents. UK brands like TSHAOUN offer multi-packs for £10-20, available through Amazon UK with prime delivery.
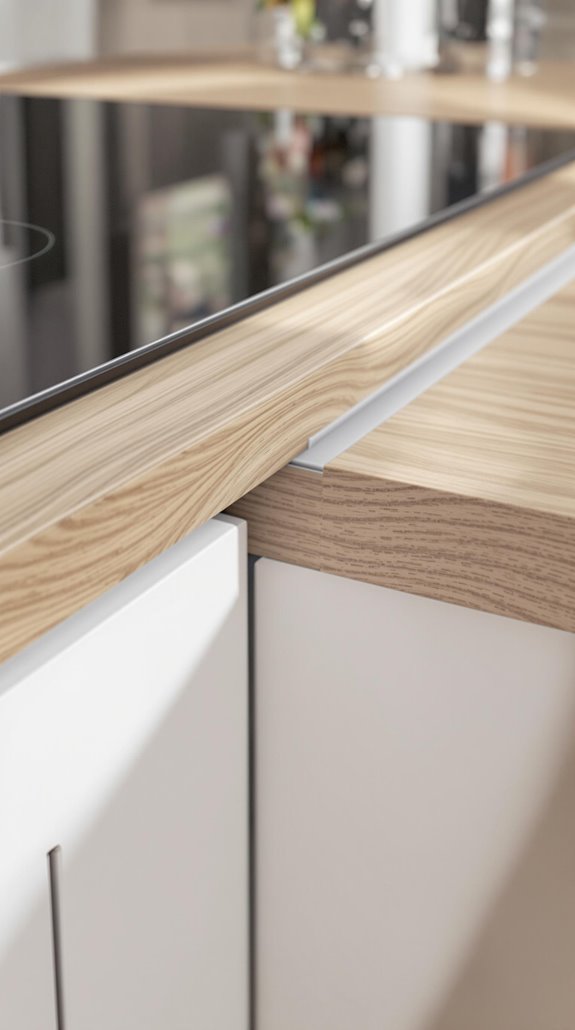
Custom-Made Fillers for Permanent Professional Installations
While temporary solutions work for renters, custom-made fillers deliver the permanent, seamless integration that transforms your kitchen’s professional appearance. I’ve found that 304 stainless steel offers superior durability and heat resistance, perfect for areas near your stove. You’ll need precise measurements—most gaps range from 1/2 to 2 inches wide—so I recommend using digital measurement tools for accuracy. Additionally, incorporating layered lighting in your kitchen can further enhance its ambiance alongside the functional installations.
Professional installation involves securing fillers with construction adhesive and mechanical fasteners for stability. The angled design allows friction-fit installation between your stove and cabinet. I always guarantee proper leveling to align with countertops.
For aesthetic integration, choose brushed metal finishes that complement stainless appliances or wood fillers that match your cabinetry. These installations typically last 10-15 years with minimal maintenance, making them worthwhile investments. Custom fillers also provide proper ventilation channels that protect your cabinet materials from heat damage while maintaining optimal airflow around your cooking appliances.
Budget-Friendly Temporary Wood Filler Options
Three affordable wood options can transform that unsightly gap between your stove and cabinet without breaking your budget. I’ll guide you through timber strips, the most cost-effective solution at roughly £4 per piece from your local hardware store.
First, measure your gap precisely—you’ll need pieces typically 90mm thick or less. Cut timber to size, then bevel the edges to match your cabinet’s profile for that seamless look we’re after. Position the filler flush with your cabinet face, then secure it with nails or screws to prevent movement. It’s important to note that a well-planned house extension can significantly enhance your kitchen’s functionality and aesthetic appeal.
Don’t extend beyond visible areas—you’ll waste material and money. For under £10 total, you’ll have a professional-looking temporary fix that beats expensive permanent solutions while maintaining your kitchen’s cohesive appearance. Remember that structural integrity should always take priority over cosmetic fixes when dealing with cabinet gaps.
Induction Hob Surrounds and Implementation Best Practices
Since induction hobs require precise measurements and proper ventilation clearances, I’ll walk you through the essential implementation steps that’ll guarantee your new hob fits seamlessly while maintaining safety standards.
First, I’ll verify the hob dimensions against your existing cutout – if it’s larger than specified, you’ll need mounting brackets for secure fitting. Check that you’ve got 55mm clearance from the back wall and worktop edge for proper ventilation. Maintain 500mm between your hob and extractor hood to ensure optimal performance and safety standards in your kitchen.
For aesthetic solutions, I recommend plain wood surrounds to frame the hob professionally. Custom filler strips bridge any remaining gaps between cabinetry. Secure everything with mounting brackets screwed to the base unit, ensuring the hob sits level and flush with your worktop for that seamless finish we’re after. Consider adding wire baskets beneath the hob for practical storage that complements the modern aesthetic.
Conclusion
I’ve shown you three practical approaches to tackle that annoying gap between your stove and cabinets. Whether you choose heat-resistant silicone covers for quick fixes, invest in custom-made fillers for permanent solutions, or craft budget-friendly wood strips, you’ll need proper measurements and the right tools. Don’t forget to take into account heat resistance and your hob type when selecting materials. Now grab your measuring tape and get started!
References
- https://simplehomely.uk/stove-cabinet-gap/
- https://www.younghouselove.com/all-the-little-things/
- https://www.mumsnet.com/talk/property/2909554-gap-in-our-new-house-s-kitchen-how-to-fill
- https://pracownik.kul.pl/files/12439/public/3_David.pdf
- https://www.ebay.co.uk/itm/285281571387
- https://www.betterkitchens.co.uk/blog/kitchen-buying-tips-and-advice-4/kitchen-cabinet-dimensions-guide-for-standard-upper-cabinets-75
- https://clairedouglasstyling.co.uk/post/how-to-fill-the-gap-above-kitchen-cabinets-in-6-easy-steps
- https://www.firstinarchitecture.co.uk/metric-data-09-kitchen-standard-sizes/
- https://www.ramsbottomkitchens.co.uk/standard-sizes-kitchen-cabinets-appliances/
- https://www.u-buy.co.uk/product/47240012M-kitchen-silicone-stove-gap-cover-2-pack-2521inch-kitchen-silicone-stove-counter-gap-cover-between-oven-and-countertop-dishwasher-easy-clean-heat