I’ll show you how to build a brick wall that looks like a professional mason crafted it, even if you’ve never laid a brick before. Most DIY enthusiasts make critical mistakes in the foundation phase that compromise the entire project, but I’ve identified the exact steps that separate amateur attempts from walls that’ll stand strong for decades. The difference between a wobbly disaster and a perfectly straight, durable wall comes down to mastering three specific techniques that contractors don’t want you to know.
Key Takeaways
- Prepare a solid foundation with proper dimensions, level base, and strong concrete footing cured for one week.
- Mix mortar using 6:1:1 ratio and maintain consistent 10mm joint thickness while checking alignment with spirit level.
- Use appropriate reinforcement for walls over 3 feet and maintain precise alignment with chalk lines and gauge rods.
- Tool joints when mortar reaches thumbprint hardness, using concave joints for better water resistance and structural strength.
- Clean surfaces with stiff brush, rinse after 24-48 hours, and apply breathable sealer for professional water-repellent finish.
Selecting the Right Brick Types and Meeting Quality Standards
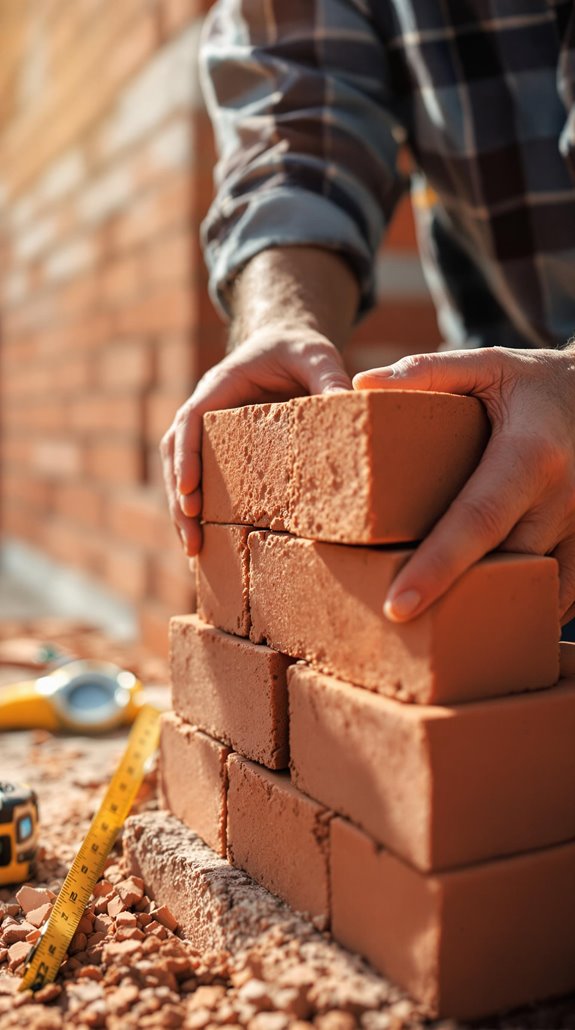
When building a brick wall, selecting the right brick type determines both the structural integrity and longevity of your project. I’ll guide you through the essential options that’ll serve your needs best.
Burnt clay bricks remain the most popular choice for foundations, walls, and columns, offering that classic red appearance we all recognize. For internal work, concrete bricks provide excellent versatility for walls and facades. When you’re dealing with moisture-prone areas like basements, engineering bricks deliver superior water resistance and strength. Consider incorporating modern design elements to enhance aesthetic appeal while renovating spaces like kitchens and bathrooms.
Fire bricks are your go-to for chimneys and outdoor ovens, while fly ash bricks offer an eco-friendly alternative for standard construction. Remember, burnt clay bricks come in four quality classes—choose Class 1 for premium projects requiring maximum durability and weather resistance.
Beyond brick selection, you’ll need to determine your wall construction method based on your project’s structural requirements and budget constraints. Solid walls provide maximum strength for heavy load-bearing applications, while cavity walls offer better insulation through their air gap design.
Foundation Preparation and Trench Excavation Essentials
Foundation preparation forms the backbone of any successful brick wall project, and getting it right the first time saves countless headaches down the road. I’ll walk you through the essential steps that separate amateur attempts from professional results.
Start by digging your foundation trench to proper dimensions – typically 0.5m deep for a 1m high wall. Clear all debris and guarantee the bottom’s completely level and compact. You’ve got two proven base preparation methods: place 4cm of gravel topped with sand, or pour 4cm of lean concrete (150 kg/m³) and let it cure for one day.
Next, pour your footing using stronger concrete (300-350 kg/m³), place reinforcement properly, and smooth the surface. Cover and cure for one full week before proceeding. Mark the area with stakes and builder’s line to ensure your foundation prevents shifting over time and maintains proper alignment throughout the construction process.
Mortar and Grout Mixing for Maximum Bond Strength
With your foundation properly cured and ready, the next make-or-break factor in your brick wall’s longevity comes down to mortar quality. I’ll walk you through the proven ratios that separate amateur work from professional results.
For standard bricks, I use a 6:1:1 ratio—six parts sand, one part cement, one part hydrated lime. This creates the perfect balance of strength and workability. Always combine your dry ingredients first, then add water gradually until you achieve a thick, paste-like consistency that resembles stiff peanut butter. Current market trends indicate that using high-quality materials can further enhance the durability of your wall.
Here’s what separates the pros from weekend warriors: your mortar should stick to the trowel without dripping. Too much water reduces bond strength by 30%, while too little prevents proper hydration. Mix only what you’ll use within 1.5 hours. Using the correct mortar ratio protects your walls from damage and prevents cracks while maintaining structural integrity.
Essential Bricklaying Techniques for Straight Walls
Once you’ve got your mortar mixed to perfection, success depends entirely on your bricklaying technique. I’ll walk you through the essential steps that separate amateur attempts from professional-quality walls.
First, I spread mortar on the foundation in a “V” shape for even distribution. I position each brick firmly, checking horizontal and vertical alignment with my spirit level. Here’s the key: I apply mortar to the short edge of subsequent bricks before placement, maintaining consistent 10mm joint thickness. Additionally, proper site assessment can help identify any underlying issues that may affect the wall’s stability.
I tap each brick gently with my hammer to seat it securely, then check alignment immediately while the mortar’s still workable. I use my string line as a constant reference, sighting along it periodically to catch any deviations. After completing the first layer, I allow it to dry completely before beginning the second row to ensure structural integrity. This methodical approach guarantees your wall stays perfectly straight and level throughout construction.
Reinforcement Installation and Structural Requirements
Perfect bricklaying technique means nothing if your wall lacks proper structural support. I’ll keep freestanding unreinforced walls to 3 feet maximum height – anything taller requires reinforcement and building code consultation. For structural walls, I construct two wythes with reinforcement spanning the entire length without gaps.
I use stainless steel or galvanized reinforcement to resist corrosion. Ladder-type reinforcement works best for vertical applications, while mesh systems distribute horizontal loads effectively. I place horizontal reinforcement in mortar joints during construction or within bond beams.
For anchor installations, I core drill holes into existing walls, then pump cementitious grout to embed steel anchors. I’ll remove bricks to form cavities connecting anchors to the building structure. I maintain a pump pressure of 30 p.s.i. during grout injection until the hole is completely filled for optimal anchor performance. Remember – proper reinforcement transforms your wall from decorative barrier to structural element.
Maintaining Proper Alignment and Level Throughout Construction
While reinforcement provides structural integrity, maintaining precise alignment and level throughout construction determines whether your wall looks professional or amateur. I’ll snap a chalk line between endpoints to mark my centered wall guideline, ensuring the string stays taut to prevent sagging that compromises level brickwork.
For each course, I’ll lay stretcher bricks in mortar, applying excess to head joints for proper adhesion. I’ll position each brick firmly to squeeze out mortar, then check the entire course height immediately using a spirit level. I’ll verify every 3-4 bricks with my level to catch deviations early.
I’ll use gauge rods to measure course height uniformity after every layer, placing levels diagonally and horizontally to confirm everything’s plumb and level throughout construction. I’ll move the string line up with each new row to maintain consistent alignment as the wall height increases.
Joint Tooling and Finishing Methods
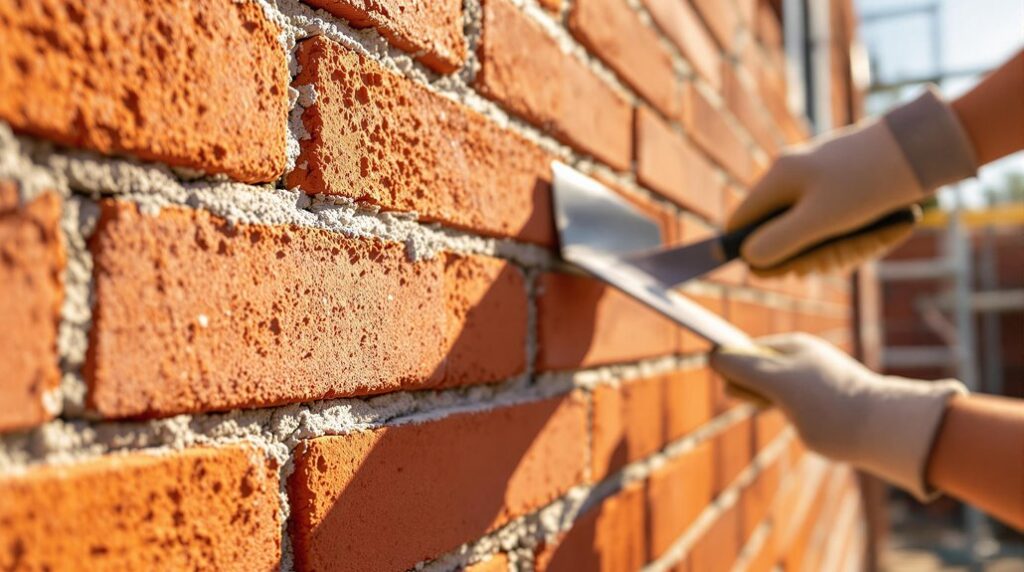
After completing each course of brickwork, I’ll focus on joint tooling to achieve both structural integrity and visual appeal. I’ll tool joints when the mortar reaches “thumbprint hard” consistency – firm enough to hold its shape without smearing.
For maximum water resistance, I’ll use a curved steel jointer to create concave joints that compress and seal the mortar effectively. If I’m after dramatic shadow lines, I’ll rake the mortar to consistent depth, though this reduces weatherproofing.
I’ll select my joint style based on climate exposure – concave or V-joints work best in wet conditions, while flush joints suit drier climates. For load-bearing walls, I’ll stick with concave joints since they maintain structural strength while preventing water penetration that could compromise the wall’s integrity.
For a distinctive textural element, I can create a grapevine joint by dragging a thin, blunt instrument along the mortar in both horizontal and vertical directions, leaving a thin linear cavity that adds unique character to the finished wall.
Curing Process and Weather Protection Strategies
Once I’ve completed the joint tooling, I’ll shift my focus to the critical curing process that determines my brick wall’s long-term strength and durability. I’ll start by spraying water on my foundation surfaces immediately after finishing to prevent drying. Then I’ll cover the work with wet burlap or polyethylene sheets to retain moisture consistently.
For proper curing, I’ll maintain this moisture for at least seven days on brickwork and fifteen days on any reinforced concrete elements. I’ll refill water ponds 2-3 times daily and keep coverings damp. During extreme weather, I’ll extend curing time and use plastic sheeting as weather barriers. I must ensure that complete hydration of the cement occurs to achieve the wall’s full strength potential. This methodical approach guarantees my wall develops maximum strength and prevents cracking that could compromise the entire structure.
Final Cleanup and Professional Finishing Touches

With the curing process complete, I’ll turn my attention to the final cleanup and professional finishing touches that transform my functional brick wall into a polished, lasting structure.
First, I’ll brush the surface vigorously with a stiff-bristle brush after the mortar reaches thumbprint hardness, eliminating smears before they fully cure. I’ll rinse with low-pressure water 24-48 hours post-build to prevent efflorescence, avoiding acidic cleaners that compromise mortar integrity.
Next, I’ll apply a breathable silane/siloxane sealer for water repellency without trapping vapor. I’ll guarantee 150-200 square feet coverage per gallon, prioritizing high-moisture zones like foundation rows. I’ll use my trowel to fill any remaining spots and gaps in joints, ensuring the mortar application is perfectly even throughout the wall surface. Finally, I’ll verify wall plumbness with a laser level, maintaining tolerance under 1/8 inch per 10 feet for professional results.
Conclusion
I’ve walked you through every critical step to build a professional brick wall—from selecting quality materials to final finishing touches. You now understand proper foundation prep, mortar mixing ratios, and essential bricklaying techniques. Don’t rush the process; take time with alignment, reinforcement, and curing. Follow these methods precisely, and you’ll create a durable, visually appealing wall that’ll stand the test of time. Your DIY brick wall will rival any professional job.
References
- https://www.masonryandhardscapes.org/resource/cmu-tec-001/
- https://brickhunter.com/blog/how-to-build-a-brick-wall-a-step-by-step-guide
- https://www.gobrick.com/media/file/17a-reinforced-brick-masonry—materials-and-construction93a217bd209d64698fc2ff000028783f.pdf
- https://yorkspace.library.yorku.ca/xmlui/bitstream/handle/10315/35785/Boeva_Yana_2018_PhD.pdf?sequence=2&isAllowed=y
- https://archi-monarch.com/specification-on-brickwork-and-concrete/
- https://brickhunter.com/blog/different-types-of-brick-walls
- https://brickblockstones.com/how-to-build-a-brick-wall/
- https://www.angi.com/articles/types-of-bricks.htm
- https://757brick.com/blog/a-guide-to-brick-shapes-and-sizes/
- https://ccmps.co.uk/how-to-build-a-brick-wall/