I’ll walk you through the technical process of converting your hip roof into a gable configuration, transforming that cramped attic space into a fully functional room. This structural modification involves removing the sloped hip section and constructing a vertical gable wall using steel beams, proper foundations, and weatherproofing systems. You’ll need specific tools like reciprocating saws, steel brackets, and membrane materials. However, before you grab your toolbox, there’s one critical step that determines whether your project succeeds or fails.
Key Takeaways
- Hip to gable conversion transforms sloping roof into vertical wall, adding 20m² of usable space with full ceiling height.
- Construction typically takes 6-12 weeks, involving structural steel supports, new gable wall, and complete weatherproofing systems.
- Property value increases 10-20% while annual energy savings reach £310-£445 through proper insulation and efficient glazing.
- Planning permission requires permitted development rights with 40-50m³ volume allowances plus mandatory Building Regulations approval.
- Professional structural assessment and experienced contractor selection are essential for safe, compliant, and successful conversion outcomes.
What Is a Hip to Gable Loft Conversion?
A hip to gable loft conversion transforms your home’s sloping hip roof into a vertical gable wall, creating substantially more usable floor space in your loft. I’ll walk you through exactly what this involves.
Your existing hipped roof slopes down on all four sides, limiting headroom and floor area. We’ll extend that sloping hip end vertically, constructing a new gable wall using studwork or masonry. The roof ridge extends to align with this gable end, and we’ll fill the gap with matching roofing materials. This addition can significantly increase your home’s property value, making it an appealing investment for homeowners.
This technique specifically targets properties with hip-end structures—detached, semi-detached, or end-terrace houses. You can’t apply this method to mid-terraced properties lacking hip ends. The conversion eliminates those restrictive sloped ceilings, maximizing your loft’s potential while maintaining architectural integrity. Beyond functionality, this transformation significantly enhances your home’s aesthetic appeal.
How the Structural Transformation Process Works
Converting your hip to gable loft requires a systematic approach that begins with extending the roof’s central ridge line. I’ll guide you through this technical transformation that fellow DIY enthusiasts have mastered.
First, you’ll remove existing hip rafters and install structural steel supports for reinforcement. Next, construct your vertical gable wall using masonry or timber framing, ensuring it matches your property’s exterior materials. This structural requirement is essential for maintaining the integrity of your home. Install insulation and window openings for compliance and functionality.
Your roof framework integration involves connecting new rafters from ridge to gable wall top plate, maintaining proper pitch alignment. Apply breathable membrane and matching tiles for weatherproofing continuity.
Finally, strengthen your loft floor joists for increased live loads, frame partition walls, and route utilities through new cavities. This methodical process delivers professional results and typically takes 6 to 8 weeks to complete depending on project complexity.
Construction Timeline and Skilled Labor Requirements
Six to twelve weeks represents the typical timeframe you’ll need for completing your hip to gable loft conversion, though I’ll break down the exact phases so you can plan your project timeline effectively.
Week one involves site setup—scaffolders install access systems while demolition begins. Weeks two through five focus on structural transformation where your carpenter team (2-3 workers) handles steel beam installation and roof restructuring. Specialist roofers guarantee watertight seals during this critical phase, ensuring compliance with building regulations.
First fix installations consume weeks four through seven, with electricians and plumbers working simultaneously on systems integration. Plasterers follow immediately after structural completion, requiring 1-2 weeks for surface finishing.
Final fixtures and decorating conclude your project in weeks eight through ten. Professional painters typically complete 2-3 days per room during this finishing phase. Remember, planning permissions add 2-12 weeks upfront, and weather disruptions can extend roofing stages considerably.
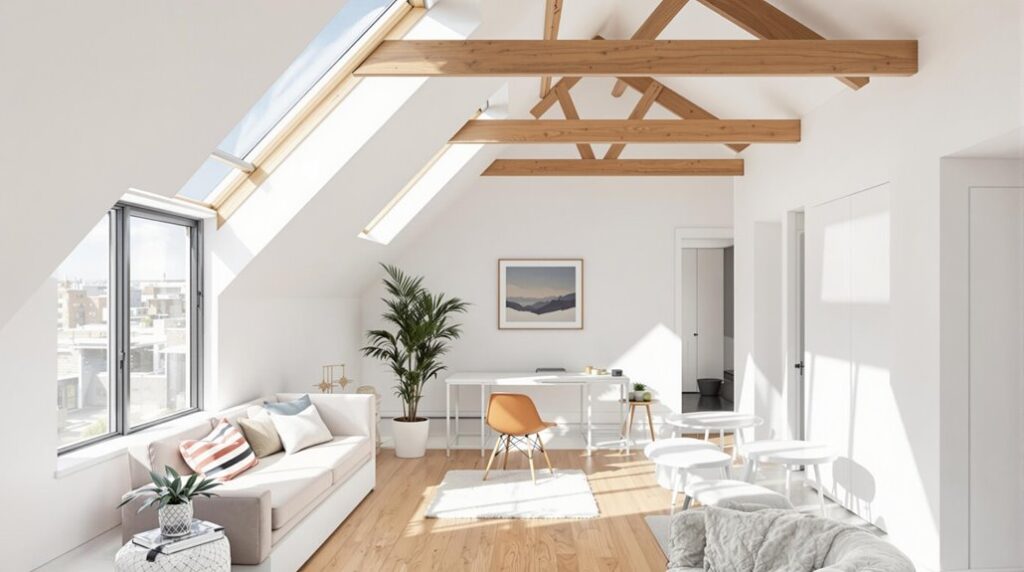
Maximizing Space and Floor Area Benefits
Once you’ve completed your construction timeline, you’ll immediately recognize how hip to gable conversions deliver unmatched spatial gains compared to alternative loft solutions. I’ll walk you through the measurable benefits you’ll achieve.
First, you’ll convert that sloping hip roof into a vertical gable end, eliminating angled constraints that previously limited your headroom. This transformation adds at least 20m² of functional floor area—space you can actually use.
Next, you’ll enjoy full ceiling height throughout your converted space, enabling standard-sized windows and doors. Unlike dormer conversions, you’re maximizing space utilization efficiency. Your property value could increase by up to 20% through this significant expansion of usable living space.
Finally, you’ll accommodate diverse room layouts including en-suite bathrooms and walk-in closets. Your rectangular floor plan eliminates awkward corners, supporting custom storage solutions and complex electrical systems that fellow homeowners struggle to install in traditional loft spaces.
Complementary Design Enhancements and Extensions

Beyond maximizing your converted floor area, you’ll need strategic design enhancements that integrate seamlessly with your hip to gable structure. I’ll walk you through the essential upgrades that transform your space from functional to exceptional.
Start with dormer additions—install a rear shed dormer using matching roof tiles and weatherproof membrane systems. This creates vital headroom and natural light entry points.
Next, implement zoned interior layouts using stud partition walls and built-in storage solutions. Position your staircase strategically to minimize circulation waste while ensuring full staircase access for optimal daily use.
For lighting integration, mount Velux roof windows at 15-degree angles and install LED downlight circuits throughout. Use light-colored finishes and reflective surfaces to amplify brightness.
Finally, match your exterior materials—brick slip cladding, UPVC fascia boards, and coordinated roof tiles guarantee your conversion feels like a natural extension rather than an obvious addition.
Property Value and Return on Investment
When you’re evaluating the financial impact of your hip to gable loft conversion, you’ll find that this investment typically delivers exceptional returns compared to other home improvement projects. You’ll see property value increases of 10-20%, with high-demand areas often exceeding 20%. In England, that’s £30,200 added to a £302,000 home, while Wales sees £21,400 gains on £214,000 properties.
Your conversion’s value depends on creating functional spaces like master suites or home offices that move your property into higher pricing tiers. You’ll achieve better ROI than moving house since you’re avoiding estate agent fees, stamp duty, and relocation costs. The enhanced equity you’ll gain is recognized by lenders, giving you leverage for remortgaging or fund release. This investment is particularly valuable in urban areas where demand for additional living space continues to increase, making your converted loft a highly marketable asset. Additionally, understanding the home extension costs can help you budget effectively and maximize your investment.
Energy Efficiency and Cost Savings

Since proper insulation forms the foundation of your hip to gable conversion’s energy efficiency, you’ll achieve heat loss reductions of up to 30% through modern materials that meet U-values of 0.15 W/m²K or lower. I’ll guide you through maximizing your savings with Low-E double-glazed windows that cut heat transfer by 50% compared to single glazing. Install reflective roof coatings that deflect 85% of solar heat gain, then add energy recovery ventilation systems retaining 90% of conditioned air. Your annual energy bills will drop £310-£445, with larger 40m²+ lofts achieving maximum savings. You’ll reduce household heating consumption by 10-15% while cutting CO₂ emissions by 1.2-2.3 tonnes annually, creating lasting value for your investment. The vertical wall design of hip-to-gable conversions provides superior thermal performance compared to sloped roof sections, as continuous insulation runs without interruption from floor to ceiling. Additionally, properties with higher EPC ratings are often more attractive to buyers, increasing their market value.
Planning Permission and Building Regulations
Your hip to gable loft conversion requires steering through two distinct regulatory pathways: permitted development rights and building regulations approval. I’ll guide you through the technical requirements that determine whether you need full planning permission.
Under permitted development, you’re allowed 40m³ for terraced houses or 50m³ for detached/semi-detached properties. However, materials must match your existing house, and any side-facing windows need obscure glazing below 1.7m height. Previous extensions count toward your volume allowance.
Conservation areas, listed buildings, and Article 4 directives often restrict these rights. Properties in the Green Belt may also require full planning permission despite otherwise qualifying for permitted development. I recommend applying for a Lawful Development Certificate first to confirm your position.
Regardless of planning status, you’ll need Building Regulations approval covering structural integrity, fire safety, and insulation standards. This requires detailed drawings and professional calculations.
Choosing the Right Contractor for Your Project
How do you select a contractor capable of executing your hip to gable conversion‘s complex structural requirements? I’ll guide you through five essential steps that guarantee project success.
First, work with a professional engineer to assess your existing roof structure before contractor selection. This assessment determines load-bearing capacity and identifies necessary reinforcements, ensuring that your renovation adheres to UK regulations for structural safety.
Second, find a reputable and qualified contractor with proven hip to gable experience. Verify their credentials, insurance coverage, and recent project portfolio. Seek referrals from friends and neighbors who have completed similar conversions successfully.
Third, negotiate contract terms thoroughly, establishing clear scope boundaries and responsibilities. Don’t rush this vital phase.
Fourth, understand all costs involved, including materials, labor, and additional fees. Request itemized breakdowns for transparency.
Finally, establish a realistic timeline with provisions for weather delays and permit approvals. Buffer time prevents rushed workmanship.
Conclusion
I’ve outlined the essential technical steps for your hip to gable conversion project. You’ll need structural calculations, proper steel beam installation, and precise timber framing techniques. Don’t forget to secure building regulations approval and hire certified contractors with loft conversion experience. Measure twice, cut once—proper planning prevents costly mistakes. With the right tools, skilled tradespeople, and methodical approach, you’ll successfully transform your attic into valuable living space while maximizing your property’s potential.
References
- https://www.allaboutlofts.com/post/stages-of-a-loft-conversion
- https://loftworld.co.uk/understanding-a-hip-to-gable-loft-conversion/
- https://amberlofts.co.uk/all-about-lofts/maximize-your-space-a-full-guide-to-hip-to-gable-loft-conversion/
- https://www.econoloft.co.uk/post/maximizing-loft-space-the-benefits-of-hip-to-gable-conversions
- https://extensionarchitecture.co.uk/blog/hip-to-gable-loft-conversion-a-comprehensive-guide/
- https://wartonwoodworks.com/hip-gable-loft-conversion/
- https://the-loftroom.com/hip-to-gable-loft-conversion/
- https://the-loftroom.com/hip-to-gable-loft-conversions-the-benefits-and-considerations/
- https://visionarylofts.co.uk/uncategorized/the-ultimate-guide-to-hip-to-gable-loft-conversions/
- https://www.homebuilding.co.uk/advice/how-long-does-a-loft-conversion-take