I’ve discovered that creating an impressive gallery wall doesn’t require expensive artwork or professional design skills—it’s about understanding placement principles and making strategic choices. When I started transforming bland hallways and landings into striking focal points, I realized most people make three critical mistakes that sabotage their efforts before they even hang the first piece. Let me show you how to avoid these pitfalls and create gallery displays that look intentionally curated rather than randomly assembled.
Key Takeaways
- Create a centered focal point with one large statement piece and arrange smaller artworks symmetrically around it for immediate visual impact.
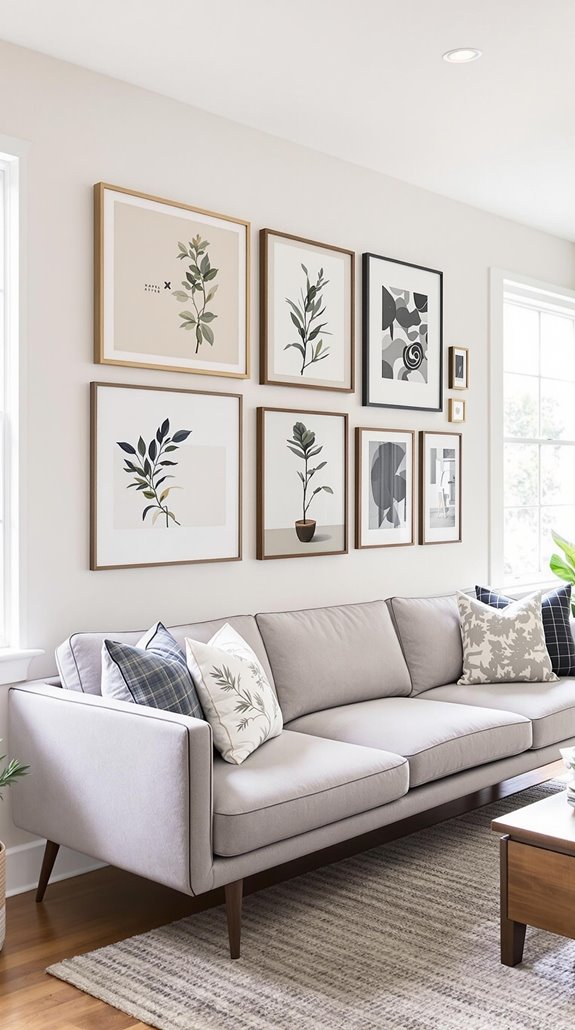
- Use consistent frame finishes and spacing in a grid layout to achieve a professional, cohesive look that elevates the landing’s sophistication.
- Install wall sconces positioned 60-66 inches from the floor with warm LED lighting to transform your gallery wall into a curated showcase.
- Mix 70% framed art with 30% three-dimensional elements like woven baskets or vintage clocks for added texture and visual interest.
- Apply the Rule of Odds by arranging pieces in groups of three or five while maintaining adequate negative space to prevent visual clutter.
Strategic Layout Techniques for Maximum Visual Impact
When you’re planning your gallery landing, the layout strategy determines whether your space feels intentional or chaotic. I’ll guide you through proven techniques that transform any landing into a curated showcase.
Start with grid-based layouts using identical frame sizes and consistent spacing—this creates the foundation we all recognize from professional galleries. For larger walls, I recommend rectangular block designs that group pieces into impactful clusters. Incorporating popular materials like wood or metal frames can also enhance the overall aesthetic of your display.
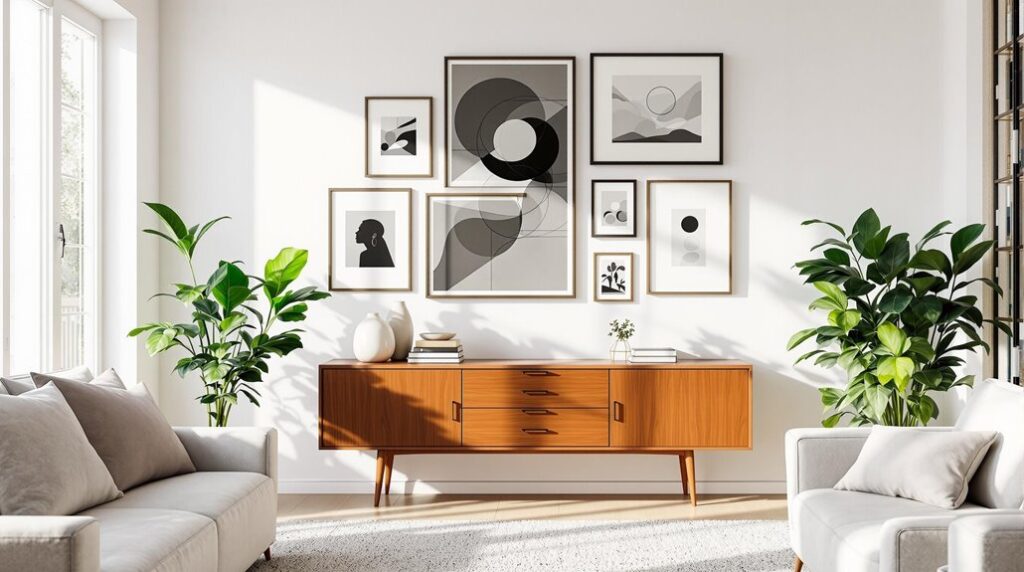
Try the centered focal point approach: anchor one standout piece, then arrange smaller works around it. This creates visual hierarchy while maintaining balance. Consider the visual weight distribution of each piece to ensure your arrangement feels dynamic rather than static.
Don’t overlook asymmetrical arrangements either. Diagonal placements add movement, while deliberate negative space prevents overwhelm. Before hanging anything, test your layout on the floor first—this guarantees proper spatial distribution and saves you from costly mistakes.
Frame Selection Methods That Create Cohesive Design
The right frame selection makes or breaks your gallery landing’s visual coherence. I’ll walk you through proven methods that create stunning, unified displays.
Start by mixing materials thoughtfully. I combine wood frames for warmth, metal for contemporary edge, and acrylic for modern minimalism. This blend creates depth without chaos.
Next, coordinate finishes strategically. I mix matte and glossy surfaces, blend metallic tones like gold and silver, then ascertain they complement your existing decor. Repeat finishes across multiple frames for cohesion.
Incorporate diverse styles purposefully. I pair ornate vintage pieces with clean-lined modern frames, adding floating frames and shadow boxes for dimension. Consider your room’s existing color schemes when selecting frame colors to ensure everything works together harmoniously.
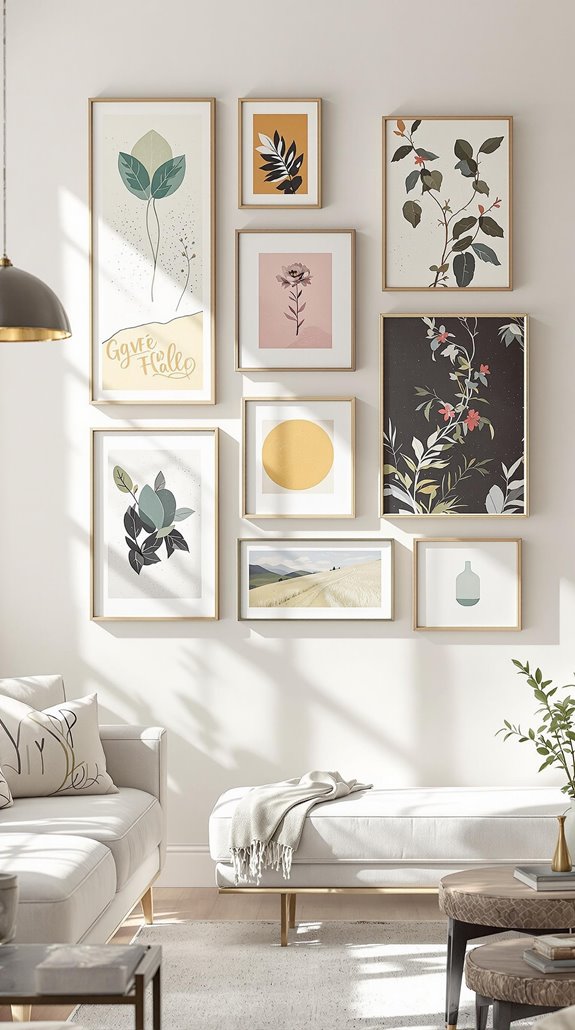
Finally, balance sizes and shapes carefully. I mix large statement pieces with smaller frames, incorporate rectangles, squares, and circles, then distribute them evenly across the wall.
Room-Specific Gallery Applications for Every Space
Since every room serves a different purpose, your gallery wall approach must adapt to each space’s unique requirements and traffic patterns. I’ll guide you through tailored strategies that transform each area into a cohesive design statement.
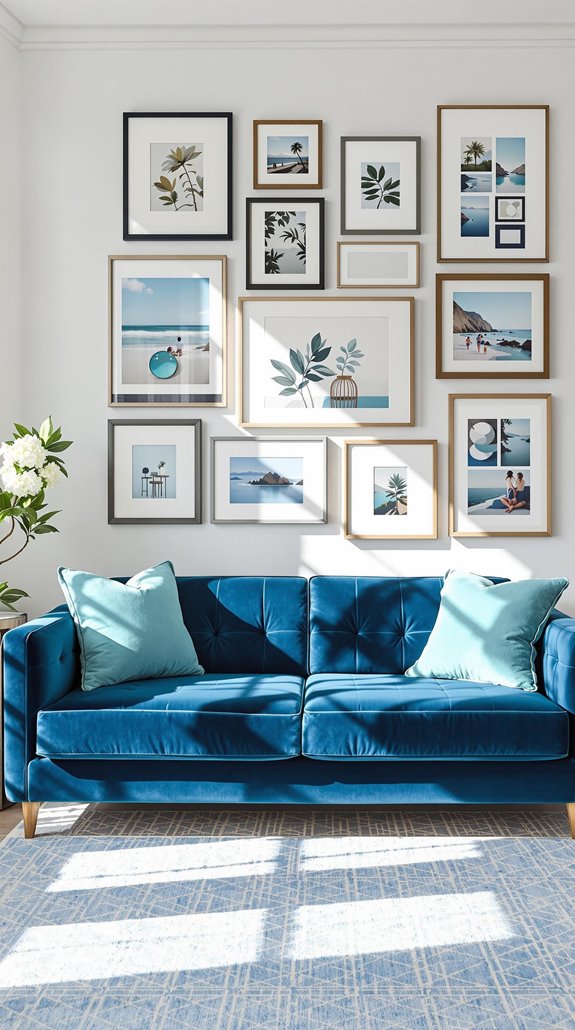
Living Room Applications
Mix family photos with abstract art for conversation-starting displays. Incorporate mirrors to reflect light and enhance spaciousness. Use symmetrical grids for balanced arrangements, or create eclectic mixes of frame styles for personalized aesthetics. Maintain adequate negative space to prevent visual clutter.
Dining Room Walls
Install floor-to-ceiling galleries for dramatic impact in high-ceilinged spaces. Vary artwork sizes while ensuring sufficient spacing. Apply thematic curation to unify pieces around common subjects. Use consistent frame colors to create cohesion among diverse art pieces for enchanting meal backdrops. Consider incorporating floating shelves to add dimensional layers and the flexibility to change displays seasonally.
Thematic Curation Approaches for Personalized Collections
While individual artwork pieces create visual interest, thematic curation transforms your gallery wall into a compelling narrative that reflects your personal story and aesthetic vision. I’ll show you how to create collections that feel intentionally yours.
Start by selecting themes that resonate with your identity—whether that’s exploring portraiture, celebrating specific color palettes, or showcasing local artists. I recommend limiting each thematic display to 10-15 pieces to maintain visual clarity and narrative focus.
Choose diverse mediums within your theme: combine paintings with photography or prints to add dimensional depth. Position contrasting pieces adjacent to each other—this creates visual “conversations” that engage viewers and spark curiosity. Consider how your chosen theme can transcend temporal boundaries by incorporating both vintage and contemporary pieces that speak to the same concept.
Use descriptive labels or small placards to help guests understand your curatorial choices, transforming your home into a personalized gallery experience.
Creative Integration of Non-Art Elements and 3D Objects
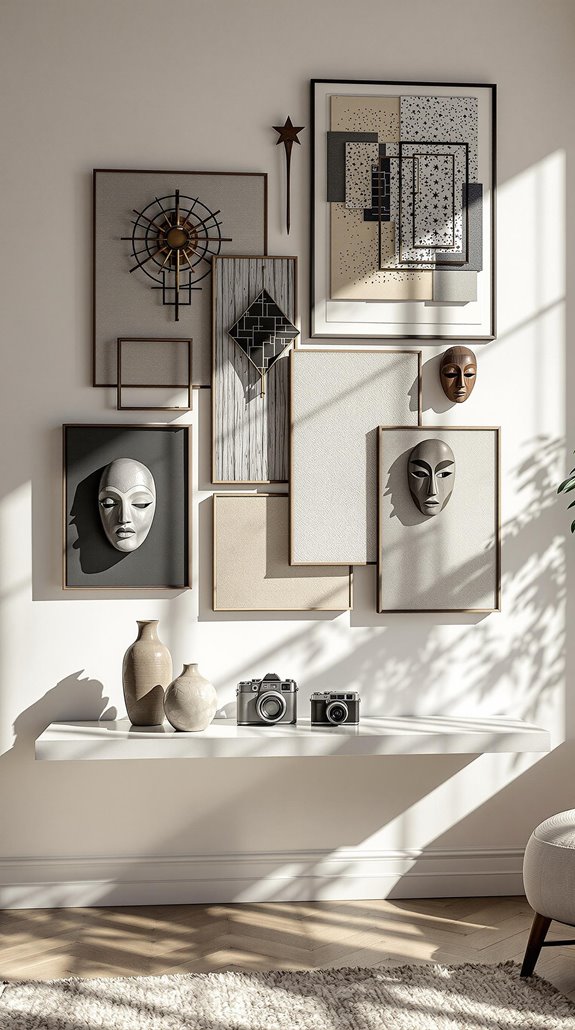
Beyond curating cohesive artwork themes, I’ll show you how incorporating three-dimensional objects and non-art elements creates gallery walls with remarkable depth and personality.
I’ll start by centering prominent 3D pieces like woven baskets or ceramic plates at eye level as focal anchors. You’ll want to maintain 2-3 inches between all objects while branching outward from these central elements.
Mix functional items like vintage clocks or mirrors with textiles such as macramé hangings. I recommend adding floating shelves to display small ceramics or natural materials like driftwood. Always be mindful of watching headroom when positioning hanging items to ensure proper clearance and safety.
Balance heavier 3D elements with lighter framed art, alternating organic shapes with geometric frames. Keep your 3D elements to 30% of the total arrangement to prevent visual overload while creating that curated, lived-in aesthetic we’re after.
Space-Enhancing Strategies for Small and Large Areas
Although gallery walls transform any space, the strategic approach differs dramatically between compact and expansive areas. I’ll guide you through tailored strategies that maximize your space’s potential.
For small areas, I recommend starting with your largest piece off-center, then positioning the second-largest diagonally opposite. This creates balanced visual weight without overwhelming the space. Maintain 2-4 inches between frames and prioritize multiple small prints over single large pieces to preserve openness.
In expansive areas, use asymmetrical layouts to prevent overcrowding while filling walls effectively. Mix vertical and horizontal orientations to distribute visual weight evenly across larger surfaces. Consider incorporating round or oval pieces to break up the grid-like pattern and add visual flow to your arrangement.
Don’t overlook non-traditional spaces—transform corners into focal points and apply vertical arrangements in hallways to draw eyes upward, maximizing your home’s gallery potential.
Color Coordination and Monochromatic Schemes
When selecting artwork for your gallery wall, color coordination becomes the foundation that transforms random pieces into a cohesive visual story. I’ll guide you through creating harmony that makes your space feel intentionally curated.
Start by choosing complementary color schemes—pairing opposite hues creates dynamic contrast that draws the eye. Alternatively, use coordinating schemes with adjacent colors for seamless blending. You’ll find that shared color palettes unify even the most diverse artwork collections, which is similar to how popular colors are currently favored in British decor.
Mix different frame styles to add visual interest while maintaining color consistency. Remember the Rule of Odds when arranging pieces—odd numbers naturally appeal to our visual preferences. Consider your wall’s background color as part of your overall palette. Lay out your pieces on the floor first to visualize how colors interact before committing to wall placement. This strategic approach guarantees your gallery wall feels professionally designed rather than randomly assembled.
Lighting and Functional Elements as Design Features
Proper lighting transforms your gallery wall from a simple display into a professionally curated showcase that commands attention. I’ll guide you through selecting fixtures that enhance your artwork while adding functional beauty to your landing.
Choose wall sconces positioned 60-66 inches from the floor to illuminate pieces from the sides. This angle prevents glare while highlighting colors and textures. Install dimmable LED lights with 2700K-3000K color temperature for warm, consistent illumination that won’t fade your art. Layering different light sources will create a more dynamic atmosphere for your gallery wall.
Wall light mirrors serve double duty, combining reflection and illumination to expand your space visually. Select fixtures with UV filters to protect sensitive pieces from damage. Track lighting offers flexibility for adjusting focus as you rotate artwork. Positioning lights at various angles enhances dimension in artwork by creating strategic shadows that add depth and visual interest. Remember, proper lighting doesn’t just illuminate—it creates atmosphere and transforms your landing into a sophisticated gallery experience.
Conclusion
I’ve walked you through the essential techniques for creating stunning gallery walls that transform your space. Start by selecting your layout grid, then gather frames in complementary materials. Mix artwork with 3D objects, coordinate your color palette, and position proper lighting. Remember to rotate pieces seasonally to keep your display dynamic. Now grab your measuring tape, gather your collection, and begin creating a gallery wall that truly reflects your personal style.
References
- https://www.thespruce.com/gallery-wall-decor-designs-4129057
- https://www.crateandbarrel.com/decorating-and-accessories/how-to-create-a-gallery-wall-guide/1
- https://www.teses.usp.br/teses/disponiveis/75/75135/tde-02092024-170105/publico/CarolinaSoteriorevisada.pdf
- https://stylebyemilyhenderson.com/how-to-make-a-gallery-wall
- https://mossandfog.com/mastering-gallery-walls-layouts-and-techniques/
- https://blog.hubspot.com/marketing/b2b-marketing
- https://margaritabravo.com/blog/the-trick-to-arranging-gallery-walls-like-a-pro-tips-and-ideas-for-gallery-wall-layouts/
- https://blog.hubspot.com/marketing/how-write-memo
- https://www.mefoto.com/gallery-wall-mix-and-match-frames/