I’ve installed dozens of garden fences across the UK, and I can tell you that your concrete mix choice will make or break your project’s longevity. You might think any concrete will do, but I’ve seen too many perfectly good fence panels wobble and fail within months because the foundation wasn’t properly engineered for British weather conditions. There’s a specific science to matching your mix with soil type, post material, and panel weight that most homeowners completely overlook.
Key Takeaways
- Use DIY mixing ratio of one part cement to four parts sand and ballast for optimal strength and durability.
- Quick-setting concrete hardens within 20-40 minutes, reducing project time while maintaining structural integrity for fence posts.
- High-strength concrete mixes provide superior load-bearing capacity, essential for heavy gates and robust fencing panels.
- Air-entrained concrete prevents freeze-thaw damage during harsh UK winters, extending fence foundation lifespan significantly.
- Fiber-reinforced concrete reduces cracking and enhances tensile strength, creating more resilient fence post foundations.
Choosing the Right Concrete Mix for UK Fence Posts
When selecting concrete for fence posts in the UK, the choice between different mix types considerably impacts both installation speed and long-term durability. I’ll guide you through the essential options that work best in British conditions.
Quick-setting concrete delivers rapid results, typically setting within 20-40 minutes – perfect when you’re working against time. High-strength mixes provide superior load-bearing capacity for heavy gates or panels facing strong winds. Fiber-reinforced concrete contains synthetic or steel fibers that reduce cracking and improve tensile strength.
For UK weather conditions, I particularly recommend air-entrained concrete, which contains microscopic air bubbles that prevent freeze-thaw damage during harsh winters. Ready-mix products like Postcrete offer convenience, while DIY mixing using standard ratios (3:3:1 sand, gravel, cement) provides cost savings for larger projects. The recommended ratio for homemade concrete mix is one part cement to four parts sand and ballast to ensure proper strength and durability.
Essential Tools and Materials for Professional Installation
Having the proper tools and materials ready before you begin guarantees your fence post installation runs smoothly and meets professional standards. I’ll break down what you need into essential categories.
For excavation, you’ll need a spade, post-hole digger, auger, and shovel. Site preparation requires spray paint or wooden stakes for marking, string line for alignment, tape measure, and spirit level for accuracy.
Your concrete handling toolkit should include a wheelbarrow for mixing, rubber mallet for adjustments, wooden props for support, and bars or timber for levering posts into position. Ensuring your concrete is properly mixed can significantly enhance the energy efficiency of your overall project.
Material-wise, you’ll need concrete fence posts, postcrete or concrete mix, gravel for drainage, and water. For a quicker alternative to traditional concrete, consider post-fixing foam that fits all post sizes and provides effective installation. Having everything organised beforehand prevents delays and guarantees you achieve that professional finish every time.
Step-by-Step Guide to Setting Fence Posts in Concrete

Five critical stages define the process of setting fence posts in concrete, and following them systematically guarantees your installation achieves professional-grade stability and alignment.
I’ll walk you through each stage to make certain you get it right first time.
First, verify your boundary lines and gather essential tools: spade, spirit level, tape measure, and concrete mix. Mark post positions with spray paint, spacing them 1.83m apart for standard panels. It’s also important to consider regional price variations when budgeting for your fencing project.
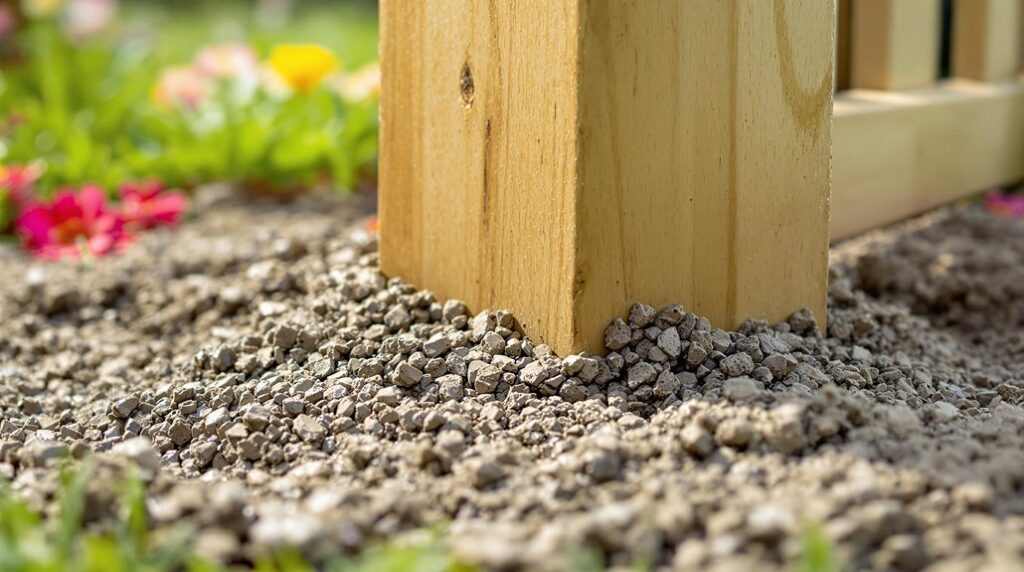
Next, dig holes 600mm deep and three times the post width. Add 100mm of gravel for drainage.
Then, center your post on the gravel and pour concrete around it, filling to 50mm below ground level. Use your spirit level to make sure it’s perfectly vertical.
Install temporary braces while the concrete cures for 24-48 hours. Consider using quick setting concrete if you need to reduce waiting time, as it hardens rapidly within 20-40 minutes after mixing with water.
Common Mistakes That Compromise Fence Stability
Following proper installation procedures won’t guarantee success if you fall into the traps that sabotage even well-planned fence projects. I’ve seen countless installations fail because installers ignore the one-third depth rule or skimp on hole diameter. Your concrete mix matters too—weak ratios and insufficient quantities create crumbling bases within years. Additionally, understanding permitted development rights can help you navigate any potential restrictions on your fencing project.
Don’t rush the alignment process. Skipping spirit-level checks leaves you with crooked fence lines that scream amateur work. I always verify plumb during pouring and recheck after initial setting. Always stretch a string line between your corner posts to maintain perfect alignment throughout the installation process.
Curing patience separates professionals from weekend warriors. Installing panels before full cure weakens your concrete-post bond by 30%. Cold weather doubles curing time, while hot conditions demand moisture protection. For wooden posts, never fully encapsulate in concrete—trapped moisture accelerates rot despite your best concrete work.
Maintenance Tips for Long-Lasting Concrete Fence Foundations

While proper installation sets the foundation for fence longevity, ongoing maintenance determines whether your concrete posts will last decades or deteriorate within years. I’ll check my posts every few months for cracks or crumbling, repairing damage immediately with appropriate concrete materials. After repairs, I apply waterproof sealant to prevent moisture ingress. Additionally, I recommend being vigilant for any signs of damp issues, as they can severely compromise the integrity of your fence.
For cleaning, I pre-wet surfaces thoroughly and limit pressure washing to 2-3 times yearly on sealed sections only. I maintain proper drainage by installing gravel around post bases and keeping 5-10cm clearance between soil and panels using gravel boards. When scrubbing stubborn stains, I always start from bottom and work upward to prevent streaking and ensure even coverage of cleaning solutions.
I reapply sealant every 3-5 years and use acrylic latex primer before painting with masonry-specific paint. These straightforward practices guarantee my concrete fence foundations remain structurally sound for 50+ years.
Conclusion
I’ve covered the essential elements for creating durable concrete fence foundations that’ll withstand UK weather conditions. You now understand how to select appropriate mixes, use proper tools, and follow correct installation procedures. By avoiding common pitfalls and implementing regular maintenance practices, you’ll guarantee your fence posts remain stable for years. Remember, investing time in proper concrete preparation and curing will save you costly repairs down the road. Your garden fencing investment deserves this foundation quality.
References
- https://www.homebuilding.co.uk/advice/concreting-fence-posts
- https://www.greencircleconcreteltd.co.uk/what-is-the-best-type-of-concrete-to-use-for-a-fence-post/
- https://finetunefencingfarnborough.co.uk/blog/what-size-is-a-standard-concrete-fence-post-in-the-uk/
- https://community.screwfix.com/threads/how-many-bags-of-concrete-per-fence-post.217544/
- https://proconcrete247.co.uk/blogs/concrete-fence-post-installation-common-mistakes/
- https://www.myjobquote.co.uk/questions/how-much-postcrete-do-i-need-for-each-wooden-post
- https://shop.postsaver.com/fence-post-installation-equipment-supplies/
- https://ukfixingsdirect.com/collections/fencing-tools
- https://www.youtube.com/watch?v=w13ULipRBxM
- https://tate-fencing.co.uk/product-category/fixings-and-tools/tools/