I’ve helped countless UK homeowners transform their tired tiled floors without breaking the bank, and I can tell you that installing vinyl over existing tiles isn’t just possible—it’s one of the smartest budget moves you’ll make. You’ll slash material costs by up to 50% while avoiding expensive tile removal that can run £15-25 per square metre. However, success depends entirely on proper surface preparation and choosing the right vinyl type, because one wrong step will cost you far more than you’ve saved.
Key Takeaways
- Yes, vinyl can be installed over tiles in the UK, offering 20-50% material savings compared to tile replacement.
- Choose 4mm-8mm thick vinyl with waterproof cores to mask grout lines and prevent moisture issues in bathrooms.
- Fill grout lines with thin-set mortar and apply self-leveling compound to create smooth surfaces before vinyl installation.
- Part E-compliant underlays costing £2-4 per m² are required for acoustic compliance in UK flats and apartments.
- Professional installation costs £12-£15 per m², keeping total project costs under £50 per m² including materials.
Why Vinyl Over Tiles Makes Financial Sense for UK Homeowners

When you’re weighing flooring options for your home renovation, the financial benefits of vinyl over tiles become clear once you examine the numbers. Vinyl flooring materials cost £20-£40 per square metre, while tiles start at £40+ per square metre. You’ll save 20-50% on materials alone by choosing vinyl over traditional tiles. Additionally, considering installation costs associated with home extension projects can further highlight the advantages of vinyl flooring, as it allows homeowners to allocate resources more effectively.
Installation costs favour vinyl too. Labour for vinyl fitting averages £12-£15 per square metre, compared to tile installation requiring more skilled tradespeople and time. The simpler installation process means you’re looking at faster completion and lower labour bills. When planning your budget, remember that long-term value considerations should include both immediate savings and future maintenance costs.
Combined material and labour costs for vinyl typically stay under £50 per square metre, whilst tile installations often exceed this threshold. You’ll achieve savings of 20-40% on your total flooring project by selecting vinyl over tiles.
Essential Surface Preparation Steps Before Installation
Before you can install vinyl flooring over tiles, proper surface preparation determines whether your project succeeds or fails spectacularly. I’ll walk you through the essential steps that’ll save you costly mistakes.
First, inspect your existing tiles for cracks, chips, or loose pieces. Check grout lines for gaps exceeding 3mm – these need filling. Tap tiles to detect hollow sounds indicating poor adhesion.
Next, clean thoroughly. Remove all debris, scrub with pH-neutral detergent, and degrease kitchen areas using TSP solution. Rinse completely and allow 72 hours for drying.
For uneven surfaces, apply self-leveling compound using an 8mm notched trowel. Install moisture barriers if needed, then prime with acrylic-based primer at 100-150g/m². Allow your vinyl tiles to acclimatize for 24 hours in the room before beginning installation. Proper preparation prevents expensive do-overs.
Choosing the Right Vinyl Products for Tile Coverage

After completing your surface preparation, selecting the appropriate vinyl product becomes your next critical decision that’ll directly impact both installation success and long-term performance. I recommend choosing vinyl between 4mm-8mm thickness to effectively mask grout lines and surface irregularities you’re working with. Additionally, thorough planning ensures that you select the best materials for your budget and needs.
For high-traffic areas like kitchens, you’ll want wear layers of 12-20 mils for scratch resistance. Luxury Vinyl Planks (LVP) offer excellent stability for bridging minor tile imperfections, while sheet vinyl provides the most economical solution at £10-£25/m² for larger spaces.
If your grout lines exceed 1/8 inch depth, opt for thicker, flexible vinyl to prevent telegraphing. For moisture-prone bathrooms, waterproof cores with vapor barriers guarantee you won’t face mold issues down the line. Installing vinyl directly over existing tile creates a stable base that eliminates the need for costly demolition work.
Step-by-Step Installation Guide for DIY Success
Five critical phases will determine whether your vinyl-over-tile project succeeds or becomes a costly nightmare requiring complete removal.
First, I’ll prepare your surface by filling grout lines with thin-set mortar, sanding smooth, and cleaning thoroughly. This preparation is crucial for achieving a modern charm that complements the aesthetics of contemporary renovations. Next, I’ll level any imperfections using patching compound—deviations exceeding 3mm over 1m will cause visible telegraphing through your vinyl.
During layout, I’ll acclimate materials for 48 hours and plan cuts to avoid narrow end pieces that scream “amateur job.” For installation, I’ll stagger joints by 150mm minimum and maintain proper expansion gaps.
Finally, I’ll secure trim with brad nailers and apply silicone caulk for moisture protection. This method provides a modern look without the mess of traditional tile painting or stenciling alternatives. Following these phases saves you from the £800+ demolition costs that plague rushed installations.
UK Building Regulations and Climate Considerations

Your perfectly executed installation won’t matter if it fails UK building regulations or buckles under Britain’s unpredictable climate. I’ll help you navigate these essential requirements without breaking your budget.
For acoustic compliance in flats, you’ll need Part E-compliant underlays – factor £2-4 per m² into your costs. Your subfloor must meet BS 8203 evenness standards, or you’ll face premature failure. Properly maintaining your flooring can also prevent issues like premature lifting of the vinyl. Public areas require pendulum slip testing, so choose appropriate vinyl grades.
Britain’s humidity swings demand proper expansion gaps per manufacturer specs. I’ve seen countless DIY disasters from ignoring thermal movement. Your vinyl’s low VOC emissions and moisture resistance make it ideal for our climate, but only if you follow installation guidelines. Skip asphaltic adhesive removal, and you’ll regret it when tiles lift within months.
Ground floors require damp proofing to prevent moisture issues that could compromise your vinyl installation over time.
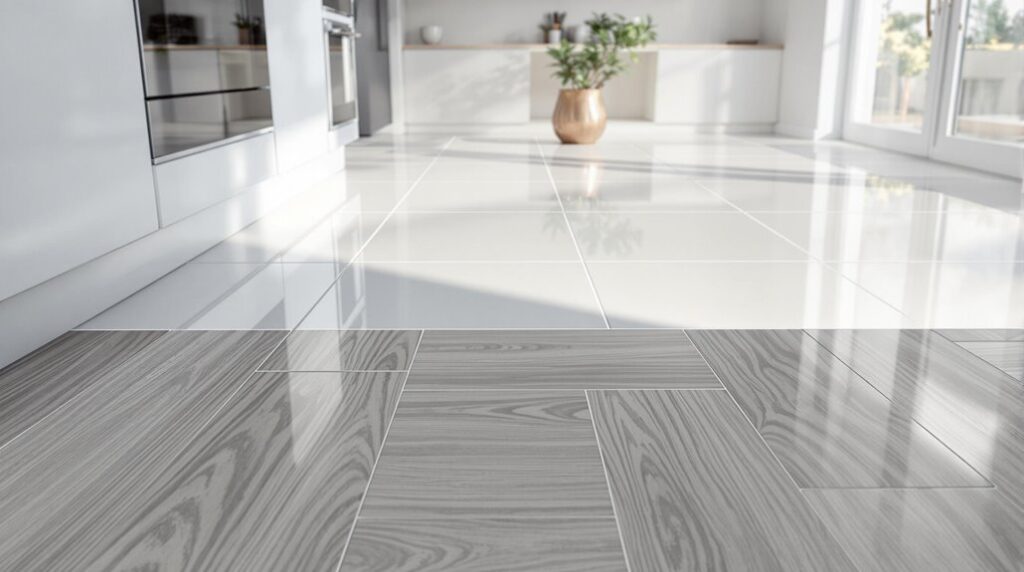
Best Vinyl Types for Different Room Applications
Choosing the wrong vinyl type for your space wastes money and guarantees disappointment. I’ve learned that matching vinyl to room function is essential for getting value from your investment.
Kitchen: LVT or vinyl sheet work best here. LVT mimics stone and ceramic while offering grout lines for authenticity. Vinyl sheet provides seamless coverage, preventing water penetration where spills happen most.
Bathroom: LVT handles moisture exceptionally well and creates that premium tile look without the cost.
Living Room: LVP delivers hardwood aesthetics in multiple plank sizes, transforming your main space affordably.
Bedroom: LVP or click vinyl offer comfort underfoot with easy DIY installation.
Hallway: Luxury herringbone adds style, while rigid core handles heavy traffic punishment. The multiple layers construction provides enhanced durability for areas that endure constant footfall.
Choose based on your room’s specific demands, not just appearance.
Long-Term Care and Maintenance Requirements

After spending money on the right vinyl for your space, I’ve found that proper maintenance determines whether your investment lasts five years or twenty. Daily sweeping with soft-bristled brooms removes debris that’ll scratch your surface, while weekly mopping with pH-neutral cleaners keeps it pristine without damaging the protective layer.
I’ll increase cleaning frequency in high-traffic areas like kitchens and entryways—it’s cheaper than early replacement. Monthly deep cleaning with manufacturer-approved solutions maintains the finish, and I reapply protective coatings annually for enhanced durability.
The key cost-saving habits? Immediate spill cleanup, felt pads under furniture, and quarterly seam inspections. Professional deep-cleaning every 18-24 months might seem expensive, but it’s fraction of replacement costs. These simple routines protect your flooring investment long-term. Remember to use warm water rather than hot when mopping, as excessive heat can damage the vinyl surface and compromise its integrity.
Common Mistakes to Avoid During Installation
Even when you’ve selected quality vinyl and prepared your budget, installation mistakes can turn your cost-effective flooring project into an expensive disaster. I’ve seen countless DIY enthusiasts struggle with surface preparation—failing to clean tiles thoroughly, ignoring uneven grout lines, and skipping the leveling process that creates visible imperfections under your vinyl. Proper home insulation can also help in maintaining a consistent temperature, which is beneficial for vinyl flooring.
Don’t rush the acclimation period either. Your planks need 48 hours to adjust to room conditions, or you’ll face costly gaps and buckling later. In high-humidity areas like bathrooms, skipping the moisture barrier creates long-term problems that’ll force expensive repairs. Ensuring that your home is properly insulated can help prevent excess moisture buildup in these areas.
Use proper tools—tapping blocks, pull bars, and spacers—to avoid alignment issues. These small investments prevent the frustration of redoing sections and protect your budget from unnecessary material waste. Remember that cracked or loose tiles must be addressed before installation, as vinyl will showcase these flaws and potentially lead to moisture damage that compromises your entire flooring investment.
Conclusion
I’ve shown you how laying vinyl over tiles can slash your flooring costs by up to 50% while delivering professional results. You’ll save on both materials and labor by skipping tile removal. Remember, proper surface prep is essential – don’t rush the cleaning and leveling steps. Choose quality vinyl that’s suited for your room’s moisture levels and foot traffic. With careful planning and attention to detail, you’ll achieve a durable, stylish floor that won’t break your budget.
References
- https://www.blesserhouse.com/how-to-install-sheet-vinyl-flooring-over-tile/
- https://tekaflooring.co.uk/blog/can-you-put-vinyl-flooring-over-tile/
- https://www.youtube.com/watch?v=hNha9JSt2JE
- https://forums.overclockers.co.uk/threads/putting-vinyl-flooring-over-ceramic-tiles.18870237/
- https://www.easipaycarpets.co.uk/blog/vinyl-flooring-over-tile-tips/
- https://www.checkatrade.com/blog/cost-guides/vinyl-vs-tile-flooring-cost/
- https://www.myjobquote.co.uk/costs/vinyl-flooring-costs
- https://www.vinylflooringdirect.co.uk/blog/vinyl-plank-flooring-vs-tile-the-ultimate-comparison/
- https://www.toppstiles.co.uk/knowledge-base/lvt-vs-vinyl
- https://smartspender.uk/vinyl-flooring-cost/