I’ve repaired countless plasterboard holes over the years, and I can tell you that choosing the wrong approach will leave you with a patchy, unprofessional finish that stands out like a sore thumb. Whether you’re dealing with small screw holes or gaping damage from a doorknob, each size requires specific tools and techniques. The difference between a seamless repair and an obvious bodge job comes down to understanding which method matches your particular damage—and there’s more to it than most people realize.
Key Takeaways
- Clean around damaged areas and use quality joint compound or plaster for lasting repairs that properly adhere.
- Small holes need thin filler layers with 1-2 hours drying time, sanded with 120-grit then 220-grit paper.
- Medium holes require metal-reinforced patches 5cm larger than hole diameter with cross-hatch compound application technique.
- Large holes need timber noggins for support and replacement patches cut to exact dimensions using plasterboard screws.
- Apply primer before painting and sand between coats for seamless blending with existing wall surface.
Essential Tools and Materials for Plasterboard Repair
Having the right tools and materials makes the difference between a professional-looking repair and a patchy mess that’ll haunt you every time you walk past. I’ll walk you through what you actually need in your toolkit.
For cutting, grab a sharp utility knife, plasterboard saw, and hole saw for clean edges. Your fixing arsenal should include a reliable drill with screws, plus a collated drywall gun if you’re tackling multiple repairs.
Surface prep demands a quality taping knife, sanding block, and rasp for smooth finishes. Don’t forget your mixing bucket, paddle, joint compound, and plasterboard tape – these create seamless blends. To ensure your repairs are durable and long-lasting, it’s crucial to follow building regulations that apply to your project.
Safety-wise, wear a dust mask and keep your vacuum handy for cleanup. Remember that quality tools will save you time and frustration while ensuring your repair looks visually appealing. Trust me, proper preparation prevents poor performance.
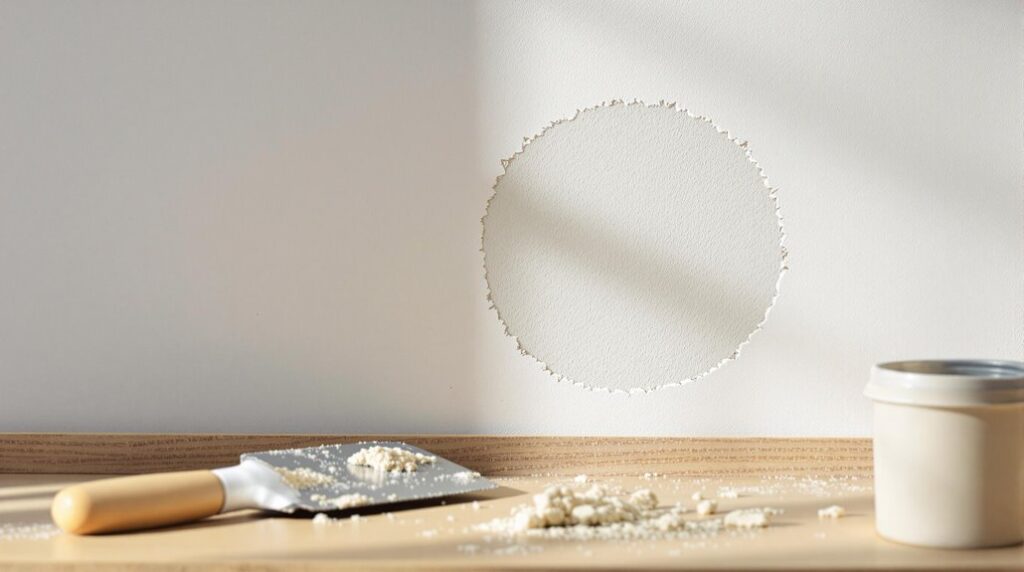
Small Hole Repair Techniques for Screw and Nail Damage
Now that you’ve got your toolkit sorted, let’s tackle those annoying small holes that screw and nail removals leave behind. First, I’ll clean the area and sand around the hole to create a flat surface. I’ll compress any torn plasterboard edges inward with a blunt tool for that flush finish we’re after. It’s important to remember that early detection of subsidence can help prevent larger issues down the line.
Using my palette knife, I’ll apply thin, even layers of smoothing filler—remember, we’re building up gradually rather than overfilling. Each layer needs 1-2 hours to dry properly. Once dry, I’ll sand with 120-grit paper using circular motions, then wipe with a damp cloth to spot any imperfections.
The final touch? Light sanding with 220-grit paper creates that perfect feather-edge connection. If you notice any remaining imperfections after this process, don’t hesitate to reapply filler and repeat the sanding steps for a flawless finish.
Medium Hole Repair Using Commercial Patches
Medium holes spanning 2-10 cm require a different approach than simple filler applications. I’ll show you how commercial patches make these repairs straightforward and professional-looking.
First, I clean debris from the hole and sand the perimeter for better adhesion. I choose metal-reinforced patches for high-stress areas like behind doors, ensuring the patch exceeds my hole’s diameter by 5 cm.
I peel the backing and center the patch over the hole, pressing edges firmly. Next, I apply thin smoothing compound with a palette knife, feathering outward in cross-hatch patterns between 2-3 coats. Each layer dries for two hours maximum.
The reinforced metal centre prevents further damage and ensures strong bonding throughout the repair process.
Finally, I sand with 120-grit paper until flush, seal with PVA solution, then paint immediately for uniform texture absorption.
Large Hole Repair With Plasterboard Replacement
Large holes exceeding 10 cm in diameter require complete plasterboard replacement for proper structural integrity. I’ll guide you through this repair like a seasoned professional.
First, I use a detector to locate hidden pipes and electrical cables behind the wall. I mark vertical stud centers with my pencil, then outline a rectangular section around the hole ending at these centers. Using my utility knife, I score the marked lines deeply, angling the blade for beveled edges. It’s important to understand that property surveys can reveal underlying issues that may affect your wall repairs.
Next, I measure the gap between studs and cut two horizontal noggins from 100mm x 50mm timber. I position these flush with the hole’s edges and secure them with screws spaced 150mm apart. I cut my replacement patch to match the hole’s dimensions, then attach it using 25mm plasterboard screws every 150mm along the noggins. Throughout the cutting process, I wear safety equipment including a dust mask, eye protection, and gloves to protect myself from debris and particles.
Step-by-Step Filler Application Methods
With your replacement patch securely fastened, I’ll show you how to apply filler using proven techniques that deliver professional results.
First, I’ll mix the filler powder with water—380ml per 1kg—stirring until you’ve got a smooth, thick paste. You’ll want to work quickly since mixed filler hardens within 20-30 minutes.
Now I’ll apply the first layer using cross-directional strokes with your flexible filling knife, pressing firmly to eliminate air bubbles. Keep each coat under 3mm thick—we’re building depth gradually with multiple layers.
I’ll slightly overfill each area to account for shrinkage, then smooth with a wide blade for that flush finish. For most repairs, one coat will be sufficient as quality fillers are designed to provide complete coverage without the need for additional layers. Remember, you’re part of the DIY community that takes pride in proper technique over shortcuts.
Professional Finishing Techniques for Seamless Results
Once your filler has dried completely, I’ll guide you through the critical finishing steps that separate amateur repairs from professional-quality results.
I start by sanding the repair area with fine-grit paper, working in circular motions to eliminate ridges and blend edges seamlessly with the surrounding surface. Additionally, for repairs in plaster walls, it’s important to consider quick fixes for hairline cracks to ensure a smooth finish. Next, I apply a thin skim coat of joint compound across the entire repair zone, feathering the edges outward for invisible shifts.
After this layer dries, I sand again lightly, then inspect under angled light to spot any remaining imperfections. I’ll address these with targeted touch-ups before applying the final step: a mist coat of diluted emulsion primer. This seals the repair and guarantees your topcoat adheres evenly, creating that flawless finish you’re after.
The primer or sealer creates an even surface that enhances paint adhesion and reduces the number of topcoat layers needed for complete coverage.
Common Mistakes to Avoid During Plasterboard Repairs
Even with perfect finishing techniques, I’ve seen countless repairs fail because of preventable errors made earlier in the process. The biggest mistake I encounter is rushing surface preparation – skipping the cleaning of dust, loose paint, or debris around damaged areas. You’ll compromise adhesion every time. Additionally, proper planning for costs is crucial to ensure you have the right materials and budget for your repairs.
Another critical error is using inappropriate materials. Don’t grab random fillers or glue; proper joint compound and plaster are essential for lasting repairs. I’ve watched DIYers apply massive amounts of filler in single applications, creating weak spots that crack later.
Always address underlying issues first. If water damage caused the hole, fix the leak before repairing. Overworking the surface with excessive troweling can create trowel marks and uneven drying that ruins your finish. Finally, resist the urge to skip primer – it’s what guarantees your repair blends seamlessly with existing paintwork.
Conclusion
I’ve walked you through every technique from simple screw holes to major plasterboard replacement. Remember, you’ll get professional results by matching your repair method to the hole size, using quality materials, and taking time with each step. Don’t rush the drying process or skip primer – these shortcuts always show in your final finish. With these proven methods and the right tools, you’ll tackle any plasterboard damage confidently and achieve seamless wall repairs every time.
References
- https://www.screwfix.com/guides/building/how-to-fill-holes-in-a-wall
- https://www.diy.com/ideas–advice/building–hardware/interior-walls–ceilings/how-to-fix-a-large-hole-in-a-wall
- https://clairedouglasstyling.co.uk/post/diy-hacks-how-to-repair-plasterboard-walls
- https://littleredindustries.com/renovate/2023/2/14/repair-any-size-hole-in-plasterboard
- https://www.youtube.com/watch?v=IKJtnODDA3k
- https://www.stick2products.co.uk/blogs/news/what-do-you-need-for-fixing-plasterboard-a-complete-guide
- https://www.manomano.co.uk/advice/plasterboard-tools-buying-guide-7015
- https://drywalltoolsdirect.co.uk/blog/essential-plastering-tools-for-the-diy-enthusiast-a-comprehensive-guide
- https://www.youtube.com/watch?v=SfUWcIQQcgY
- https://www.homebuilding.co.uk/advice/fill-holes-in-plasterboard