I’ve learned that drilling into brick isn’t just about having the right drill—it’s about understanding the material you’re working with. When I approach a brick wall project, I know that one wrong move can crack the surface, create uneven holes, or worse, damage hidden utilities behind the wall. The difference between a professional-looking result and a DIY disaster comes down to mastering specific techniques that most homeowners overlook, and there’s a particular sequence I follow that changes everything.
Key Takeaways
- Use a hammer drill with tungsten carbide-tipped SDS-plus bits and minimum 7-amp motor for effective brick penetration.
- Create a pilot hole with 1/8-inch masonry bit before activating hammer function at 1/4-inch depth.
- Maintain 90-degree angle, constant forward pressure, and withdraw bit every 20-30 seconds to clear dust.
- Keep drill RPM low, take cooling breaks, and maintain 1-inch distance from brick edges to prevent cracking.
- Use depth stopper to prevent over-drilling and clear holes with compressed air before installing anchors.
Essential Tools and Equipment for Brick Drilling
While standard drills might penetrate softer materials with ease, brick demands specialized equipment that can handle its dense, abrasive nature. I recommend investing in a hammer drill with rotary hammer function—the Metabo KHE D-26 SDS Plus delivers the combined impact and rotational force you’ll need. Guarantee your drill has a minimum 7-amp motor for sustained power. To enhance your drilling experience, consider incorporating modern design elements that improve functionality in your workspace.
You’ll need tungsten carbide-tipped bits with SDS-plus shanks for secure attachment. Match bit diameter to your anchor size, typically 1/4″ for standard applications. The spiral flute design efficiently removes debris during drilling.
Don’t skip safety gear: ANSI-rated safety glasses, N95 respirator for silica dust, hearing protection, and cut-resistant gloves. For precision work, grab a bubble level, center punch, and masking tape for depth markers. Before drilling, always check for electrical wires or plumbing behind the brick to avoid dangerous utility strikes.
Preparation Steps Before You Start Drilling
Before you power up that hammer drill, proper preparation determines whether you’ll achieve clean, precise holes or create a frustrating mess of cracked brick and crooked anchors.
I always start by measuring and marking my drilling points with chalk, then use a level to guarantee alignment for multiple holes. Next, I check for utilities using a wall scanner—never drill near electrical outlets or switches without confirming what’s behind the brick.
I clear my work area of obstacles and set up proper lighting. If I’m drilling high, I position a stable ladder and keep a vacuum nearby for dust cleanup.
Before drilling, I measure my fastener to determine hole depth, then mark my drill bit with tape. Finally, I put on safety goggles, earplugs, and a dust mask—brick dust is no joke.
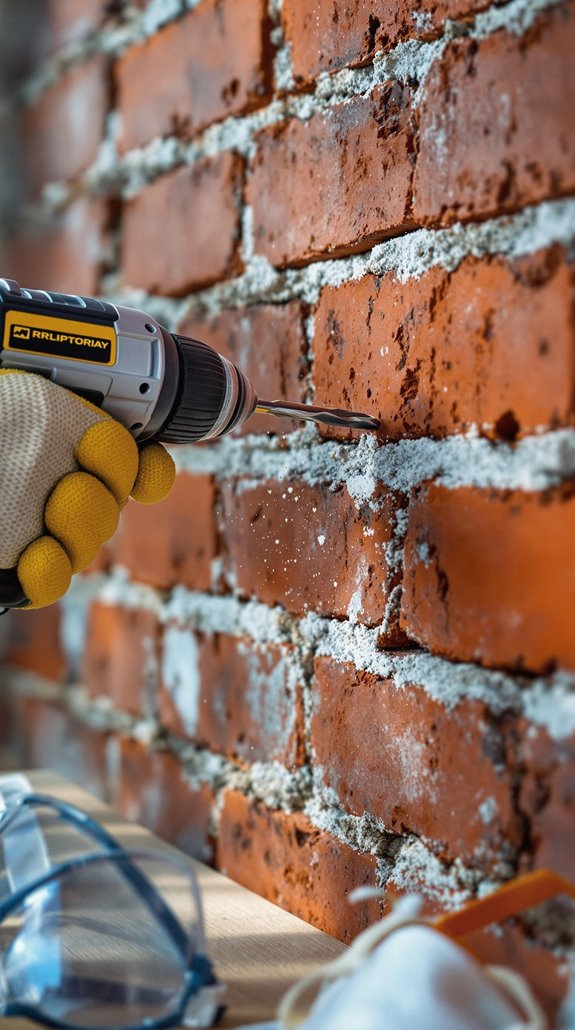
For any installation over two pounds, I always plan to drill into the brick itself rather than the mortar joints, as mortar is significantly weaker and will deteriorate faster over time.
Proper Drilling Technique and Positioning
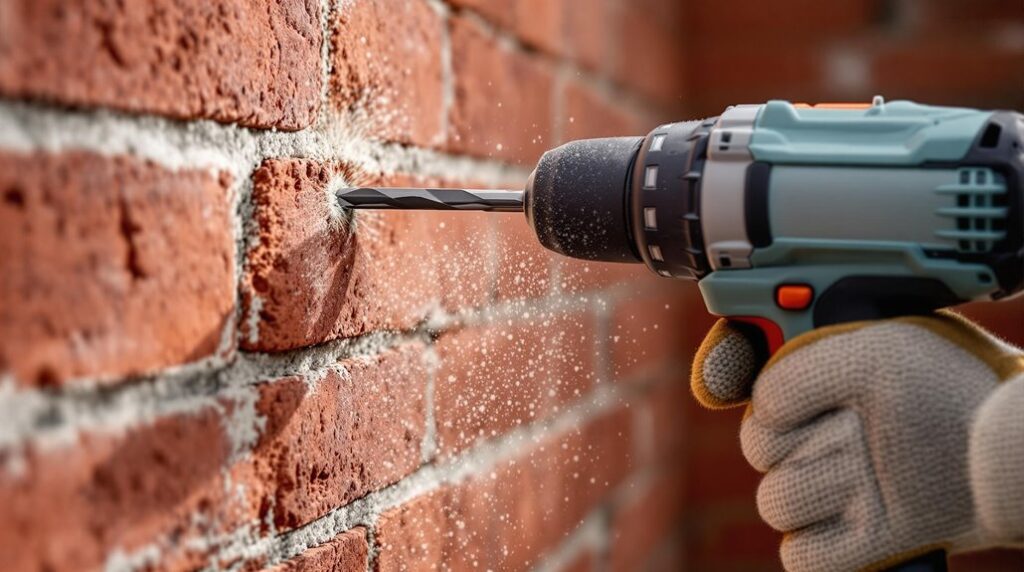
Once you’ve completed your preparation, success depends entirely on maintaining proper drill positioning and using the correct technique throughout the entire process. I’ll start by positioning my drill at a perfect 90-degree angle to the brick surface—this isn’t negotiable. I use a bubble level to confirm perpendicular alignment before I begin.
I create my pilot hole with a 1/8-inch masonry bit at the lowest speed, tapping the chuck once to create a starter indentation. No hammer function yet—just continuous rotation until I reach 1/4-inch depth. Then I activate the hammer function and gradually increase speed while maintaining constant forward pressure. I withdraw the bit every 20-30 seconds to clear dust accumulation, ensuring my drill doesn’t overheat during extended operations. Setting the depth stopper on your hammer drill prevents accidentally drilling too far and damaging the wall behind your target area.
Managing Heat and Dust During the Process
The drilling process generates significant heat and dust that can damage your bit, overheat your drill, and create hazardous working conditions. I’ll keep my drill RPM as low as possible to reduce friction-generated heat. Taking regular breaks allows the bit to cool down naturally—I never drill continuously without pause.
For dust management, I use a vacuum attachment to capture debris at the source and periodically withdraw the bit to clear accumulated dust from the hole. A wire brush cleans my bits thoroughly after each use, followed by a light coating of machine oil to prevent rust.
I maintain steady pressure without forcing the bit, letting the hammer drill do the work. High-quality drills often include overheating protection features that safeguard the motor during extended use. Using PVC insulation tape on the shank serves as my depth guide while monitoring drilling progress effectively.
Common Problems and How to Prevent Them
While drilling into brick appears straightforward, several common problems can derail your project and compromise structural integrity. I’ll help you avoid these pitfalls with proven techniques.
First, prevent cracking by maintaining a 1-inch distance from brick edges and using steady, even pressure. Start with pilot holes to reduce stress, and choose sharp carbide-tipped bits for intact surfaces only.
When selecting between mortar and brick, prioritize sound brick for heavy loads despite slower drilling. Mortar offers speed but limited holding strength.
Size your bits precisely for anchors—a 3/16″ Tapcon needs a 5/32″ bit. If you hit metal obstructions, stop immediately and relocate at least 1 inch away.
For anchors, match diameter exactly to hole size and insert plastic sleeves fully to prevent failure. Always use compressed air to thoroughly clear dust and debris from holes before installing anchors, as remaining particles significantly reduce holding power.
Safety Considerations and Protective Gear
Before you power up that hammer drill, proper safety gear will protect you from the real hazards of brick drilling. I’ll equip you with the essentials: safety glasses with side shields block flying debris, while an N95 respirator guards against carcinogenic silica dust. Gloves provide grip and prevent abrasions, and ear protection shields you from drill noise. Wear sturdy, slip-resistant footwear for stability.
Before drilling, I inspect my power cord for damage and verify the drill bit’s sharpness. I scan for overhead hazards and confirm the hammer function matches my brick material. For dust control, I use drill-mounted extraction systems and work in ventilated areas. I always survey walls for hidden utilities and maintain proper clearance zones for bystander safety. When selecting your drill, corded drills deliver superior power and control compared to battery-powered alternatives for demanding masonry work.
Finishing Touches and Hole Cleanup
Once you’ve completed your drilling, immediate cleanup becomes essential for both safety and professional results. I’ll vacuum the hole immediately using a shop vac with a crevice nozzle to eliminate debris that’ll obstruct anchors. After blowing out residual dust, I’ll follow with a light water spray for ideal surface preparation.
For seamless repairs, I’ll fill holes with quick-repair cement, blending the brick dust I collected during drilling for perfect color matching. I’ll pack the cement tightly, smooth it flush with my trowel, then mist the area to enhance curing.
I’ll sweep the work area immediately and wipe surfaces with a damp cloth. By assigning a partner to hold the vacuum nozzle during drilling, we achieve real-time dust control that professional contractors rely on. I’ll also inspect my drill bits for any signs of wear or damage after completing the job, as encountering hard materials or potential obstructions can affect their performance.
Maintenance Tips for Your Drilling Equipment
A well-maintained drill performs like a precision instrument, delivering consistent results project after project. I’ll share the vital maintenance practices that keep your equipment running smoothly.
After each use, I remove brick dust from bits using a wire brush and apply machine oil to metal components. Monthly compressed air cleaning of drill vents prevents internal buildup, while annual lubrication of bearings and joints guarantees smooth operation.
Heat management is essential—I pause drilling every 2-3 minutes to let bits cool and attach a vacuum nozzle to capture dust during operation. Regular structural inspections matter too. I check drill bits monthly for damage and examine derricks before each project.
Component-specific care includes replacing fuel filters annually and analyzing engine oil every 500 operating hours. Establishing tailored maintenance schedules based on your work environment and usage patterns helps control costs while reducing the risk of unexpected equipment failures.
Conclusion
I’ve covered the essential techniques you’ll need for drilling perfect holes in brick. Remember, success depends on using the right carbide-tipped bits, maintaining steady pressure, and clearing dust regularly. Don’t rush the process—let your hammer drill do the work while you focus on keeping that 90-degree angle. With proper preparation and technique, you’ll achieve professional results every time. Your patience and attention to detail will pay off with clean, secure holes.
References
- https://factorydirectsupplyonline.com/blogs/news/how-to-drill-into-brick-a-guide-for-professionals
- https://www.youtube.com/watch?v=qtUU6yztzFw
- https://www.screwfix.com/guides/tools/how-to-drill-into-brick
- https://www.apsmasonrycontracting.com/services/contractor/masonry/drilling
- https://www.finehomebuilding.com/2022/03/09/accurate-holes-in-masonry
- https://www.thisoldhouse.com/masonry/22423298/how-to-drill-into-brick
- https://cf-t.com/blog/tips-tricks-drilling-into-brick-or-mortar
- https://beavertools.com/guide-to-masonry-drill-bits
- https://www.bobvila.com/articles/how-to-drill-into-brick/
- https://www.woodsmith.com/review/how-to-drill-into-brick/