I’ve helped countless homeowners transform their freezing garages into comfortable, energy-efficient spaces, and I can tell you that proper insulation makes all the difference. Most people don’t realize they’re losing hundreds of dollars annually through poorly insulated garage walls, doors, and floors. The process isn’t as straightforward as you might think—there are specific techniques and materials that’ll maximize your investment while avoiding costly moisture problems that can destroy your efforts completely.
Key Takeaways
- Assess your garage’s current insulation by measuring R-values and identifying gaps using smoke pens or thermal cameras.
- Choose climate-appropriate materials like fiberglass batts for cold regions or radiant barriers for warm climates.
- Install garage door insulation panels with R-7 to R-12 ratings and seal gaps with weatherstripping.
- Caulk around windows, doors, and utility lines while using expanding foam for larger cracks and openings.
- Maintain proper ventilation with exhaust fans and conduct seasonal inspections to prevent moisture damage.
Assessing Your Garage’s Insulation Needs
Where should you start when planning your garage insulation project? I’ll walk you through the essential assessment steps that’ll set you up for success.
First, inspect your walls, ceiling, and garage door for existing insulation. Measure the thickness and density to estimate current R-value effectiveness. You’ll likely find gaps in unfinished walls or exposed areas that need attention. Additionally, consider how a garage conversion can maximize your home’s space and influence your insulation needs.
Next, grab a smoke pen or thermal camera to detect air leaks around doors, windows, and utility penetrations. These drafts kill efficiency before you even install new insulation.
Consider your garage type—attached garages need insulation on shared walls to protect your living spaces, while detached garages require less unless you’re using them as workshops. This determines your R-value targets and budget priorities.
Don’t forget to check your concrete floor for moisture issues that could lead to humidity and rust problems once you seal up the space.
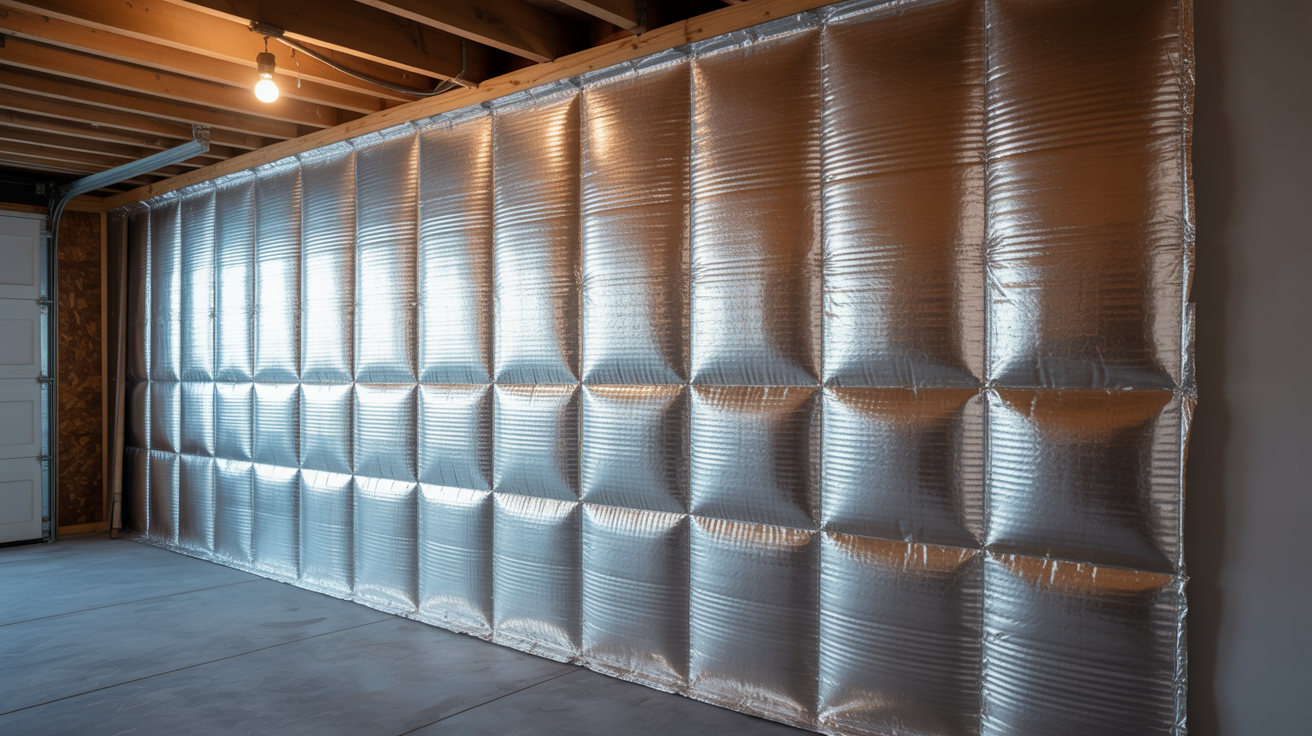
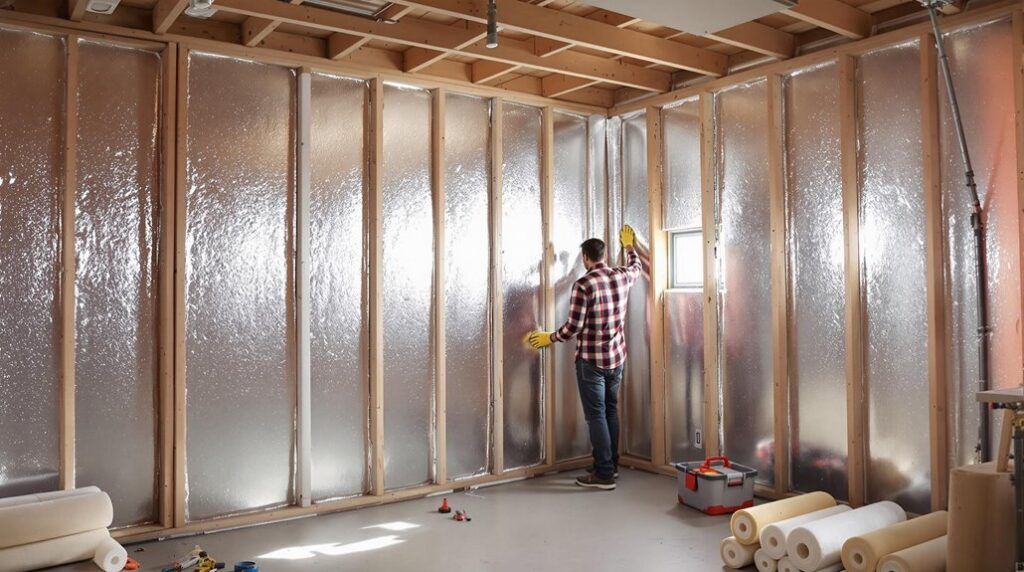
Choosing the Right Insulation Materials for Your Climate
When selecting insulation materials for your garage, your local climate dictates which products will deliver the best performance and value. I recommend fiberglass batts as the best overall choice for detached garages—they’re cost-effective, easy to install, and provide reliable thermal protection across most conditions.
If you’re in a warm climate, double-bubble radiant barrier is your go-to solution for deflecting solar heat gain. For maximum thermal resistance in any climate, closed-cell spray foam delivers the highest R-value per inch, though it requires professional installation.
Cold climates demand materials like polyurethane foam with R-values between R-8 and R-12. Hot regions only need R-2 to R-4 for effective heat deflection. Moderate climates fall between R-4 and R-8, making polystyrene foam boards an excellent middle-ground option.
Beyond temperature control, proper insulation also provides noise reduction benefits, creating a quieter environment whether you’re working in your garage or relaxing in adjacent living spaces.
Weatherproofing Windows and Doors Against Cold Air
Even the best insulation won’t perform if cold air sneaks through gaps around your garage windows and doors. I’ll show you how to seal these vulnerable spots effectively.
Start by caulking around window frames and door jambs where gaps appear. Apply weatherstripping to door edges and window sashes—V-type strips work especially well for garage doors. Check where panels meet and seal those gaps too.
For larger cracks, use expanding foam sealant around utility lines and where walls meet the floor. Don’t forget the foundation perimeter. Allow the foam to cure completely for eight hours before proceeding with any additional weatherproofing steps.
Consider upgrading to double-pane windows and insulated garage doors if your current ones are single-pane or uninsulated. These improvements dramatically reduce heat loss and make your weatherproofing efforts more effective.
Insulating Your Garage Door for Maximum Energy Efficiency
Your garage door represents the largest single surface area where heat escapes from your garage, making it the most critical component to insulate for maximum energy efficiency. I’ll guide you through the most effective approaches that’ll transform your garage into a thermal barrier.
For maximum impact, I recommend polystyrene panels over fiberglass—they’re more energy-efficient and provide superior thermal retention. While fiberglass costs less initially, polystyrene delivers better long-term value through reduced energy consumption. Proper insulation can significantly reduce your energy bills by improving your home’s thermal efficiency.
Installation’s straightforward with pre-cut kits ranging from $50-$200. Target an R-value of R-7 to R-9 for most climates, though colder regions benefit from R-12 or higher. You’ll typically recoup your investment within 2-3 years through energy savings, making this upgrade both practical and profitable. Don’t forget to seal gaps with weather stripping to prevent drafts and air leaks around your door’s perimeter.
Sealing Gaps and Cracks Throughout the Structure
After insulating your garage door, the next critical step involves hunting down and sealing every gap and crack that allows conditioned air to escape. I’ll focus on the most problematic areas where air leaks steal your energy. One of the essential benefits of sealing these gaps is that it can significantly enhance your home’s energy efficiency.
Start with the gap between your garage floor and drywall—this is a major culprit. Next, examine wall corners, joints, and ceiling connections where gaps commonly develop. Don’t overlook windows and any penetrations for pipes or wires.
For materials, you’ll need silicone sealant for general gaps, caulking for stationary joints, and foam sealant for larger openings. Keep your utility knife, caulking gun, and cleanup cloths ready.
Clean surfaces thoroughly before applying any sealant. Cut away old, cured material first, then apply with steady pressure for professional results. Use mineral spirits or paint thinner to clean up any uncured sealant before it sets permanently.
Floor Insulation Solutions for Concrete Surfaces
While concrete floors provide excellent durability, they’re notorious heat sinks that’ll drain warmth from your garage faster than you can generate it. I’ll show you how to transform that cold slab into an insulated foundation that cuts heat loss by up to 60%.
Start with moisture management—apply a concrete sealer and install a damp proof membrane directly on the concrete. Next, choose rigid foam boards like Kingspan or Celotex with at least 50mm thickness. You’ve got two solid installation methods: the wood sleeper approach where you attach sleepers, fill gaps with foam, then add subfloor, or use engineered panels that adhere directly to concrete. Either way, you’ll need to accommodate 2-2.5 inches of floor elevation and potentially adjust door heights for compliance.
For areas where full floor insulation isn’t practical, consider covering sections with thick rugs or rubber mats to provide localized insulation and comfort underfoot.
Proper Ventilation to Prevent Moisture Problems
Even with perfect insulation, moisture becomes your garage’s silent enemy if you don’t establish proper ventilation. I’ll help you create a system that keeps humidity at bay while maintaining your insulation’s effectiveness.
Start with cross-ventilation by installing intake vents on one wall and exhaust vents on the opposite side. This creates natural airflow that prevents stagnant air pockets. For high-humidity areas, I recommend adding mechanical exhaust fans to actively remove moist air.
Position ceiling-mounted fans strategically to enhance circulation throughout your space. Install a humidity meter to monitor moisture levels—you’re aiming for 30-50% humidity. Remember that persistent moisture can compromise your garage’s structural integrity over time.
Don’t forget maintenance: clean vents quarterly, replace fan filters every 3-6 months, and test exhaust systems monthly. Regular upkeep guarantees your ventilation system protects your insulation investment year-round.
Professional Installation Vs DIY Methods
Before you commit to either approach, understand that your garage insulation project‘s success hinges on matching the method to your specific situation. I’ll help you make this decision based on what matters most.
If you’re tackling a single-car garage with straightforward access, DIY can work well. You’ll save on labor costs – around $200 CAD compared to professional installation at $1,400 CAD. However, you’ll need solid tool skills and safety knowledge.
For larger projects or spray foam applications, I recommend going professional. They’ll deliver superior R-values (up to R-6.5 per inch) and guarantee building code compliance. DIY errors can reduce energy savings by 20-40%, making professional installation worth the investment for complex garages. Professional installation becomes essential when working on garage ceiling insulation, where ladder work and overhead positioning create additional safety risks.
Maintaining Your Garage Insulation System Year-Round
After completing your garage insulation installation, maintaining the system’s effectiveness requires consistent attention throughout the year. I’ll guide you through essential maintenance practices that’ll keep your investment working effectively.
Start with seasonal inspections, focusing on gaps around windows, doors, and electrical outlets. You’ll want to check where walls meet ceilings for new cracks that develop over time. Use expanding foam for larger gaps and caulk for smaller ones.
Protect your insulation with proper coverings like drywall or poly membrane sheets. Install adequate ventilation to prevent moisture buildup that damages insulation performance. Consider adding soundproofing benefits to your maintenance routine by checking that insulation remains properly positioned to reduce noise transmission.
Monitor for compression, water damage, or displacement that reduces R-value. Replace damaged batts immediately and verify stored items aren’t compressing your insulation.
Conduct thorough pre-winter inspections and replace worn weatherstripping annually.
Conclusion
I’ve walked you through the essential steps to transform your garage into an energy-efficient space. You’ll need quality insulation materials, weatherstripping tools, and caulk to seal every gap. Don’t skip the garage door—it’s your biggest heat loss culprit. Remember, proper ventilation prevents moisture damage that’ll compromise your investment. Whether you tackle this project yourself or hire professionals, regular maintenance keeps your insulation performing at peak efficiency for years ahead.
References
- https://www.garageliving.com/blog/winter-proof-your-garage-pro-tips-for-insulation-heating-and-storage-solutions
- https://volcanobuilders.com/how-to-insulate-a-garage-a-step-by-step-guide/
- https://www.hunterdoor.com/blog/how-to-keep-your-garage-warm-during-winter/
- https://www.dumpsters.com/blog/how-to-insulate-a-garage-yourself
- https://www.twincitygaragedoor.com/blog/keep-your-garage-warm-without-breaking-the-bank-this-winter/
- https://cielowigle.com/blog/how-to-insulate-a-garage/
- https://blog.amarr.com/10-tips-to-keep-your-garage-warm-this-winter
- https://5starbuildings.com/news-stories/portable-garage-door-insulation/
- https://sealed.com/resources/pros-and-cons-of-insulating-garage/
- https://basc.pnnl.gov/code-compliance/air-sealing-and-insulating-garage-walls-code-compliance-brief