I’ve learned that most UK renovation disasters stem from one fundamental mistake: treating first and second fix as separate projects rather than interconnected phases. When you rush your roughing-in work or skip vital inspections between plastering stages, you’ll face expensive remedial work later. The timing between these phases determines whether your trades work harmoniously or create bottlenecks that’ll derail your schedule. Here’s what separates successful renovators from those who struggle with coordination issues.
Key Takeaways
- Complete first fix (plumbing, electrical, structural work) and plastering entirely before starting any second fix installations to prevent damage.
- Test all electrical circuits thoroughly and verify room layouts against signed-off plans before proceeding with plastering phase.
- Budget extra funds for first fix phase as hidden structural issues commonly emerge during renovation projects.
- Require completion certificates from each trade before the next begins work to maintain quality control and accountability.
- Implement daily briefings and standardized checklists to coordinate trades effectively and prevent costly scheduling conflicts.
Understanding the Critical Timing Between First and Second Fix Phases
While many renovators focus on selecting finishes and fixtures, I’ve found that mastering the timing between first and second fix phases determines whether your project runs smoothly or spirals into costly delays.
The sequence is non-negotiable: wind and watertight completion, then first fix infrastructure (electrical cabling, plumbing, insulation), followed by plastering, and finally second fix installations. I can’t stress enough how vital it is to let your plasterer finish completely before starting second fix work. Remember, professional inspections can help ensure that you meet all necessary legal standards and avoid significant penalties.
Here’s what I’ve learned from managing complex renovations: test your electrical first fix rigorously, confirm your room layouts are finalized, and verify structural elements are ready. Any shortcuts here will cascade into expensive rework later. Buffer your timeline for inspections and material delays. Effective trade coordination prevents workflow disruptions and ensures each specialist can complete their work without interfering with others.
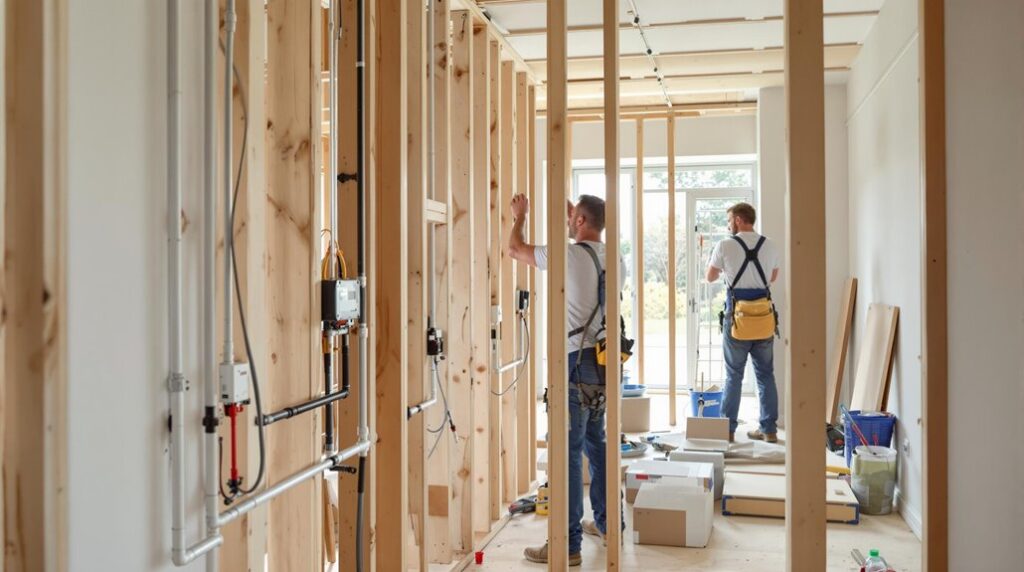
Essential First Fix Activities That Set Your Renovation Foundation
The success of your renovation hinges on executing first fix activities with precision and proper sequencing. I’ll walk you through the essential tasks that’ll make or break your project.
First, tackle your structural framework. You’ll need to modify internal walls, install door linings and window frames, then add floor joists and subflooring. Next, rough-in your plumbing infrastructure—soil pipes, hot water cylinders, and radiator pipework must go in before walls close up. Consider using lime plaster for its excellent breathability that complements the structural integrity of your home.
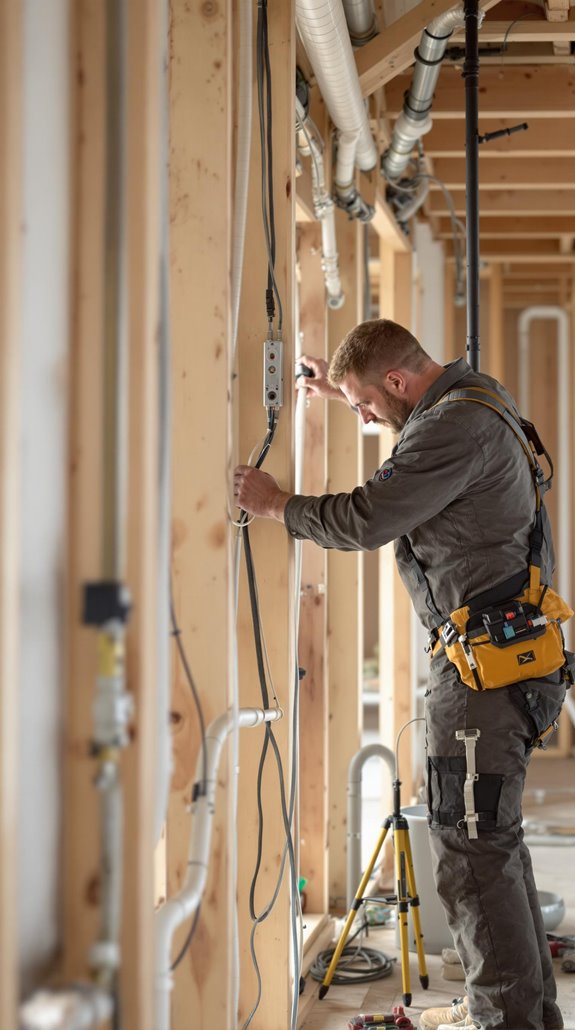
Your electrical pre-wiring comes next: lighting circuits, socket runs, and heating controls. Don’t forget speaker cables and alarm system routing.
Finally, box in all pipework and mount backing plates for heavy fixtures. Remember that this first fix work occurs after structural modifications but before plastering begins in the renovation sequence. Verify everything against your signed-off plans before proceeding—there’s no going back once plastering starts.
Second Fix Components That Transform Your House Into a Home

After completing your first fix work, you’ll shift focus to second fix components—the finishing elements that transform bare structural spaces into liveable rooms. This phase demands precision since these visible elements define your home’s character. A well-planned second fix is essential for achieving a dream bedroom extension, as it allows you to incorporate personalized features.
You’ll tackle internal doors first, ensuring proper alignment and smooth operation. Skirting boards and architraves require careful measuring and mitring—invest in a quality mitre saw for professional results. Your electrical second fix involves mounting switches, sockets, and light fittings, so double-check circuit connections before energising.
Plumbing fixtures like taps, basins, and toilets need methodical installation to prevent leaks. Window finishing touches—handles, locks, and seals—complete the weatherproofing process.
Each component builds upon your first fix foundation, creating the functional, comfortable spaces you’ve envisioned throughout your renovation journey. Plan for one to two weeks to complete second fix work in standard residential properties, allowing proper scheduling to prevent delays between different trade specialists.
Key Differences That Impact Your Renovation Planning and Budget
Understanding these critical differences between first and second fix work will prevent costly mistakes that derail your renovation timeline and budget. I’ve seen homeowners rush first fix installations only to tear apart walls later—corrections cost three times more post-plastering. Your trades need proper sequencing: structural specialists handle first fix infrastructure, while finish experts tackle second fix aesthetics.
Budget allocation demands careful balance. First fix consumes weeks with bulk materials like cables and pipes, requiring buffer funds for hidden structural issues. Additionally, building material costs can fluctuate based on market trends, impacting your overall budget. Second fix spans days to weeks, focusing on visible finishes where material upgrades quickly inflate costs.
Don’t overlap phases—you’ll damage delicate finishes and create scheduling conflicts. Plan separate tool requirements, storage needs, and inspection checkpoints. Sequential phasing protects your investment and guarantees each trade delivers quality work. Success requires comprehensive data rather than relying on assumptions about what approaches will work best for your specific project.
Expert Strategies for Optimizing Trade Sequencing and Quality Control
While proper sequencing separates successful renovations from costly disasters, I’ve developed a systematic approach that prevents the cascade failures I witness across UK projects.
I structure every renovation around five critical phases: structural work first, followed by utilities installation, then specialist trades, external works during favorable weather, and finally cosmetic finishes. This prevents the nightmare scenario where plasterers arrive before electricians complete their rough-in work.
My communication protocol includes daily briefings using digital tracking platforms and standardized PDF checklists. I require completion certificates from each trade before the next begins work—this eliminates finger-pointing when problems arise. Additionally, poor planning can lead to unexpected delays and budget overruns, so a detailed timeline is essential for project success.
For quality control, I conduct phased inspections after critical milestones like plumbing pressure tests, cross-referencing against approved specifications while documenting everything photographically for contractor accountability. Early engagement with building control ensures compliance verification at each stage, preventing costly rework later in the project.
Conclusion
I’ve walked you through the essential first and second fix phases that’ll make or break your renovation project. Master the timing between roughing-in your electrical circuits and final socket installations, coordinate your trades effectively, and you’ll avoid costly rework. Use proper inspection protocols at each handover point, maintain detailed schedules for trade sequencing, and invest in quality control measures. Execute these strategies correctly, and you’ll deliver a professional-grade renovation that stands the test of time.
References
- https://www.travisperkins.co.uk/content/first-vs-second-fix-building-construction
- https://github.com/tatsu-lab/alpaca_eval/blob/main/results/gpt35_turbo_instruct/model_outputs.json
- https://beamcentralsystems.com/blog/what-happens-at-first-fix-and-second-fix-when-building-a-home
- https://pracownik.kul.pl/files/12439/public/3_David.pdf
- https://resi.co.uk/advice/house-extensions/first-second-fix-differences
- https://creationconstruction.co.uk/construction/first-fix-vs-second-fix/
- https://www.housebeautiful.com/uk/renovate/a40141940/best-order-renovate-home/
- https://www.self-build.co.uk/first-fix-second-fix-building-work-stages-explained/
- https://www.rgbconstruction.info/post/what-to-expect-during-a-building-project-step-by-step-timeline
- https://www.cjhole.co.uk/guides/home-improvement/home-renovation-101-your-step-by-step-guide/